2.3 Deploy OceanBase Database in an experience environment
Before you deploy OceanBase Database Community Edition in a production environment, you can quickly deploy the database in an experience environment by using hosts with small specifications. A Docker image of OceanBase Database Community Edition is available. You can quickly deploy and start OceanBase Database Community Edition in a Docker container.
This topic describes how to deploy OceanBase Database Community Edition in three forms of experience environments: demo environment, cluster environment, and container environment. You can refer to this topic only for quick hands-on experience of OceanBase Database but not for production purposes.
For the requirements for deployment in a production environment, see '2.1 Preparations before deployment'.
Deploy OceanBase Database in a demo environment
If you have only one server available, you can run the obd demo command to quickly deploy a standalone OceanBase database by following the procedure described in this section.
Online deployment
If your server can connect to the Internet, perform the following steps to deploy OceanBase Database on your server:
-
Remotely pull and execute the installation script.
[admin@test001 ~] bash -c "$(curl -s https://obbusiness-private.oss-cn-shanghai.aliyuncs.com/download-center/opensource/oceanbase-all-in-one/installer.sh)" -
Load environment variables.
[admin@test001 ~] source ~/.oceanbase-all-in-one/bin/env.sh -
(Optional) Enable remote repositories.
When you use the all-in-one package for installation, remote repositories are disabled by default. To install components of versions not provided in the all-in-one package, run the following command to enable remote repositories:
Note
If remote repositories are disabled, component installation packages provided in the all-in-one package will be used when you run the
obd democommand. If remote repositories are enabled, component installation packages of the latest version will be pulled from remote repositories when you run theobd democommand.[admin@test001 ~]$ obd mirror enable remote -
Deploy OceanBase Database in a demo environment.
[admin@test001 ~] obd demoThe information about deployed components is displayed in the output. Here is an example:
+---------------------------------------------+
|                   observer                  |
+-----------+---------+------+-------+--------+
| ip        | version | port | zone  | status |
+-----------+---------+------+-------+--------+
| 127.0.0.1 | 4.2.1.3 | 2881 | zone1 | ACTIVE |
+-----------+---------+------+-------+--------+
obclient -h127.0.0.1 -P2881 -uroot -Doceanbase -A

+------------------------------------------------------------------+
|                             obagent                              |
+---------------+--------------------+--------------------+--------+
| ip            | mgragent_http_port | monagent_http_port | status |
+---------------+--------------------+--------------------+--------+
| 10.10.10.1    | 8089               | 8088               | active |
+---------------+--------------------+--------------------+--------+
+---------------------------------------------+
|                   obproxy                   |
+-----------+------+-----------------+--------+
| ip        | port | prometheus_port | status |
+-----------+------+-----------------+--------+
| 127.0.0.1 | 2883 | 2884            | active |
+-----------+------+-----------------+--------+
obclient -h127.0.0.1 -P2883 -uroot -Doceanbase -A

+------------------------------------------------------+
|                      prometheus                      |
+---------------------------+------+----------+--------+
| url                       | user | password | status |
+---------------------------+------+----------+--------+
| http://10.10.10.1:9090    |      |          | active |
+---------------------------+------+----------+--------+
+---------------------------------------------------------------------+
|                               grafana                               |
+---------------------------------------+-------+------------+--------+
| url                                   | user  | password   | status |
+---------------------------------------+-------+------------+--------+
| http://10.10.10.1:3000/d/oceanbase    | admin | ******     | active |
+---------------------------------------+-------+------------+--------+
demo running
By default, the
obd democommand deploys OceanBase Database and its components with minimum specifications in the home directory of the current user and then starts them. The components include OceanBase Database Proxy (ODP), also known as OBProxy, OBAgent, Grafana, and Prometheus. The name of the deployed cluster is fixed todemo. For more information about custom deployment, see Quick deployment command. You can use OBD commands to manage an OceanBase database deployed by using theobd democommand. For more information about the commands, see Cluster commands.Note
If Grafana or Prometheus is installed, the access address of Grafana or Prometheus is output. On Alibaba Cloud or in other cloud environments, an intranet IP address may be returned in the case of a failure to obtain a public IP address. You must use a correct public IP address.
Offline deployment
-
Download the OceanBase All in One package for OceanBase Database Community Edition from OceanBase Download Center and upload it to any directory on your server. We recommend that you download the latest version.
-
In the directory where the installation package is located, run the following command to decompress the package:
[admin@test001 ~]$ sudo tar -xzf oceanbase-all-in-one-*.tar.gz -
Go to the directory generated after the decompression and perform installation initialization.
[admin@test001 ~]$ cd oceanbase-all-in-one/bin/

# Perform installation initialization.
[admin@test001 bin]$ ./install.sh
After the initialization, the following information is returned:
#########################################################################################
 Install Finished
=========================================================================================
Setup Environment:              source ~/.oceanbase-all-in-one/bin/env.sh
Quick Start:                    obd demo
Use Web Service to install:     obd web
Use Web Service to upgrade:     obd web upgrade
More Details:                   obd -h
=========================================================================================
The commands are described as follows:
-
source ~/.oceanbase-all-in-one/bin/env.sh: sets the environment variables of OBD. -
obd demo: quickly deploys a lightweight OceanBase database. -
obd web: starts the OBD GUI for deployment. -
obd web upgrade: starts the OBD GUI for upgrade. -
obd -h: displays help information about OBD commands.
-
-
Execute the environment variable script.
[admin@test001 ~] source ~/.oceanbase-all-in-one/bin/env.sh -
Check the status of remote repositories.
Make sure that remote repositories are disabled in offline deployment mode. Otherwise, OBD will try to connect to remote repositories to obtain an installation package and an error will be returned.
[admin@test001 ~]$ obd mirror listIf
EnabledisFalsefor bothoceanbase.community.stableandoceanbase.development-kitin the output, the remote repositories have been disabled. The installation package in the local repository will be used for deployment.+-----------------------------------------------------------------------------+
| Mirror Repository List |
+----------------------------+--------+---------+----------+------------------+
| SectionName | Type | Enabled | Available | Update Time |
+----------------------------+--------+---------+----------+------------------+
| oceanbase.community.stable | remote | False | False | 1970-01-01 08:00 |
| oceanbase.development-kit | remote | False | False | 1970-01-01 08:00 |
| local | local | - | True | 2024-01-30 15:31 |
+----------------------------+--------+---------+----------+------------------+Note
When you use the all-in-one package for installation, remote repositories are disabled by default. If the output shows that remote repositories are enabled, you need to run the
obd mirror disable remotecommand to disable them. -
Deploy OceanBase Database in a demo environment.
[admin@test001 ~] obd demoThe information about deployed components is displayed in the output. Here is an example:
+---------------------------------------------+
|                   observer                  |
+-----------+---------+------+-------+--------+
| ip        | version | port | zone  | status |
+-----------+---------+------+-------+--------+
| 127.0.0.1 | 4.2.1.3 | 2881 | zone1 | ACTIVE |
+-----------+---------+------+-------+--------+
obclient -h127.0.0.1 -P2881 -uroot -Doceanbase -A

+------------------------------------------------------------------+
|                             obagent                              |
+---------------+--------------------+--------------------+--------+
| ip            | mgragent_http_port | monagent_http_port | status |
+---------------+--------------------+--------------------+--------+
| 10.10.10.1    | 8089               | 8088               | active |
+---------------+--------------------+--------------------+--------+
+---------------------------------------------+
|                   obproxy                   |
+-----------+------+-----------------+--------+
| ip        | port | prometheus_port | status |
+-----------+------+-----------------+--------+
| 127.0.0.1 | 2883 | 2884            | active |
+-----------+------+-----------------+--------+
obclient -h127.0.0.1 -P2883 -uroot -Doceanbase -A

+------------------------------------------------------+
|                      prometheus                      |
+---------------------------+------+----------+--------+
| url                       | user | password | status |
+---------------------------+------+----------+--------+
| http://10.10.10.1:9090    |      |          | active |
+---------------------------+------+----------+--------+
+---------------------------------------------------------------------+
|                               grafana                               |
+---------------------------------------+-------+------------+--------+
| url                                   | user  | password   | status |
+---------------------------------------+-------+------------+--------+
| http://10.10.10.1:3000/d/oceanbase    | admin | ******     | active |
+---------------------------------------+-------+------------+--------+
demo running
By default, the
obd democommand deploys OceanBase Database and its components with minimum specifications in the home directory of the current user and then starts them. The components include ODP, OBAgent, Grafana, and Prometheus. The name of the deployed cluster is fixed todemo. For more information about custom deployment, see Quick deployment command. You can use OBD commands to manage an OceanBase database deployed by using theobd democommand. For more information about the commands, see Cluster commands.Note
If Grafana or Prometheus is installed, the access address of Grafana or Prometheus is output. On Alibaba Cloud or in other cloud environments, an intranet IP address may be returned in the case of a failure to obtain a public IP address. You must use a correct public IP address.
Related operations
Configure a password for the root@sys user
By default, the administrator of a cluster deployed by using the obd demo command has no password. We recommend that you perform the following steps to configure a password for the root@sys user.
-
Modify the configuration file.
[admin@test001 ~] obd cluster edit-config demoAfter you run the preceding command to open the configuration file, configure
root_passwordin theoceanbase-cesection. Then, run the:xcommand to save the file and exit, and run thereloadcommand for the configuration to take effect. Here is a sample configuration file:oceanbase-ce:
servers:
- 127.0.0.1
global:
home_path: /home/admin/oceanbase-ce
... # Some parameters are omitted here.
log_disk_size: 13G
root_password: ****** # Configure the password of the root@sys user. -
Reload the cluster.
After you modify and save the configuration file, OBD will output the
reloadcommand. You can directly copy and run it. Here is a sample output:Search param plugin and load ok
Search param plugin and load ok
Parameter check ok
Save deploy "demo" configuration
Use `obd cluster reload demo` to make changes take effect.
Trace ID: 4c977d02-bf47-11ee-bc44-00163e039b49
If you want to view detailed obd logs, please run: obd display-trace 4c977d02-bf47-11ee-bc44-00163e039b49Run the
reloadcommand provided in the output.[admin@test001 ~]$ obd cluster reload demoThe output is as follows:
Get local repositories and plugins ok
Load cluster param plugin ok
Open ssh connection ok
Cluster status check ok
Connect to observer 127.0.0.1:2881 ok
Connect to Obagent ok
Reload obagent ok
Connect to obproxy ok
Connect to Prometheus ok
Reload prometheus ok
Connect to grafana ok
Reload Grafana ok
demo reload
Trace ID: 393d5bb8-bf48-11ee-bcb8-00163e039b49
If you want to view detailed obd logs, please run: obd display-trace 393d5bb8-bf48-11ee-bcb8-00163e039b49
Notice
You cannot log on to the database and execute the
ALTER USERorSET PASSWORDstatement to change the password of theroot@sysuser. If the password of theroot@sysuser configured in OceanBase Database does not match the value ofroot_passwordin the configuration file, OBD management commands cannot connect to the database, which can affect operations. For example, OBD will fail to restart a cluster.
Create a user tenant
We recommend that you create and use a user tenant for testing or business purposes. It is prohibited to use the sys tenant for such purposes. Run the following command to create a user tenant:
[admin@test001 ~]$ obd cluster tenant create demo -n test
The output is as follows:
Get local repositories and plugins ok
Open ssh connection ok
Connect to observer 127.0.0.1:2881 ok
Create tenant test ok
Trace ID: 7c73104c-bf45-11ee-91d0-00163e039b49
If you want to view detailed obd logs, please run: obd display-trace    7c73104c-bf45-11ee-91d0-00163e039b49
By default, OBD will use all remaining resources to create the tenant. You can also configure related parameters to limit the resources for the tenant. For more information about the obd cluster tenant create command, see the obd cluster tenant create section in Cluster commands.
Connect to the database
After the obd demo command succeeds, commands for connecting to OceanBase Database through OBClient are provided in the output. Here is an example:
# Connect to the sys tenant of OceanBase Database directly
obclient -h127.0.0.1 -P2881 -uroot@sys -Doceanbase -A

# Connect to the sys tenant of OceanBase Database through ODP
obclient -h127.0.0.1 -P2883 -uroot@sys -Doceanbase -A
For information about how to connect to an OceanBase Database tenant by using OBClient, see Connect to an OceanBase Database tenant by using OBClient. For more methods for connecting to OceanBase Database, see Overview.
Destroy a cluster
If you want to destroy the deployed cluster and the database data can be cleared, you can run the obd cluster destroy command to destroy the cluster.
Notice
The destroy operation is highly risky. It will uninstall the deployed cluster and its components and delete the data directory. Proceed with caution.
[admin@test001 ~]$ obd cluster destroy demo
The output is as follows:
Get local repositories ok
Open ssh connection ok
Check for standby tenant ok
Search plugins ok
Stop observer ok
Stop prometheus ok
Stop obagent ok
Stop grafana ok
Stop obproxy ok
demo stopped
Search plugins ok
Cluster status check ok
observer work dir cleaning ok
prometheus work dir cleaning ok
obagent work dir cleaning ok
grafana work dir cleaning ok
obproxy work dir cleaning ok
demo destroyed
Trace ID: 500c3140-bf4b-11ee-b85e-00163e039b49
If you want to view detailed obd logs, please run: obd display-trace 500c3140-bf4b-11ee-b85e-00163e039b49
Deploy OceanBase Database in a cluster environment
Note
This section takes OBD V2.8.0 as an example. The GUI may vary with the OBD version. For the procedure of different versions, see OceanBase Deployer documentation of corresponding versions.
If you have multiple servers available, you can run the obd web command to start the GUI of OBD and deploy a distributed OceanBase cluster on the GUI.
-
Run the
obd webcommand on the CLI to start the GUI of OBD. Visit the URL provided in the output.[admin@obtest001 ~]$ obd webThe output is as follows:
start OBD WEB in 0.0.0.0:8680
please open <http://10.10.10.1:8680>
Note
-
The default port in the URL is
8680. You can use theobd web -pcommand to specify a port. -
In a cloud environment, the program may fail to obtain a public IP address but return an intranet IP address. You must use a correct public IP address to access the GUI.
-
The
obd webcommand is bound to the IP address0.0.0.0. If multiple network interface cards (NICs) are used, you can access the GUI through any accessible IP address. -
Deploying OCP Express depends on the Java environment. OBD V2.7.0 and later support detecting and installing the JDK during deployment. If you are using OBD of a version earlier than V2.7.0, you need to install JDK 1.8 and make sure that the build version is 161 or later and that the Java commands are in the
/usr/bin/javadirectory.
-
-
Click Try Now to start the deployment process.
Note
To change the display language, click the English icon in the upper-right corner of the page and select a language as needed.
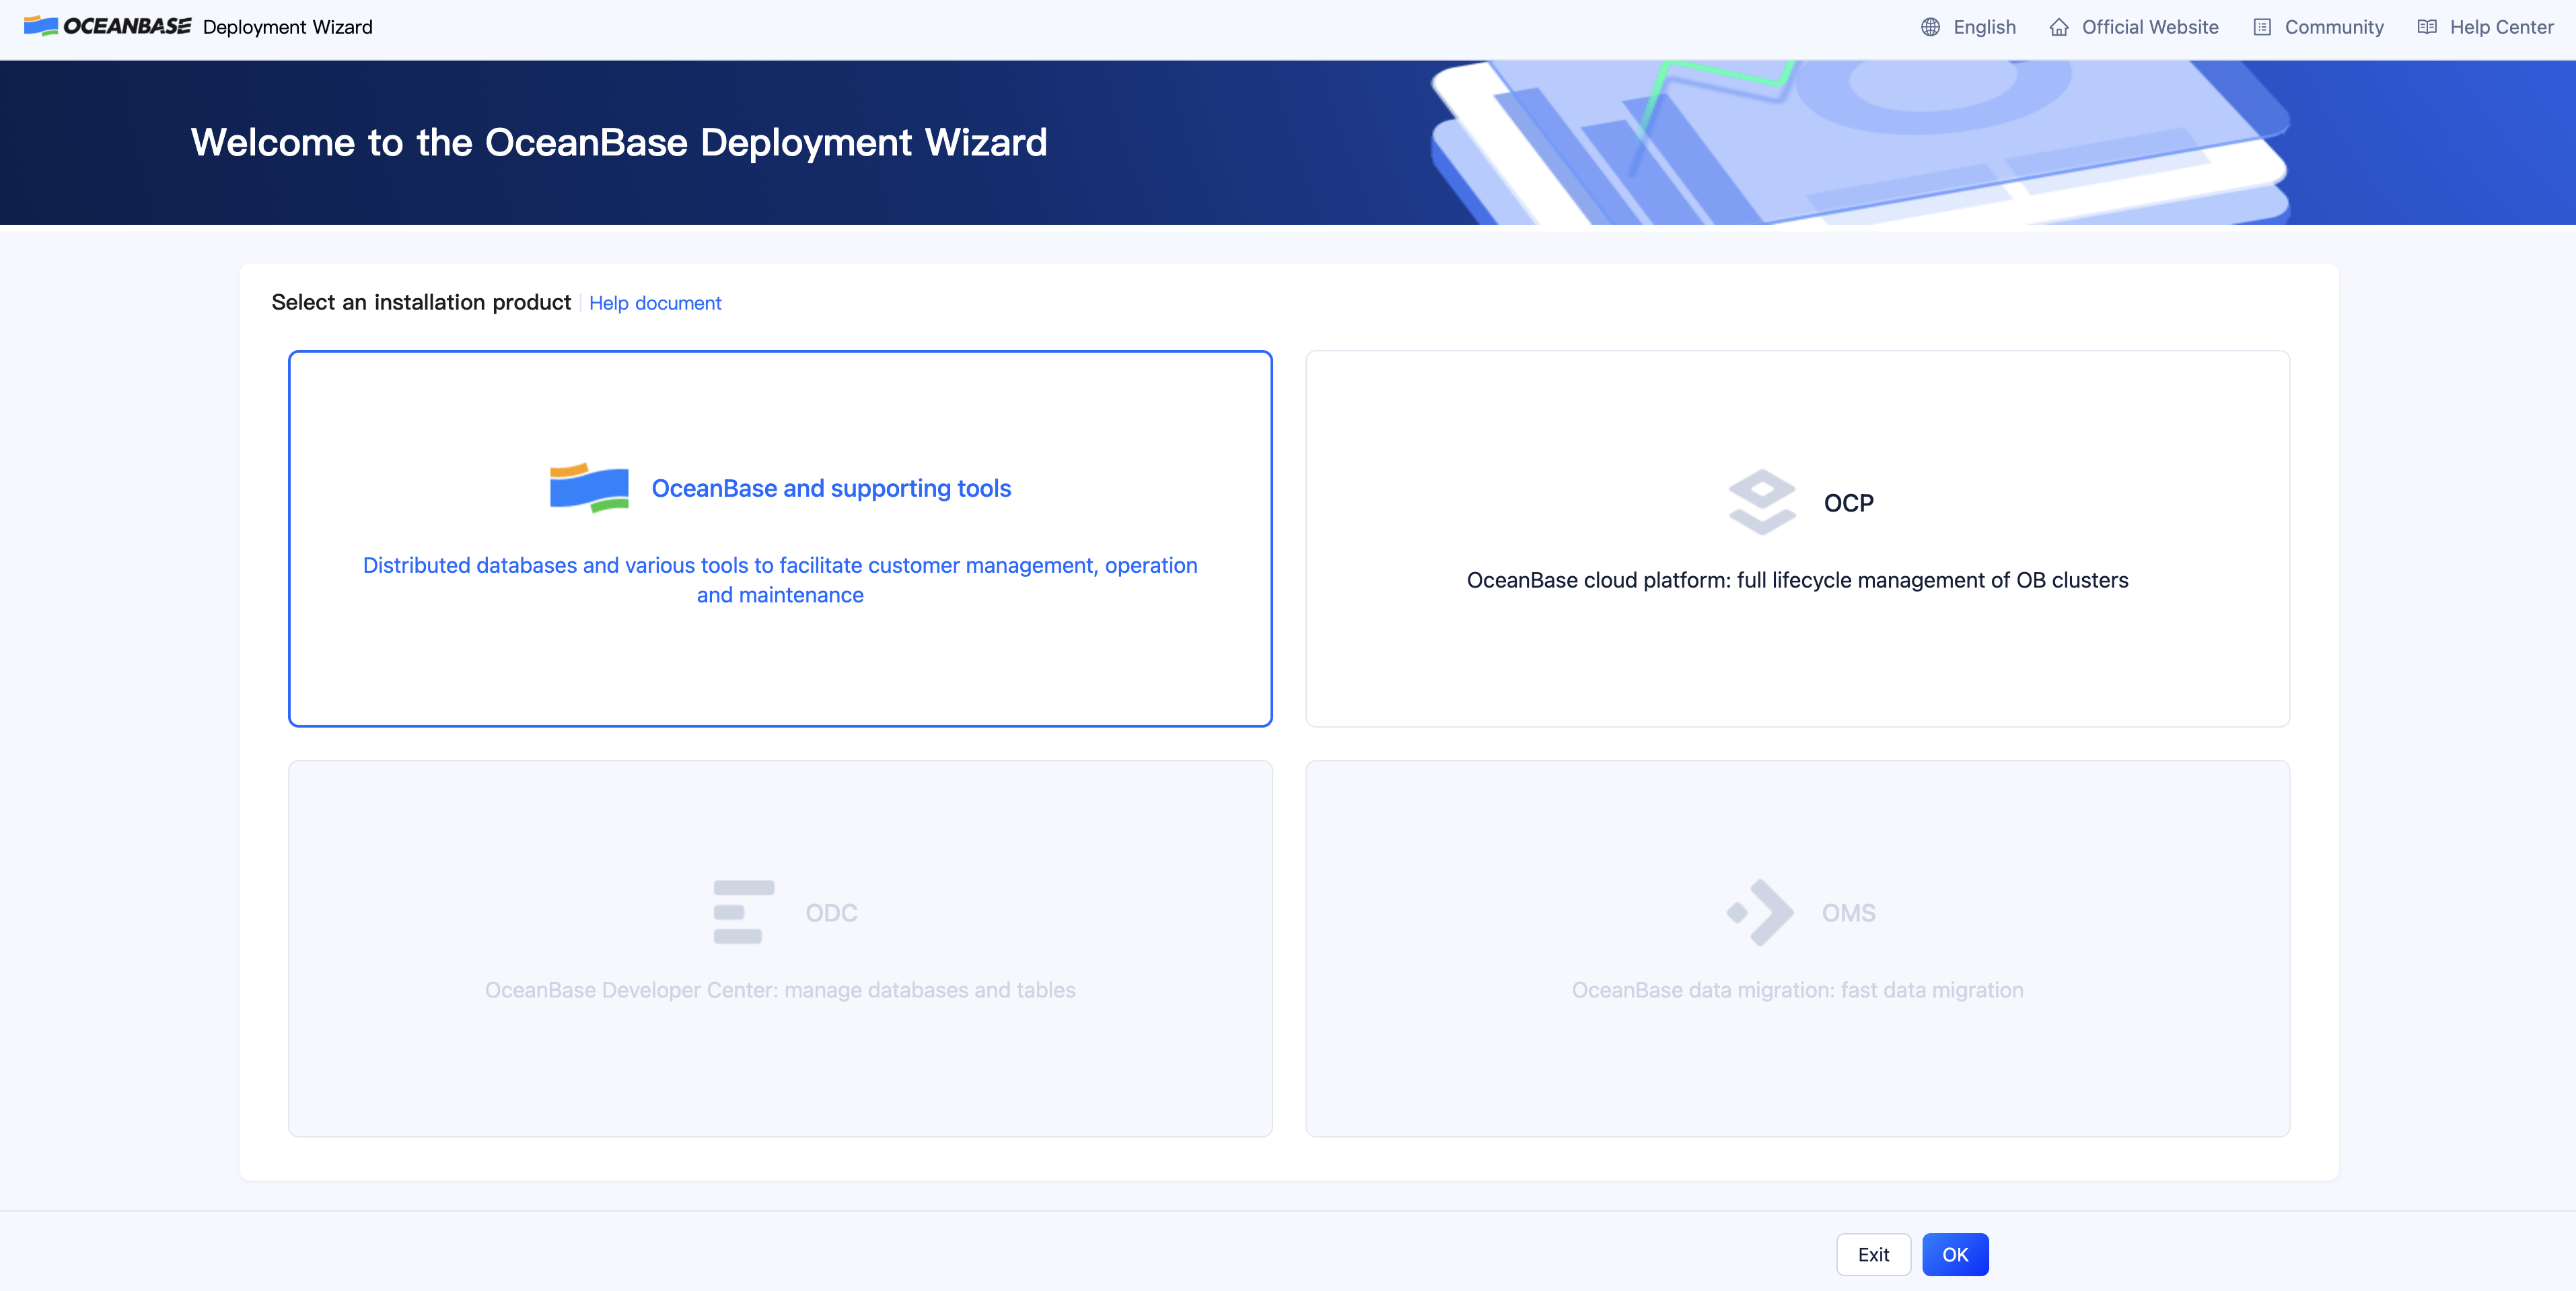
-
Select OceanBase and supporting tools and click OK.
-
On the Deployment Configuration page, modify Cluster Name and select the components that you want to deploy. You can also retain the default configurations. By default, all components are deployed.
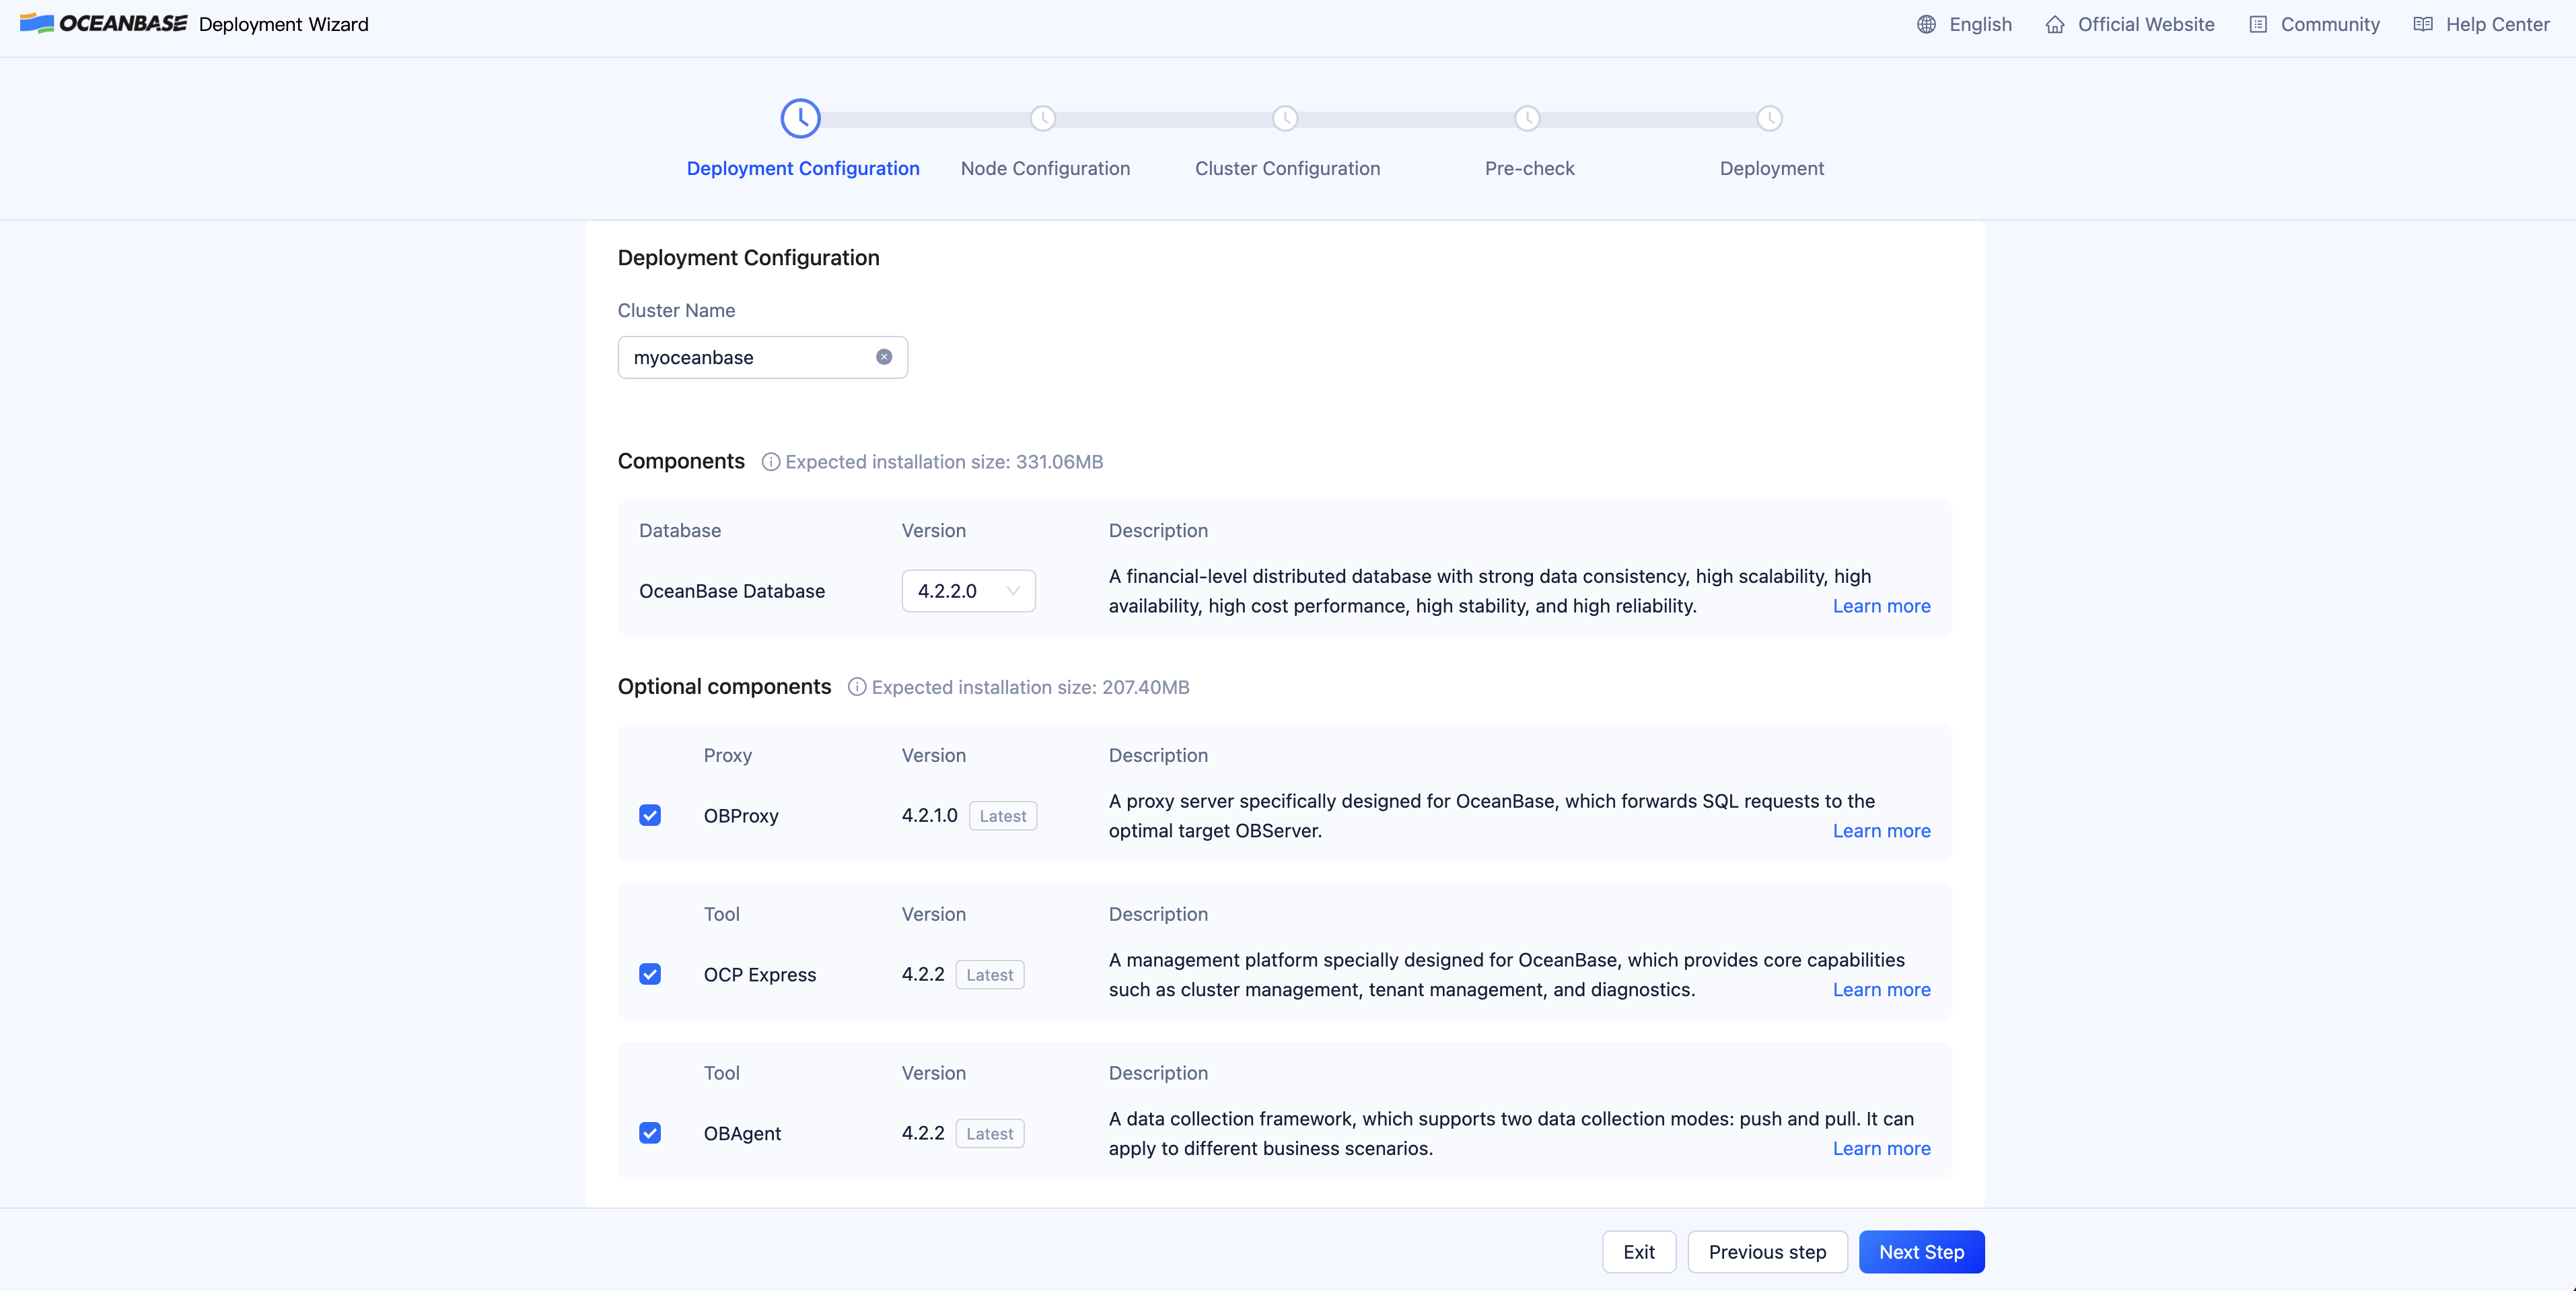
Click Next Step to go to the Node Configuration page.
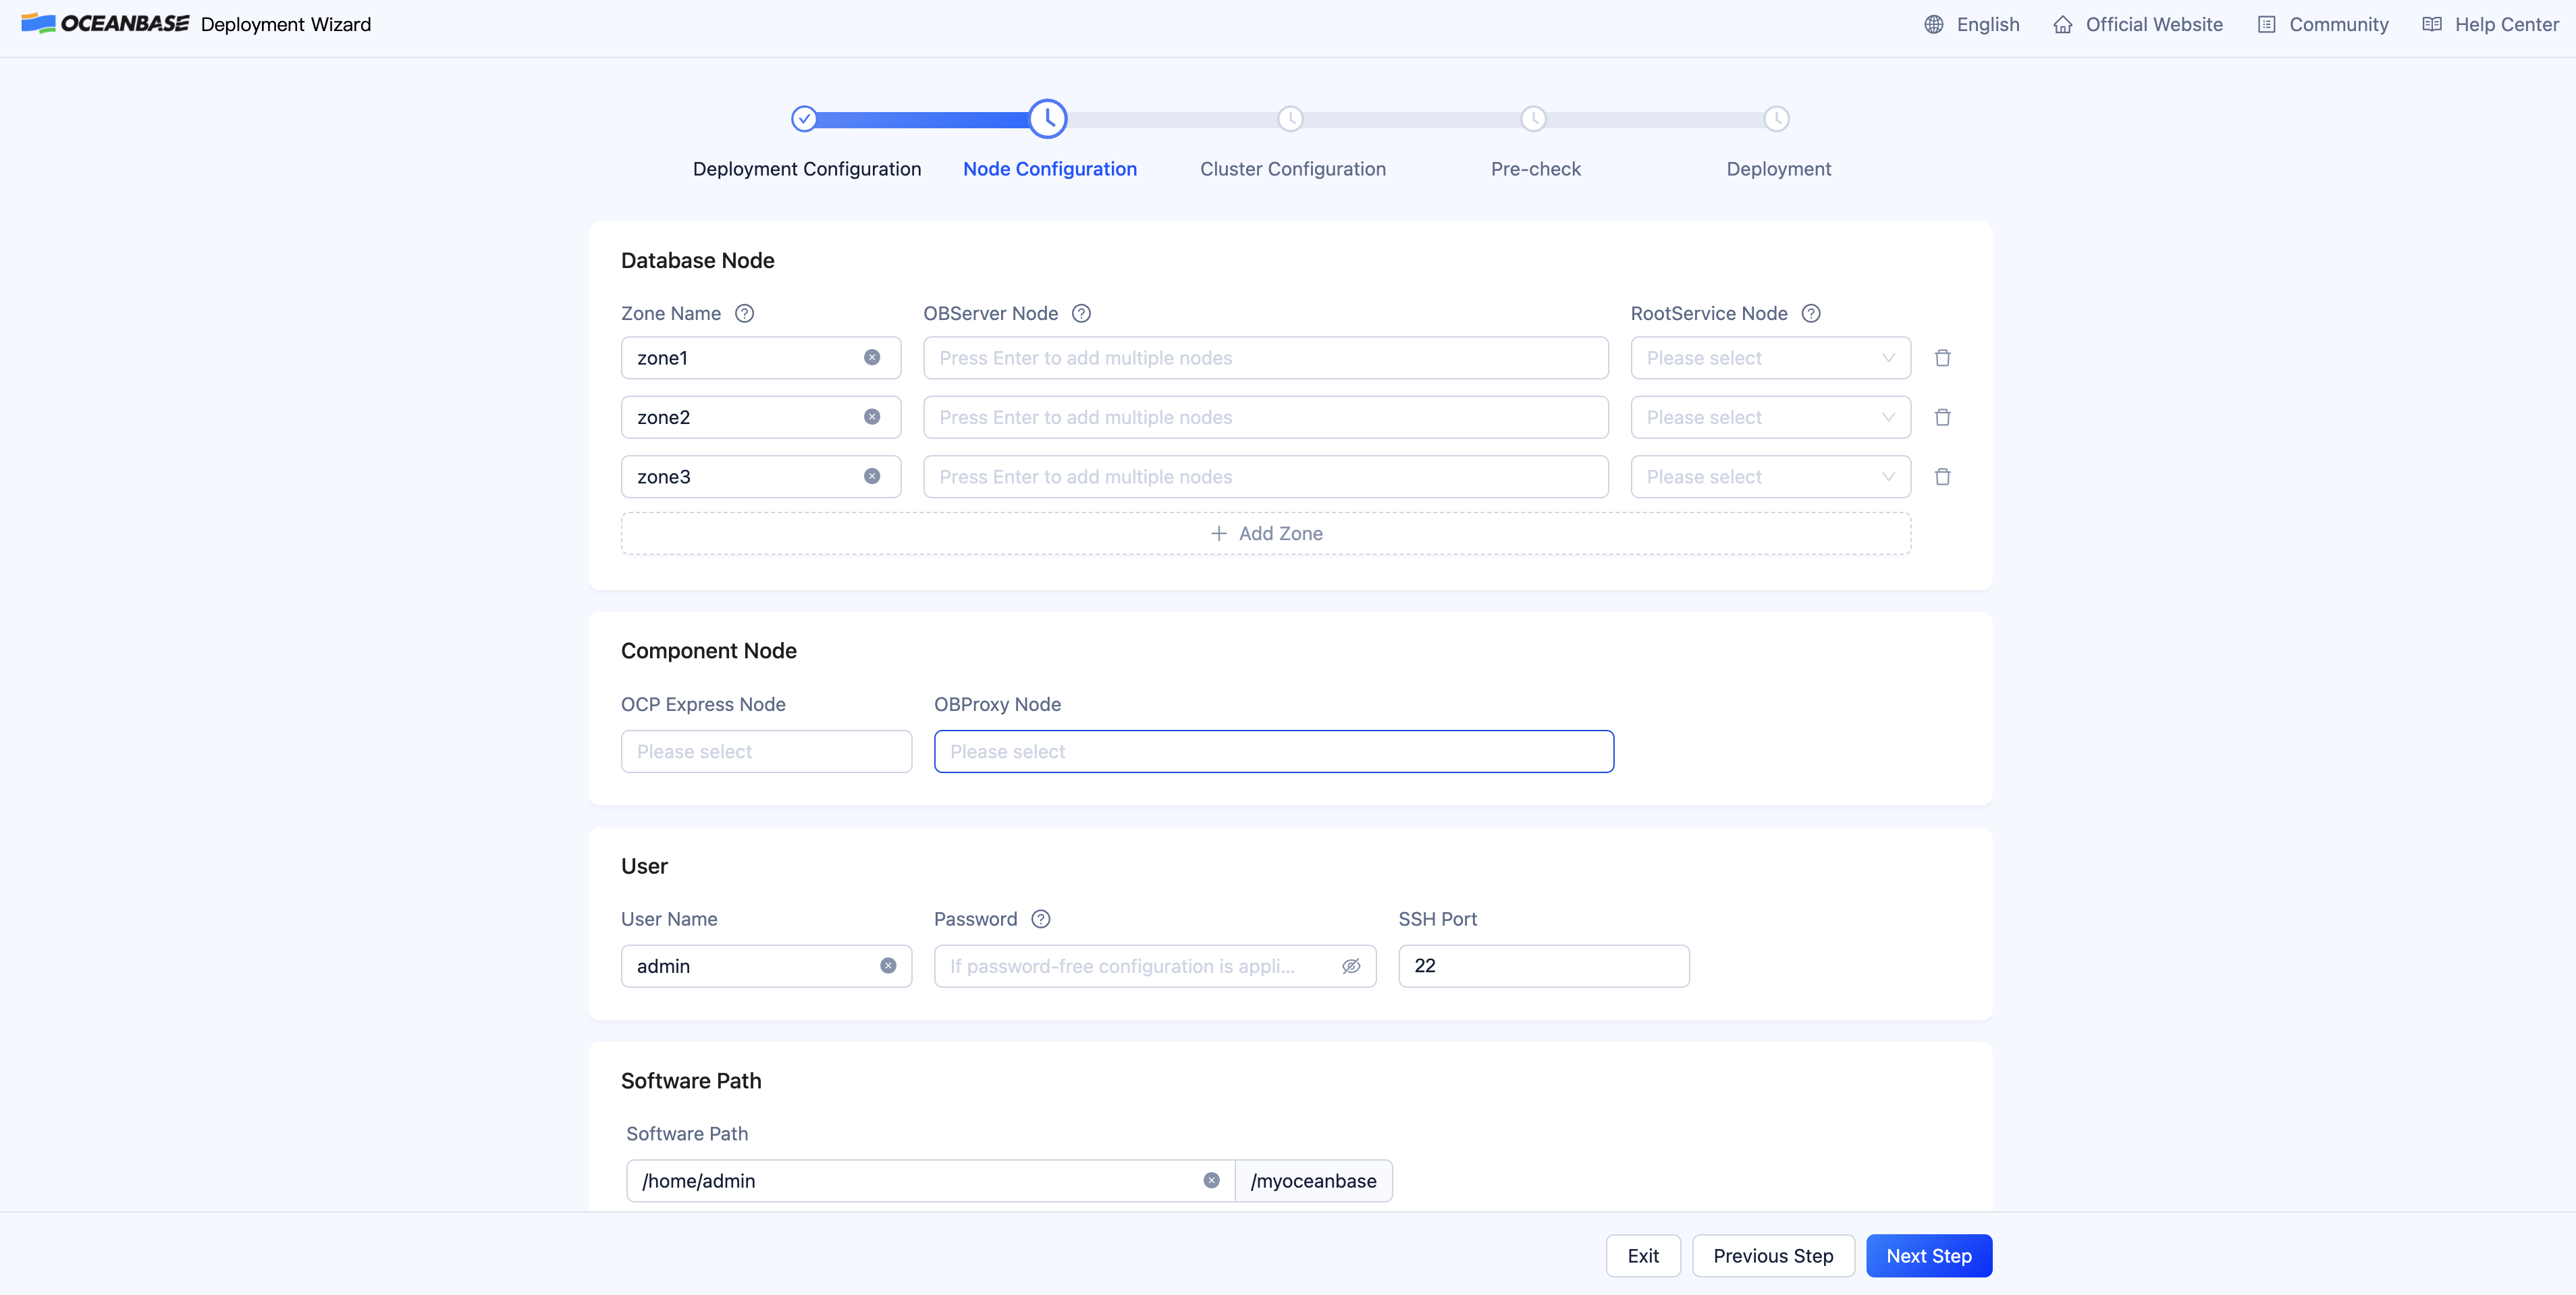
-
On the Node Configuration page, enter node IP addresses and the user password and then click Next Step to go to the Cluster Configuration page.
-
On the Cluster Configuration page, specify the deployment mode, password, directory, port, and other information about the cluster. You can also retain the default values.
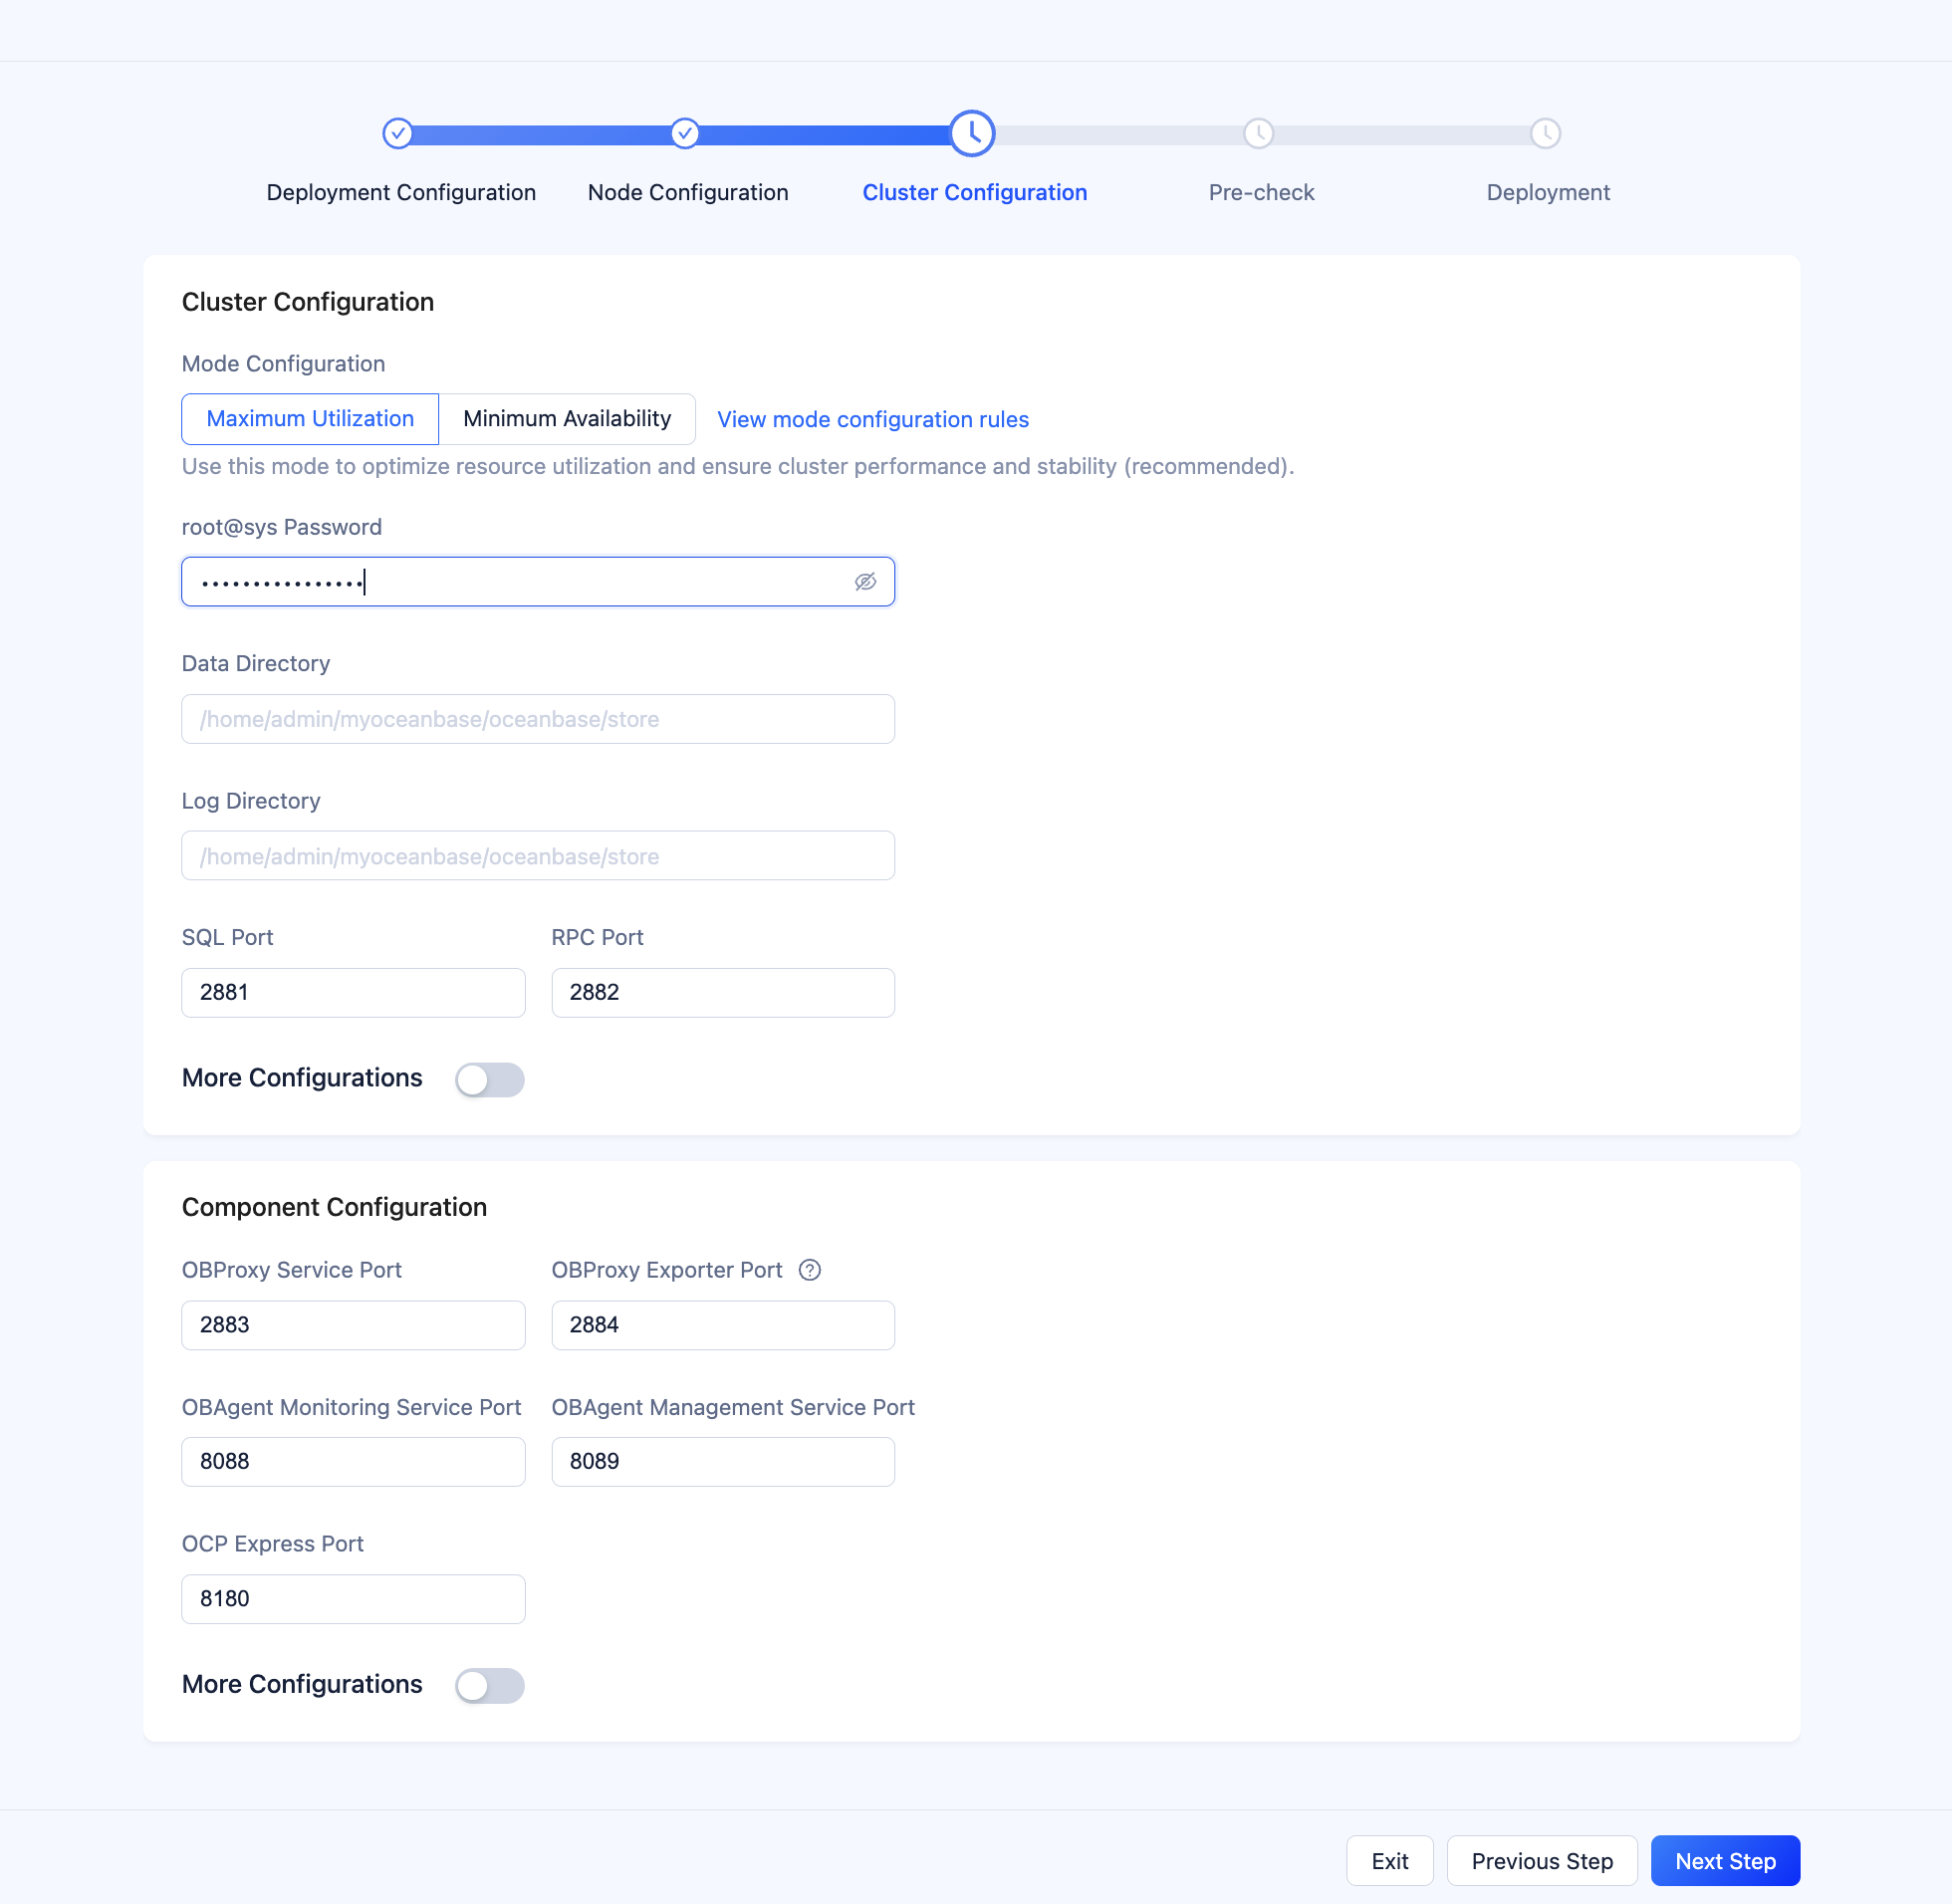
Click Next Step to go to the Pre-check page.
-
On the Pre-check page, verify the configuration information and then click Pre-check.
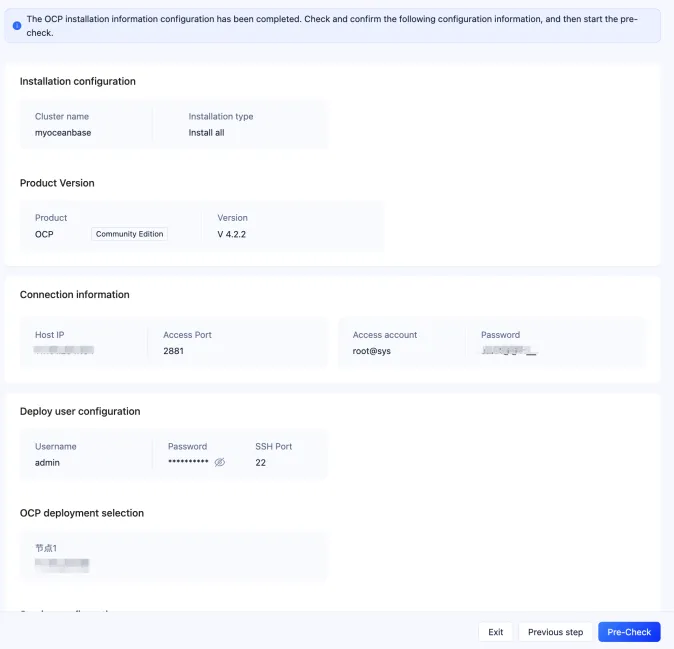
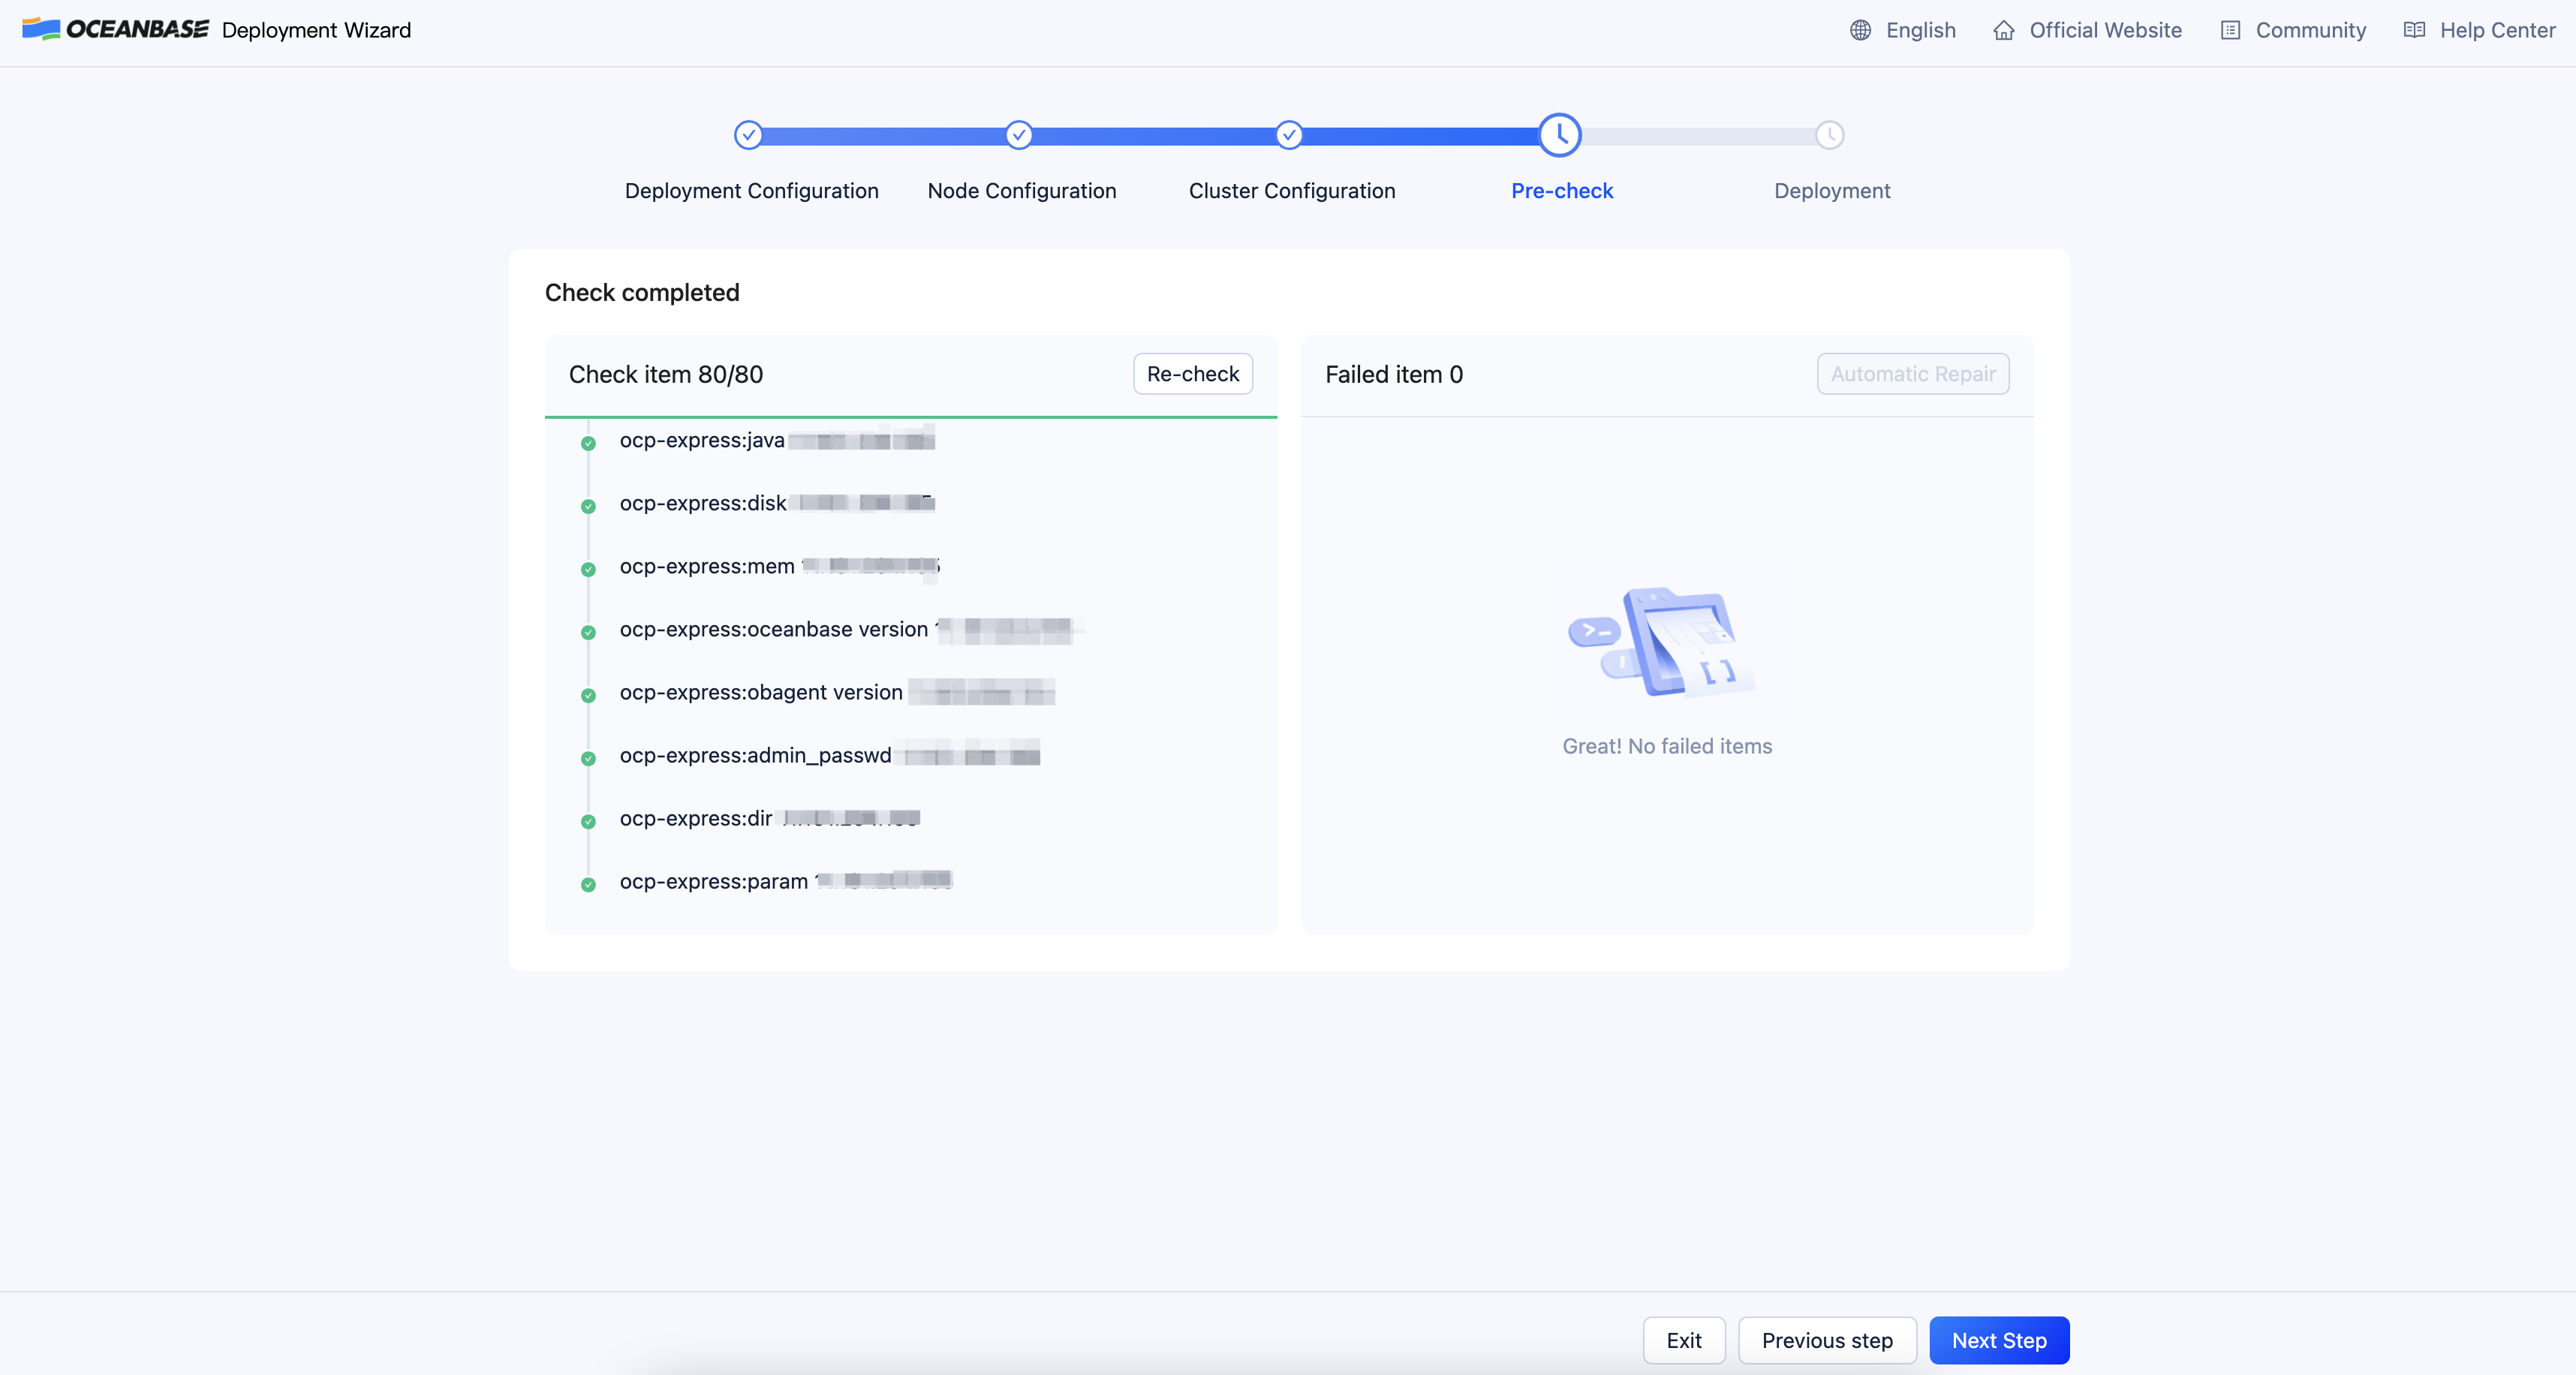
If an error code is returned, you can click Automatic Repair to automatically repair the error, or click Learn more to go to the error code document and correct the error based on the reference document. After all the errors are corrected, click Re-check to perform a precheck again. If you need to modify the content in the installation configuration file, you can usually find and edit the configuration file under ~/.obd/cluster/myoceanbase.
-
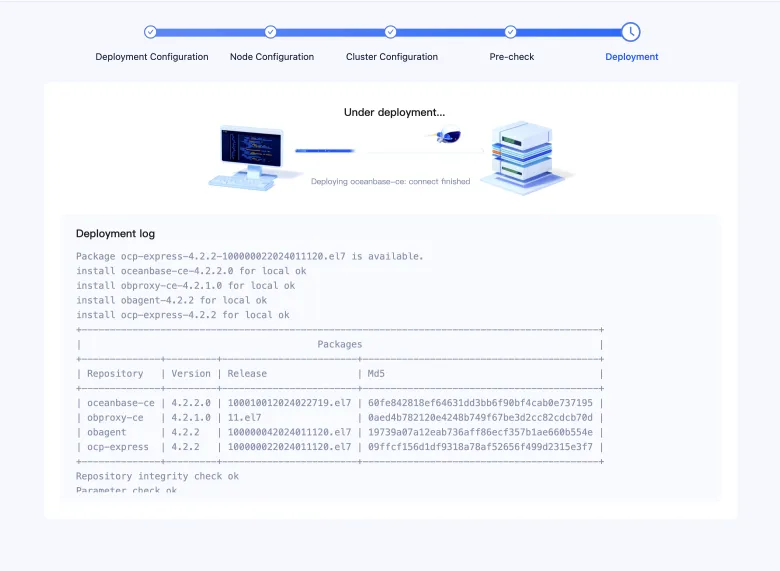
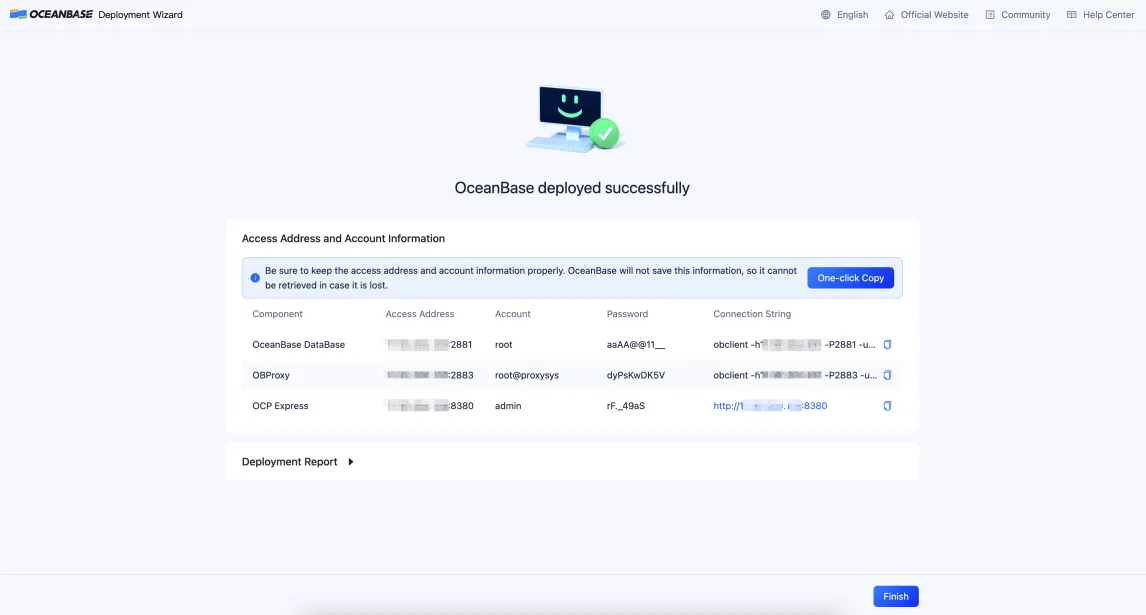
After the precheck is passed, click Deploy to start the deployment.
If the deployment is successful, the connection strings of the components are displayed. You can copy a connection string to access the corresponding component.
-
Click Finish.
-
Log on to OCP Express and create a user tenant.
If you forget or did not save the logon information of OCP Express, you can run the
obd cluster display <deploy name>command to view the information.# View the cluster list.
obd cluster list
# View the details of the myoceanbase cluster.(Prior to operation, terminate the OBD web process; otherwise, an error will occur: "Another app is currently holding the obd lock.")
obd cluster display myoceanbaseOn the Tenant Management page, click Create Tenant and specify related information to create a user tenant named
test. -
Connect to OceanBase Database by using OBClient or log on to the GUI of OCP Express and view the connection string of the tenant on the Tenant Management page.
# Directly connect to the sys tenant through port 2881.
[admin@test001 ~]$ obclient -h10.10.10.1 -P2881 -uroot@sys -p -Doceanbase -A

# Directly connect to the test tenant through port 2881.
[admin@test001 ~]$ obclient -h10.10.10.1 -P2881 -uroot@test -p -Doceanbase -A

# Connect to the sys tenant by using ODP.
[admin@test001 ~]$ obclient -h10.10.10.1 -P2883 -uroot@sys -p -Doceanbase -A

# Connect to the test tenant by using ODP.
[admin@test001 ~]$ obclient -h10.10.10.1 -P2883 -uroot@test -p -Doceanbase -A
For information about how to connect to an OceanBase Database tenant by using OBClient, see Connect to an OceanBase Database tenant by using OBClient. For more methods for connecting to OceanBase Database, see Overview.
Note
If you want to destroy the deployed cluster and the database data can be cleared, you can run the
obd cluster destroycommand to destroy the cluster. The destroy operation will uninstall the cluster and its components and delete the data directory.
Deploy OceanBase Database in a container environment
To deploy OceanBase Database in a container environment, make sure that the following conditions are met:
-
You have installed Docker and started the Docker service on the server. For more information, see Get Docker.
-
At least 6 GB of memory is available in the container. Available memory means the remaining available memory.
-
At least two logical CPUs are available in the container.
General Docker commands
You can use the following commands to manage Docker.
# View the Docker version.
docker version
# Show the Docker system information.
docker info
# View the currently running container.
docker ps
# Check for faults.
service docker status
# Start or stop Docker.
service docker start | stop
# View container logs.
docker logs -f <container name or ID>
# Clear unused containers.
docker container prune
# Clear unused images.
docker image prune
# Clear unused volumes.
docker volume prune
Download and start the Docker image
You can click the following links to view the details.
-
OceanBase Database Docker image address: https://hub.docker.com/r/oceanbase/oceanbase-ce
-
Source code address of the Docker image on GitHub: https://github.com/oceanbase/docker-images/tree/main/oceanbase-ce
-
Search for images related to OceanBase Database.
[admin@test001 ~]$ sudo docker search oceanbase -
Pull the latest image of OceanBase Database.
[admin@test001 ~]$ sudo docker pull oceanbase/oceanbase-ceThe output is as follows:
Using default tag: latest
latest: Pulling from oceanbase/oceanbase-ce
bf5ec1942180: Pull complete
e80e84f8272f: Pull complete
f72149611c5a: Pull complete
be8bfe13b526: Pull complete
e689549a77e0: Pull complete
96b878f840c3: Pull complete
4f4fb700ef54: Pull complete
Digest: sha256:547ce27e204149f7491f13b3af503299fc25ee8e4161101724357f716b787c84
Status: Downloaded newer image for oceanbase/oceanbase-ce:latest
docker.io/oceanbase/oceanbase-ce:latest
Note
-
If you fail to pull the Docker image, you can pull it from the quay.io or ghcr.io repository. To do so, you only need to replace
oceanbase/oceanbase-cein the preceding command withquay.io/oceanbase/oceanbase-ceorghcr.io/oceanbase/oceanbase-ce. For example, you can runsudo docker pull quay.io/oceanbase/oceanbase-ceto pull the Docker image from the quay.io repository. -
If you replace the repository address in the command of this step, you must also replace the repository address in the command of the startup step. The repositories in the two commands must be the same.
-
By default, the preceding command pulls the latest version of Docker image. You can select a desired image from Docker Hub, quay.io, or ghcr.io.
-
-
Start the OceanBase Database Docker container.
# Deploy an instance with the maximum specifications supported by the current container.
[admin@test001 ~]$ sudo docker run -p 2881:2881 --name obstandalone -e MODE=normal -e OB_TENANT_PASSWORD=***** -d oceanbase/oceanbase-ce

## Deploy a mini standalone instance.
[admin@test001 ~]$ sudo docker run -p 2881:2881 --name obstandalone -e MODE=mini -e OB_TENANT_PASSWORD=***** -d oceanbase/oceanbase-ce
The parameters are described as follows:
-
--namespecifies the name of the Docker container, such asobstandalonein the preceding examples. -
-especifies the environment variables. TheMODEenvironment variable specifies the deployment specifications of OceanBase Database andOB_TENANT_PASSWORDspecifies the password of the root@sys user in OceanBase Database.
-
-
View container startup logs.
After you start an OceanBase database, it takes two to five minutes to initialize the cluster. You can run the following command repeatedly to view the container startup logs. If
boot success!is returned, the container is successfully started.[admin@test001 ~]$ sudo docker logs obstandalone | tail -1You can also directly run the
sudo docker logs obstandalonecommand to view all logs, which record the following information:-
The oceanbase-ce-lib, oceanbase-ce, and obagent packages are obtained during the installation of OceanBase Database.
-
The cluster directories are initialized first when you start OceanBase Database.
-
A user tenant (such as
test) is created during the installation.
Note
Some
[WARN]information will be printed in the logs, which can be ignored. If the installation fails, you only need to check the[ERROR]information. -
Connect to an OceanBase Database instance
An OceanBase Database image contains OBD and OBClient. You can enter the container and use OBD commands to manage an OceanBase Database instance or use OBClient to connect to the instance. You can also connect to an OceanBase Database instance from the host by using the local OBClient or MySQL client.
Enter the container and then connect to the instance
-
Enter the Docker container.
[admin@test001 ~]$ sudo docker exec -it obstandalone bash -
View the details of the cluster.
# View the cluster list.
obd cluster list
# View the details of the obcluster cluster.
obd cluster display obcluster -
Connect to the cluster.
obclient -h127.0.0.1 -uroot@sys -A -Doceanbase -P2881 -p
Connect to the instance from the host by using a local client
You can connect to an OceanBase Database instance from the host by using the local OBClient or MySQL client. Here is an example:
[admin@test001 ~]# obclient -uroot@sys -h127.1 -P2881 -p
The output is as follows:
Welcome to the MariaDB monitor.  Commands end with ; or \g.
Your MySQL connection id is 3221506989
Server version: 5.7.25 OceanBase_CE 4.2.1.3   (r103000032023122818-8fe69c2056b07154bbd1ebd2c26e818ee0d5c56f) (Built Dec 28 2023 19:07:26)

Copyright (c) 2000, 2018, OceanBase and/or its affiliates. All rights reserved.

Type 'help;' or '\h' for help. Type '\c' to clear the current input statement.

obclient [(none)]>
View the process and directory information of OceanBase Database
This example uses an OceanBase database deployed in a Docker container. You can run the sudo docker exec -it obstandalone bash command to log on to the Docker container and view the process and directory information of the database.
Notice
In this example, OceanBase Database is installed under the root directory and run by the root user. Do not deploy or run OceanBase Database as the root user in a production environment.
-
View the characteristics of the observer process on the nodes of the OceanBase cluster.
You can run the following commands to view the startup location, startup files, and startup parameters of the observer process.
Run the following command to view the startup location of the process:
[root@7bfd1eb06ada ~]# ps -ef|grep observer |grep -v grepThe following output shows that the process startup directory is
/root/ob:root 263 1 36 08:16 ? 00:46:30 /root/ob/bin/observer -r 127.0.0.1:2882:2881 -p 2881 -P 2882 -z zone1 -n obcluster -c 1 -d /root/ob/store -l INFO -I 127.0.0.1 -o __min_full_resource_pool_memory=2147483648,memory_limit=6G,system_memory=1G,datafile_size=5G,log_disk_size=5G,cpu_count=16,enable_syslog_wf=False,enable_syslog_recycle=True,max_syslog_file_count=4,enable_rich_error_msg=TrueRun the following command to view the startup files of the process:
[root@7bfd1eb06ada ~]# ls -l /proc/`pidof observer`/{cwd,exe,cmdline}The output is as follows:
-r--r--r-- 1 root root 0 Jan 24 08:16 /proc/263/cmdline
lrwxrwxrwx 1 root root 0 Jan 24 08:16 /proc/263/cwd -> /root/ob
lrwxrwxrwx 1 root root 0 Jan 24 08:16 /proc/263/exe -> /root/ob/bin/observer
Run the following command to view the startup parameters of the process:
[root@7bfd1eb06ada ~]# cat /proc/`pidof observer`/cmdlineThe output is as follows. For more information about the startup parameters in the output, see Overview.
/root/ob/bin/observer-r127.0.0.1:2882:2881-p2881-P2882-zzone1-nobcluster-c1-d/root/ob/store-lINFO-I127.0.0.1-o__min_full_resource_pool_memory=2147483648,memory_limit=6G,system_memory=1G,datafile_size=5G,log_disk_size=5G,cpu_count=16,enable_syslog_wf=False,enable_syslog_recycle=True,max_syslog_file_count=4,enable_rich_error_msg=True -
View the ports listened to by the observer process.
Note
If the
netstatcommand is not installed in the container, you can run theyum install -y net-toolscommand to install it.[root@7bfd1eb06ada ~]# netstat -ntlpThe following output shows that the observer process listens to connection port
2881and RPC port2882.Active Internet connections (only servers)
Proto Recv-Q Send-Q Local Address Foreign Address State PID/Program name
tcp 0 0 0.0.0.0:2881 0.0.0.0:*LISTEN 263/observer
tcp 0 0 0.0.0.0:2882 0.0.0.0:* LISTEN 263/observer
tcp6 0 0 :::8088 :::*LISTEN 797/ob_monagent
tcp6 0 0 :::8089 :::* LISTEN 796/ob_mgragent -
View the structure of the working directory of OceanBase Database.
Note
If the
treecommand is not installed in the container, you can run theyum install -y treecommand to install it.[root@7bfd1eb06ada ~]# tree /root/ob/The output is as follows:
/root/ob/
|-- admin
|   |-- __dbms_upgrade_body_mysql.sql
|   |--__dbms_upgrade_mysql.sql
|   |-- dbms_application_body_mysql.sql
|   |-- dbms_application_mysql.sql
|   |-- dbms_ash_internal.sql
|   |-- dbms_ash_internal_body.sql
|   |-- dbms_monitor_body_mysql.sql
|   |-- dbms_monitor_mysql.sql
|   |-- dbms_resource_manager_body_mysql.sql
|   |-- dbms_resource_manager_mysql.sql
|   |-- dbms_rls.sql
|   |-- dbms_rls_body.sql
|   |-- dbms_scheduler_mysql.sql
|   |-- dbms_scheduler_mysql_body.sql
|   |-- dbms_session_body_mysql.sql
|   |-- dbms_session_mysql.sql
|   |-- dbms_stats_body_mysql.sql
|   |-- dbms_stats_mysql.sql
|   |-- dbms_udr.sql
|   |-- dbms_udr_body.sql
|   |-- dbms_udr_body_mysql.sql
|   |-- dbms_udr_mysql.sql
|   |-- dbms_workload_repository.sql
|   |-- dbms_workload_repository_body.sql
|   |-- dbms_workload_repository_body_mysql.sql
|   |-- dbms_workload_repository_mysql.sql
|   |-- dbms_xplan_mysql.sql
|   |-- dbms_xplan_mysql_body.sql
|   |-- json_element_type.sql
|   |-- json_element_type_body.sql
|   |-- json_object_type.sql
|   `-- json_object_type_body.sql
|-- audit
|`-- observer_262_20240124081603704889888.aud
|-- bin
|   |-- import_srs_data.py
|   |-- import_time_zone_info.py
|   `-- observer
|-- boot.yaml
|-- etc
|   |-- default_srs_data_mysql.sql
|   |-- fill_help_tables-ob.sql
|   |-- observer.config.bin
|   |-- observer.config.bin.history
|   |-- oceanbase_upgrade_dep.yml
|   |-- timezone_V1.log
|   |-- upgrade_checker.py
|   |-- upgrade_health_checker.py
|   |-- upgrade_post.py
|`-- upgrade_pre.py
|-- etc2
|   |-- observer.conf.bin
|   `-- observer.conf.bin.history
|-- etc3
|   |-- observer.conf.bin
|`-- observer.conf.bin.history
|-- lib
|   |-- libaio.so
|   |-- libaio.so.1
|   |-- libaio.so.1.0.1
|   |-- libmariadb.so
|   `-- libmariadb.so.3
|-- log
|   |-- election.log
|   |-- election.log.wf
|   |-- observer.log
|   |-- observer.log.20240124092657594
|   |-- observer.log.20240124094706195
|   |-- observer.log.20240124100732088
|   |-- observer.log.20240124102758021
|   |-- observer.log.wf
|   |-- rootservice.log
|   |-- rootservice.log.wf
|`-- trace.log
|-- run
|   |-- lua.sock
|   |-- observer.pid
|   `-- sql.sock
`-- store
    |-- clog
    |   |-- log_pool
    |   |   |-- 1
    |   |   |-- 2
    ... Omitted
    |   |   |-- 80

    |   |   `-- meta
    |   |-- tenant_1
    |   |   `-- 1
    |   |       |-- log
    |   |       |   `-- 0
    |   |       `-- meta
    |   |           `-- 0
    |   |-- tenant_1001
    |   |   `-- 1
    |   |       |-- log
    |   |       |   |-- 0
    |   |       |   `-- 1
    |   |       `-- meta
    |   |           `-- 0
    |   `-- tenant_1002
    |       |-- 1
    |       |   |-- log
    |       |   |   `-- 0
    |       |   `-- meta
    |       |       `-- 0
    |       `-- 1001
    |           |-- log
    |           |   `-- 0
    |           `-- meta
    |               `-- 0
    |-- slog
    |   |-- server
    |   |   `-- 1
    |   |-- tenant_1
    |   |   `-- 1
    |   |-- tenant_1001
    |   |   `-- 1
    |   `-- tenant_1002
    |       `-- 1
    `-- sstable
        `-- block_file
The following table describes the directories.
Directory path (relative to the working directory) Description bin Stores the observer process files. boot.yaml Stores the deployment configuration file. etc, etc2, and etc3 Stores configuration files. log Stores operation logs. run Stores pid files. store Stores all data, including logs. store/clog Stores clogs. store/ilog Stores ilogs. store/slog Stores slogs. store/sstable Stores block files. Note
-
If you deploy OceanBase Database manually, you must manually maintain the structure of subdirectories under this working directory. Otherwise, OceanBase Database may fail to be started.
-
If you deploy OceanBase Database by using OBD, OBD will automatically create related directories.
-