3.6 Use JMeter to test OceanBase Database in simulated business scenarios
JMeter is an open-source performance test tool developed by the Apache Software Foundation. It is built based on the Java platform and intended for load and stress tests on software applications. JMeter was designed for testing Web applications at the beginning and supports other test features later. You can use JMeter to simulate business SQL scenarios and analyze the performance of a database server under different loads.
Prepare the environment
-
Configure the Java environment. Java Development Kit (JDK) must be of a version later than 1.8.
-
Install JMeter. For more information, see JMeter Documentation.
-
Download the Java driver. Before you use JMeter to test the performance of OceanBase Database, you need to download the Java driver from MySQL Product Archives for connecting to the database. We recommend that you download
mysql-connector-java-5.1.47.jarto thelibfolder of JMeter and then restart JMeter.
Test plan
This test simulates a simple business transaction and uses the most basic SQL model to demonstrate the test procedure. The actual test procedure varies based on the actual business scenario.
Table creation statement
Execute the following SQL statement under a business account in a MySQL tenant of the OceanBase cluster:
CREATE TABLE account(id bigint NOT NULL AUTO_INCREMENT PRIMARY KEY
 , name varchar(50) NOT NULL UNIQUE
 , value bigint NOT NULL
 , gmt_create timestamp DEFAULT current_timestamp NOT NULL
 , gmt_modified timestamp DEFAULT current_timestamp NOT NULL  );
SQL model
In the basic SQL model, trans_amount indicates the transaction amount, credit_id indicates the payer, and debit_id indicates the payee.
begin ;
update account set  value = value - ${trans_amount} , gmt_modified = current_timestamp where id = ${credit_id} ;
update account set  value = value + ${trans_amount} , gmt_modified = current_timestamp where id = ${debit_id} ;
-- commit or rollback;
commit;
Test procedure
JMeter can run in the CLI or on the GUI. This section describes how to use JMeter on the GUI. For more information, see User's Manual of JMeter.
Create a test plan and a thread group
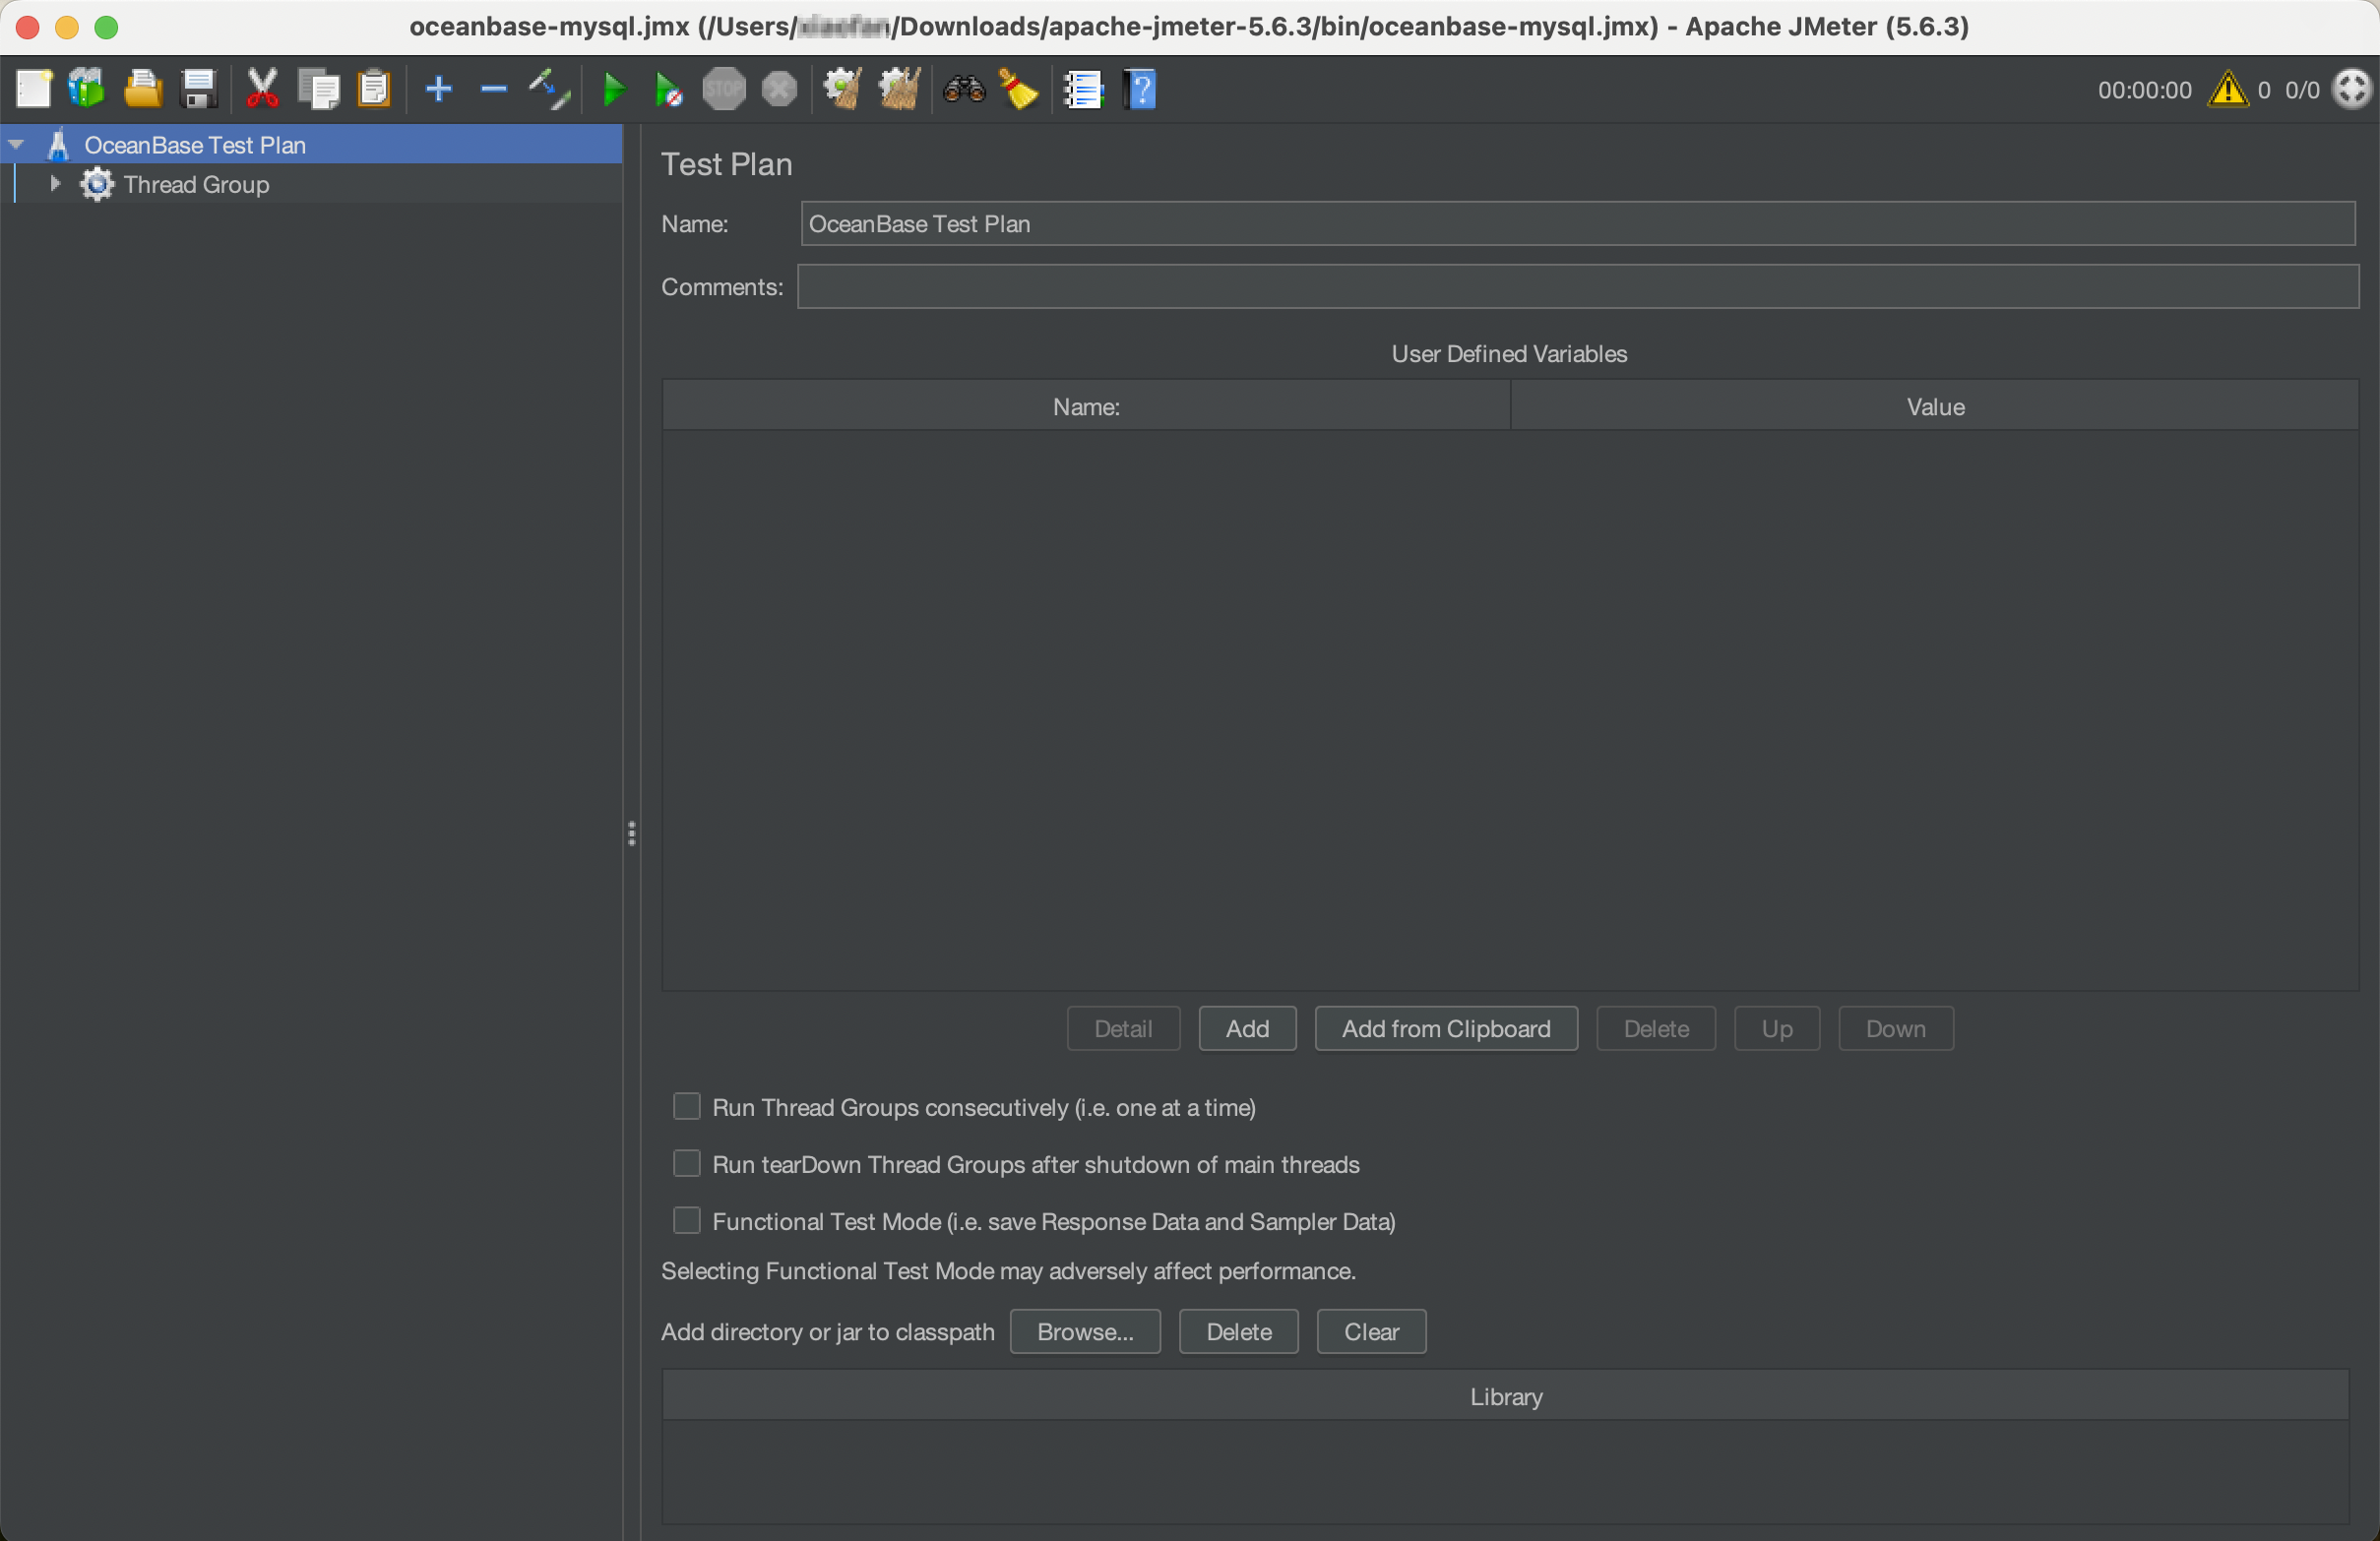
Run the sh jmeter command in the apache-jmeter-xxx/bin/ directory to go to the GUI of JMeter. On the page shown in the following figure, create a test plan named Oceanbase Test Plan.
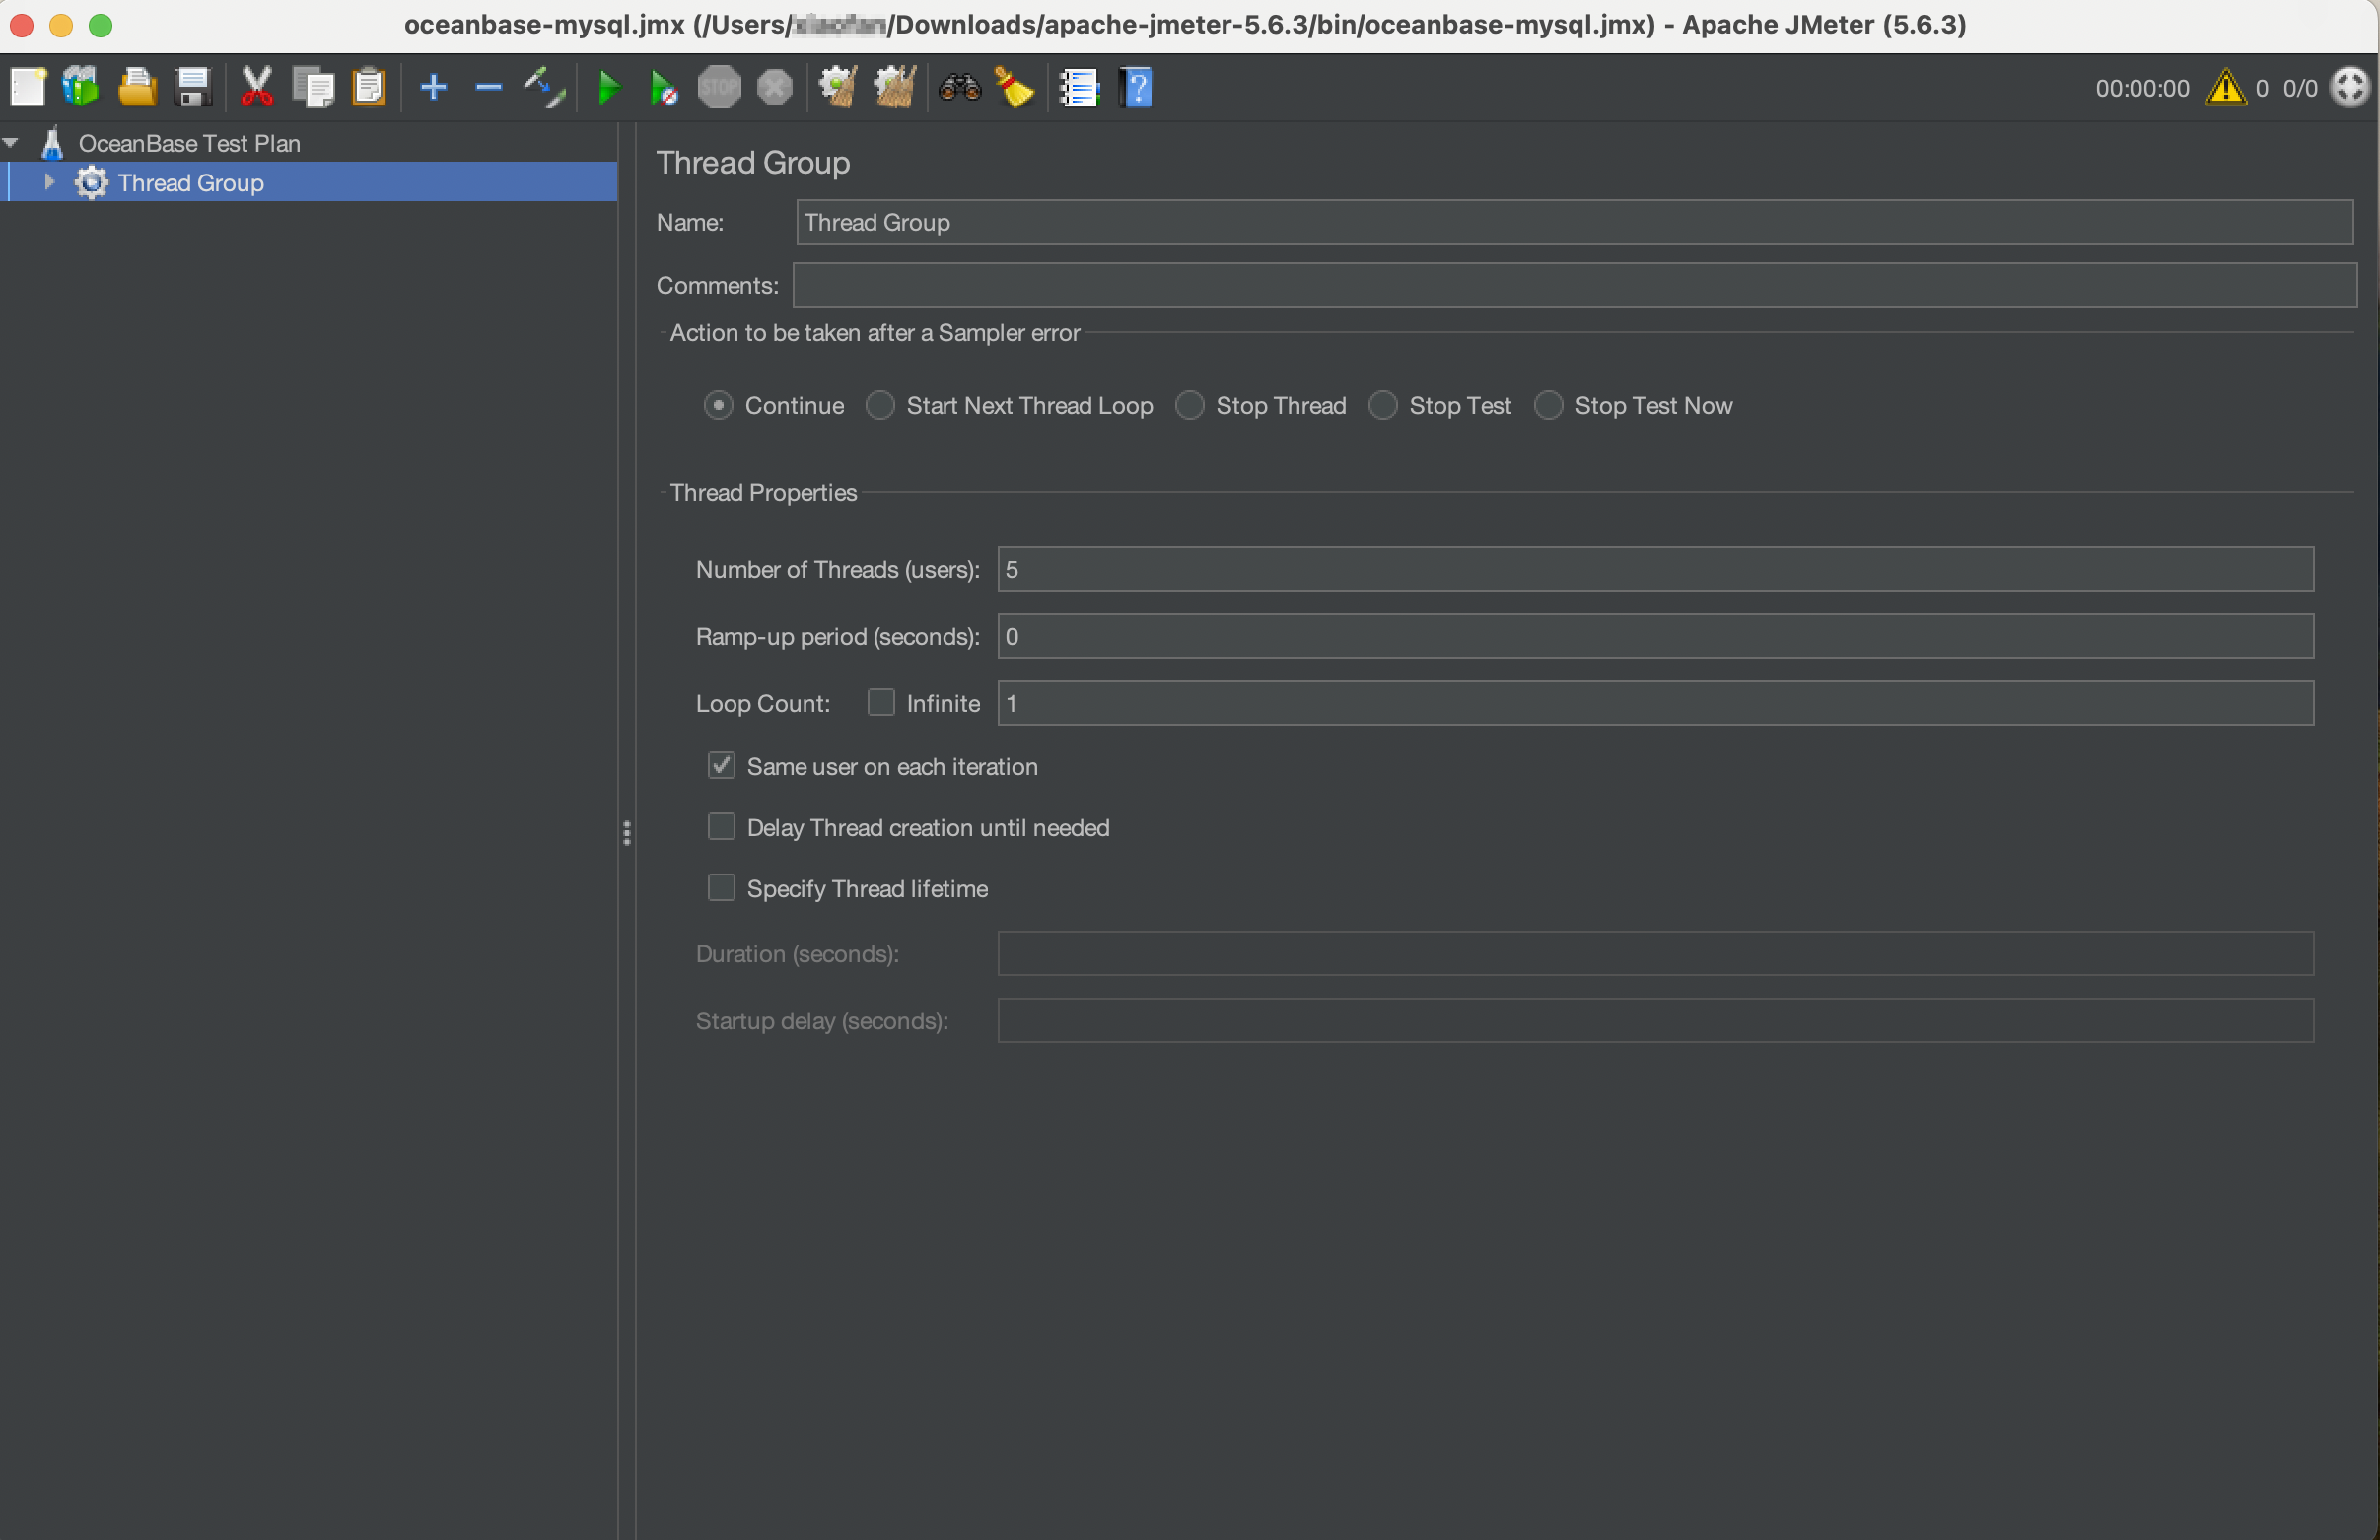
In the left-side navigation pane, click Oceanbase Test Plan and choose Add > Threads(Users) > Thread Group to create a thread group. You can configure a variety of parameters when you use JMeter for testing. For more information about the parameters, see Elements of a Test Plan in JMeter Documentation.
Add a JDBC connection
Click Thread Group and choose Add > Config Element > JDBC Connection Configuration to create a JDBC configuration file.

The attributes shown in the preceding figure are common parameters of a connection pool. For more information, see the experience in configuring Java connection pools shared on the Internet.
Pay attention to the following parameters:
-
Max Number of Connections: the maximum number of connections in the connection pool. If the number of stress testing threads is much larger than this value, you need to wait for the connection pool to create or release OceanBase Database connections. If connections in the connection pool are insufficient for stress testing threads, an error may be returned. Therefore, if stress testing threads on the client cannot obtain connections during the test process, the problem may not be directly related to OceanBase Database but related to JDBC configurations, like in Java applications. -
Transaction Isolation: the transaction isolation level for database connections. The default isolation level is Read Committed in OceanBase Database. -
Test While Idle: the keepalive setting, which is necessary. Sometimes the application may prompt that the database executes an SQL statement on a closed connection and therefore returns an error. This is because the database connection in the connection pool is disconnected due to other reasons. A keepalive mechanism is necessary for the database connection pool. Generally, no connections are idle during stress testing. Therefore, you can set this parameter toFalse. -
Database URL: the URL for connecting to the database, for example,jdbc:oceanbase://10.10.10.1:2881/test. -
JDBC Driver Class: the name of the Main class in the database driver. -
Username: the username of the user that runs the test. In OceanBase Database, a username is in the format ofUsername@Tenant nameorCluster name:Tenant name, for example,root@t1.
Transaction controller
Click Thread Group and choose Add > Logic Controller > Transaction Controller to create a transaction controller to combine multiple requests as a transaction. The following describes how to configure a transaction controller.
-
Configure transaction variables
Click Transaction Controller and choose Add > Pre Processors > User Parameters to add variables as needed. This test involves three variables:
credit_id(account A),debit_id(account B), andtrans_amount(transferred amount). The account parameters and amounts are set to random numbers within the actual ranges of test data.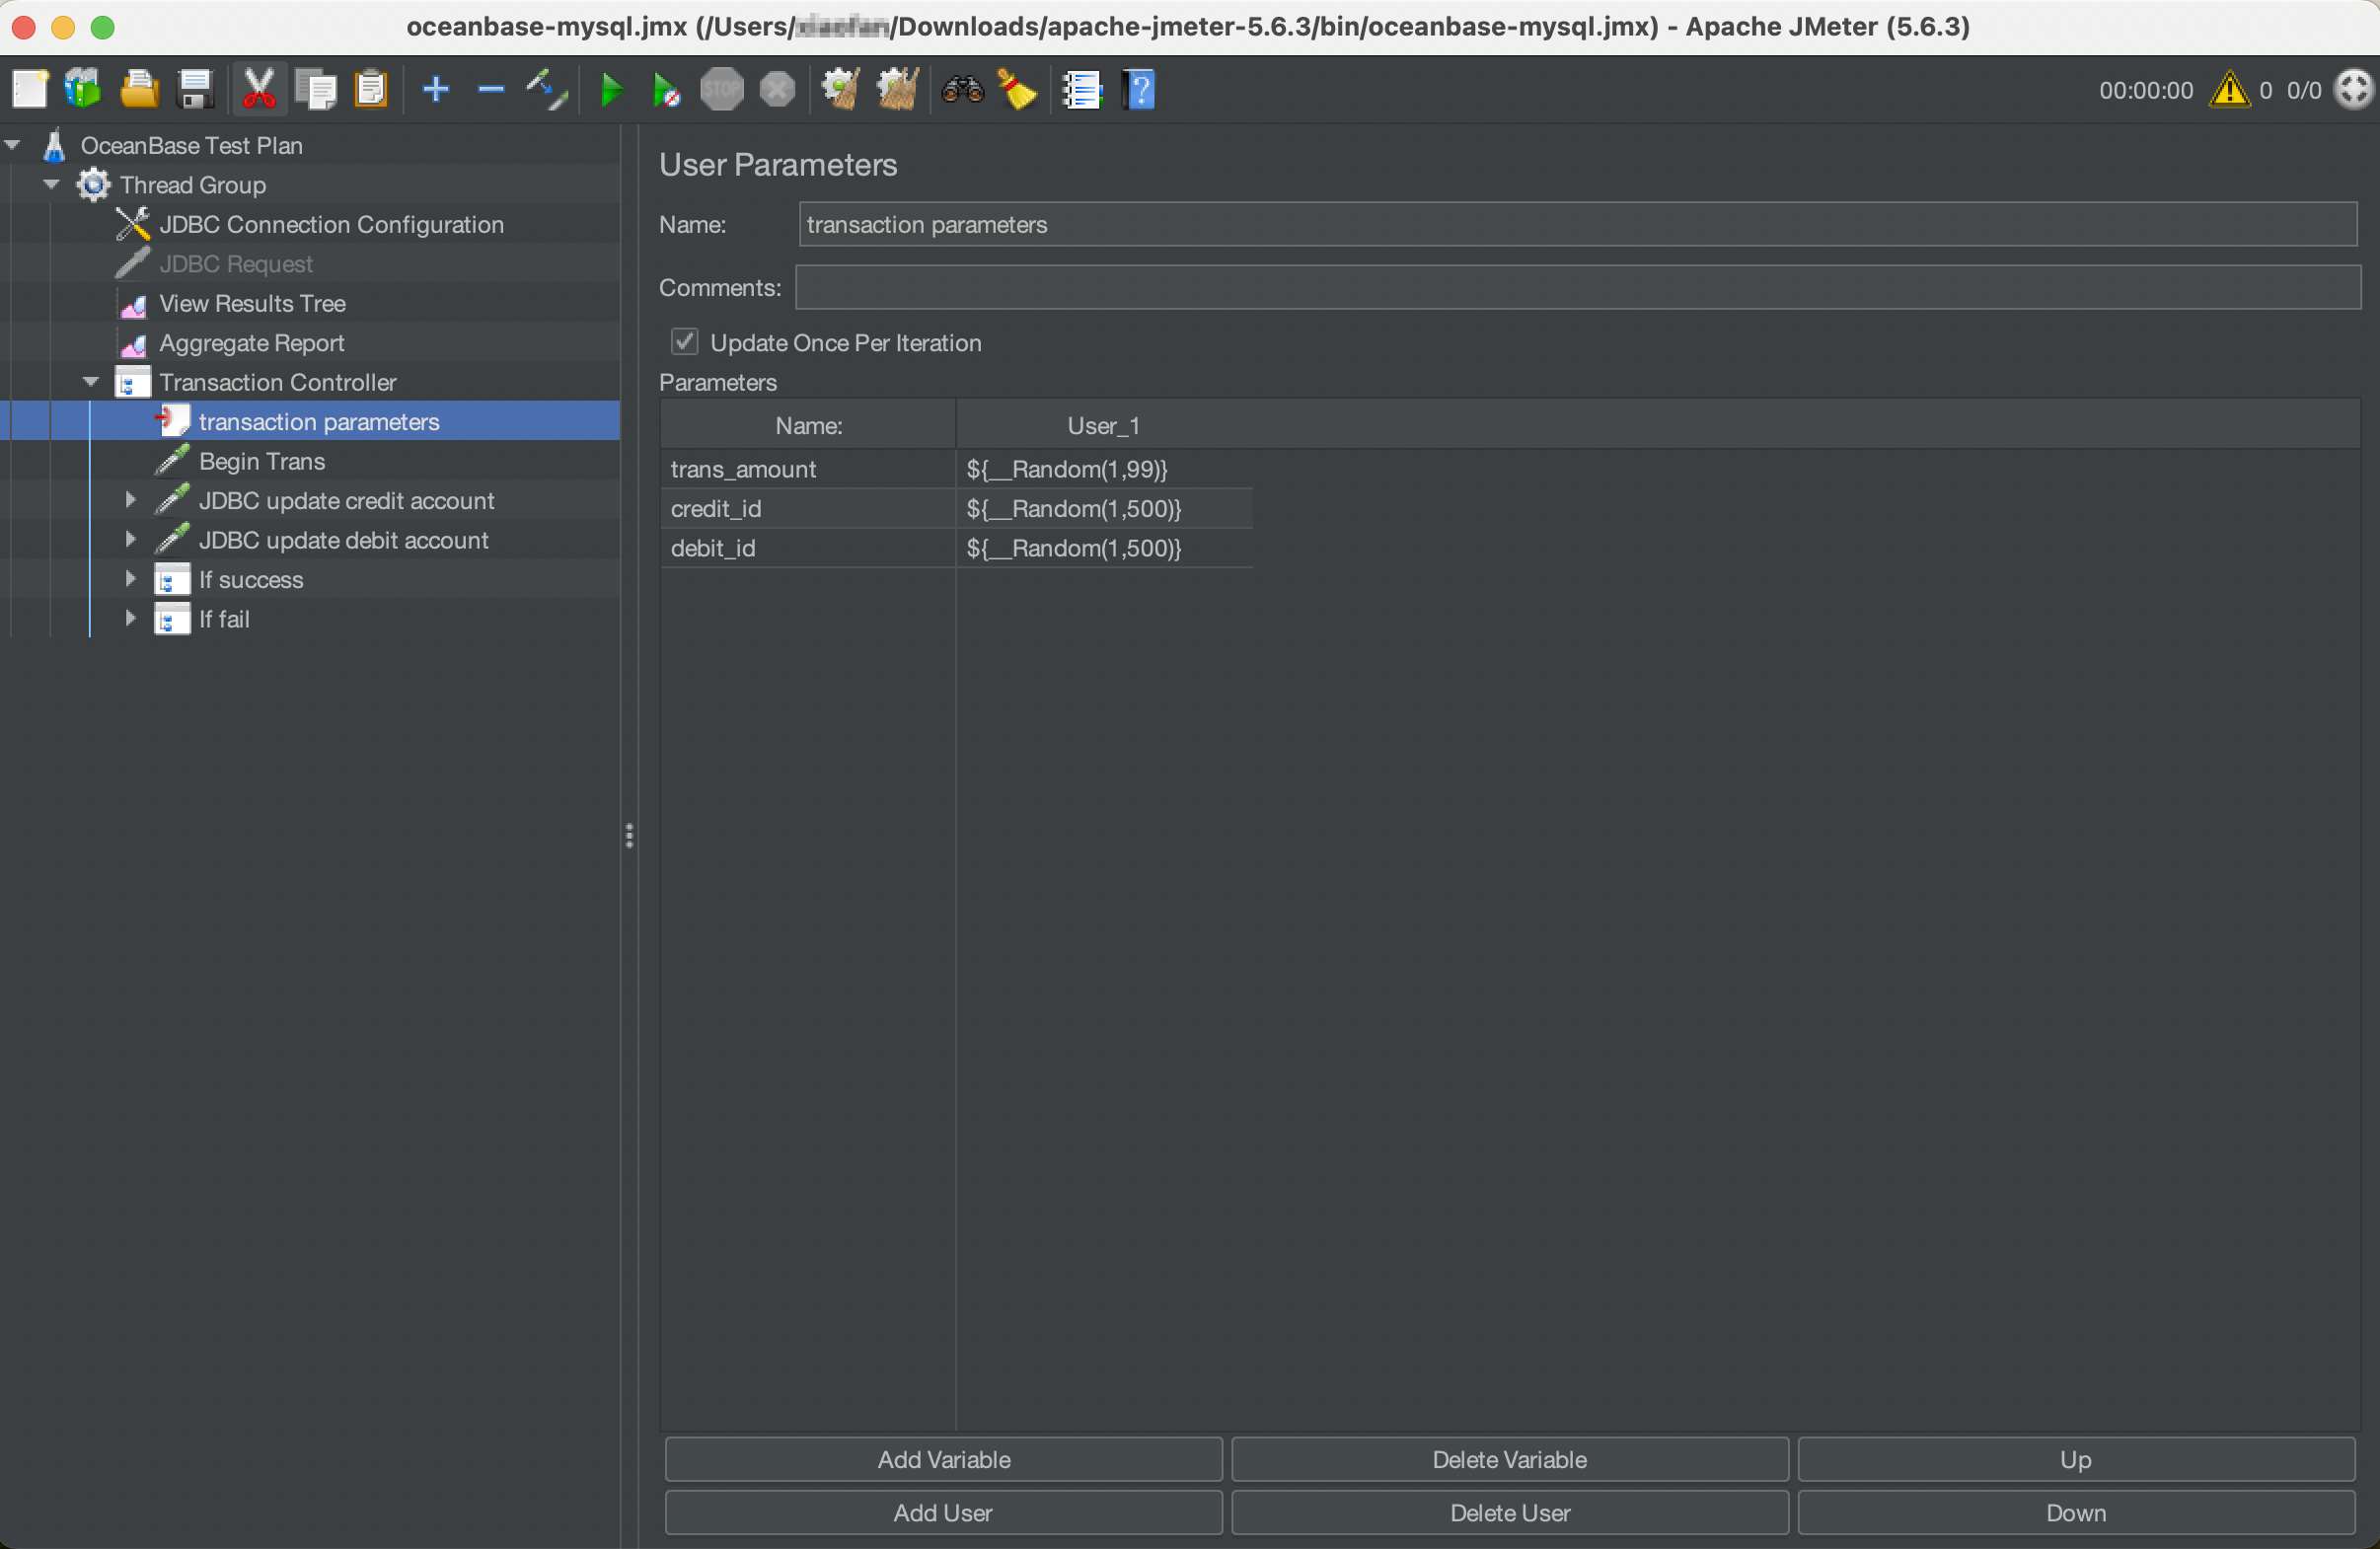
-
Start a transaction
Click Transaction Controller and choose Add > Sampler > JDBC Request to create a JDBC request. Set Query Type to
AutoCommit(false)to enable explicit transactions.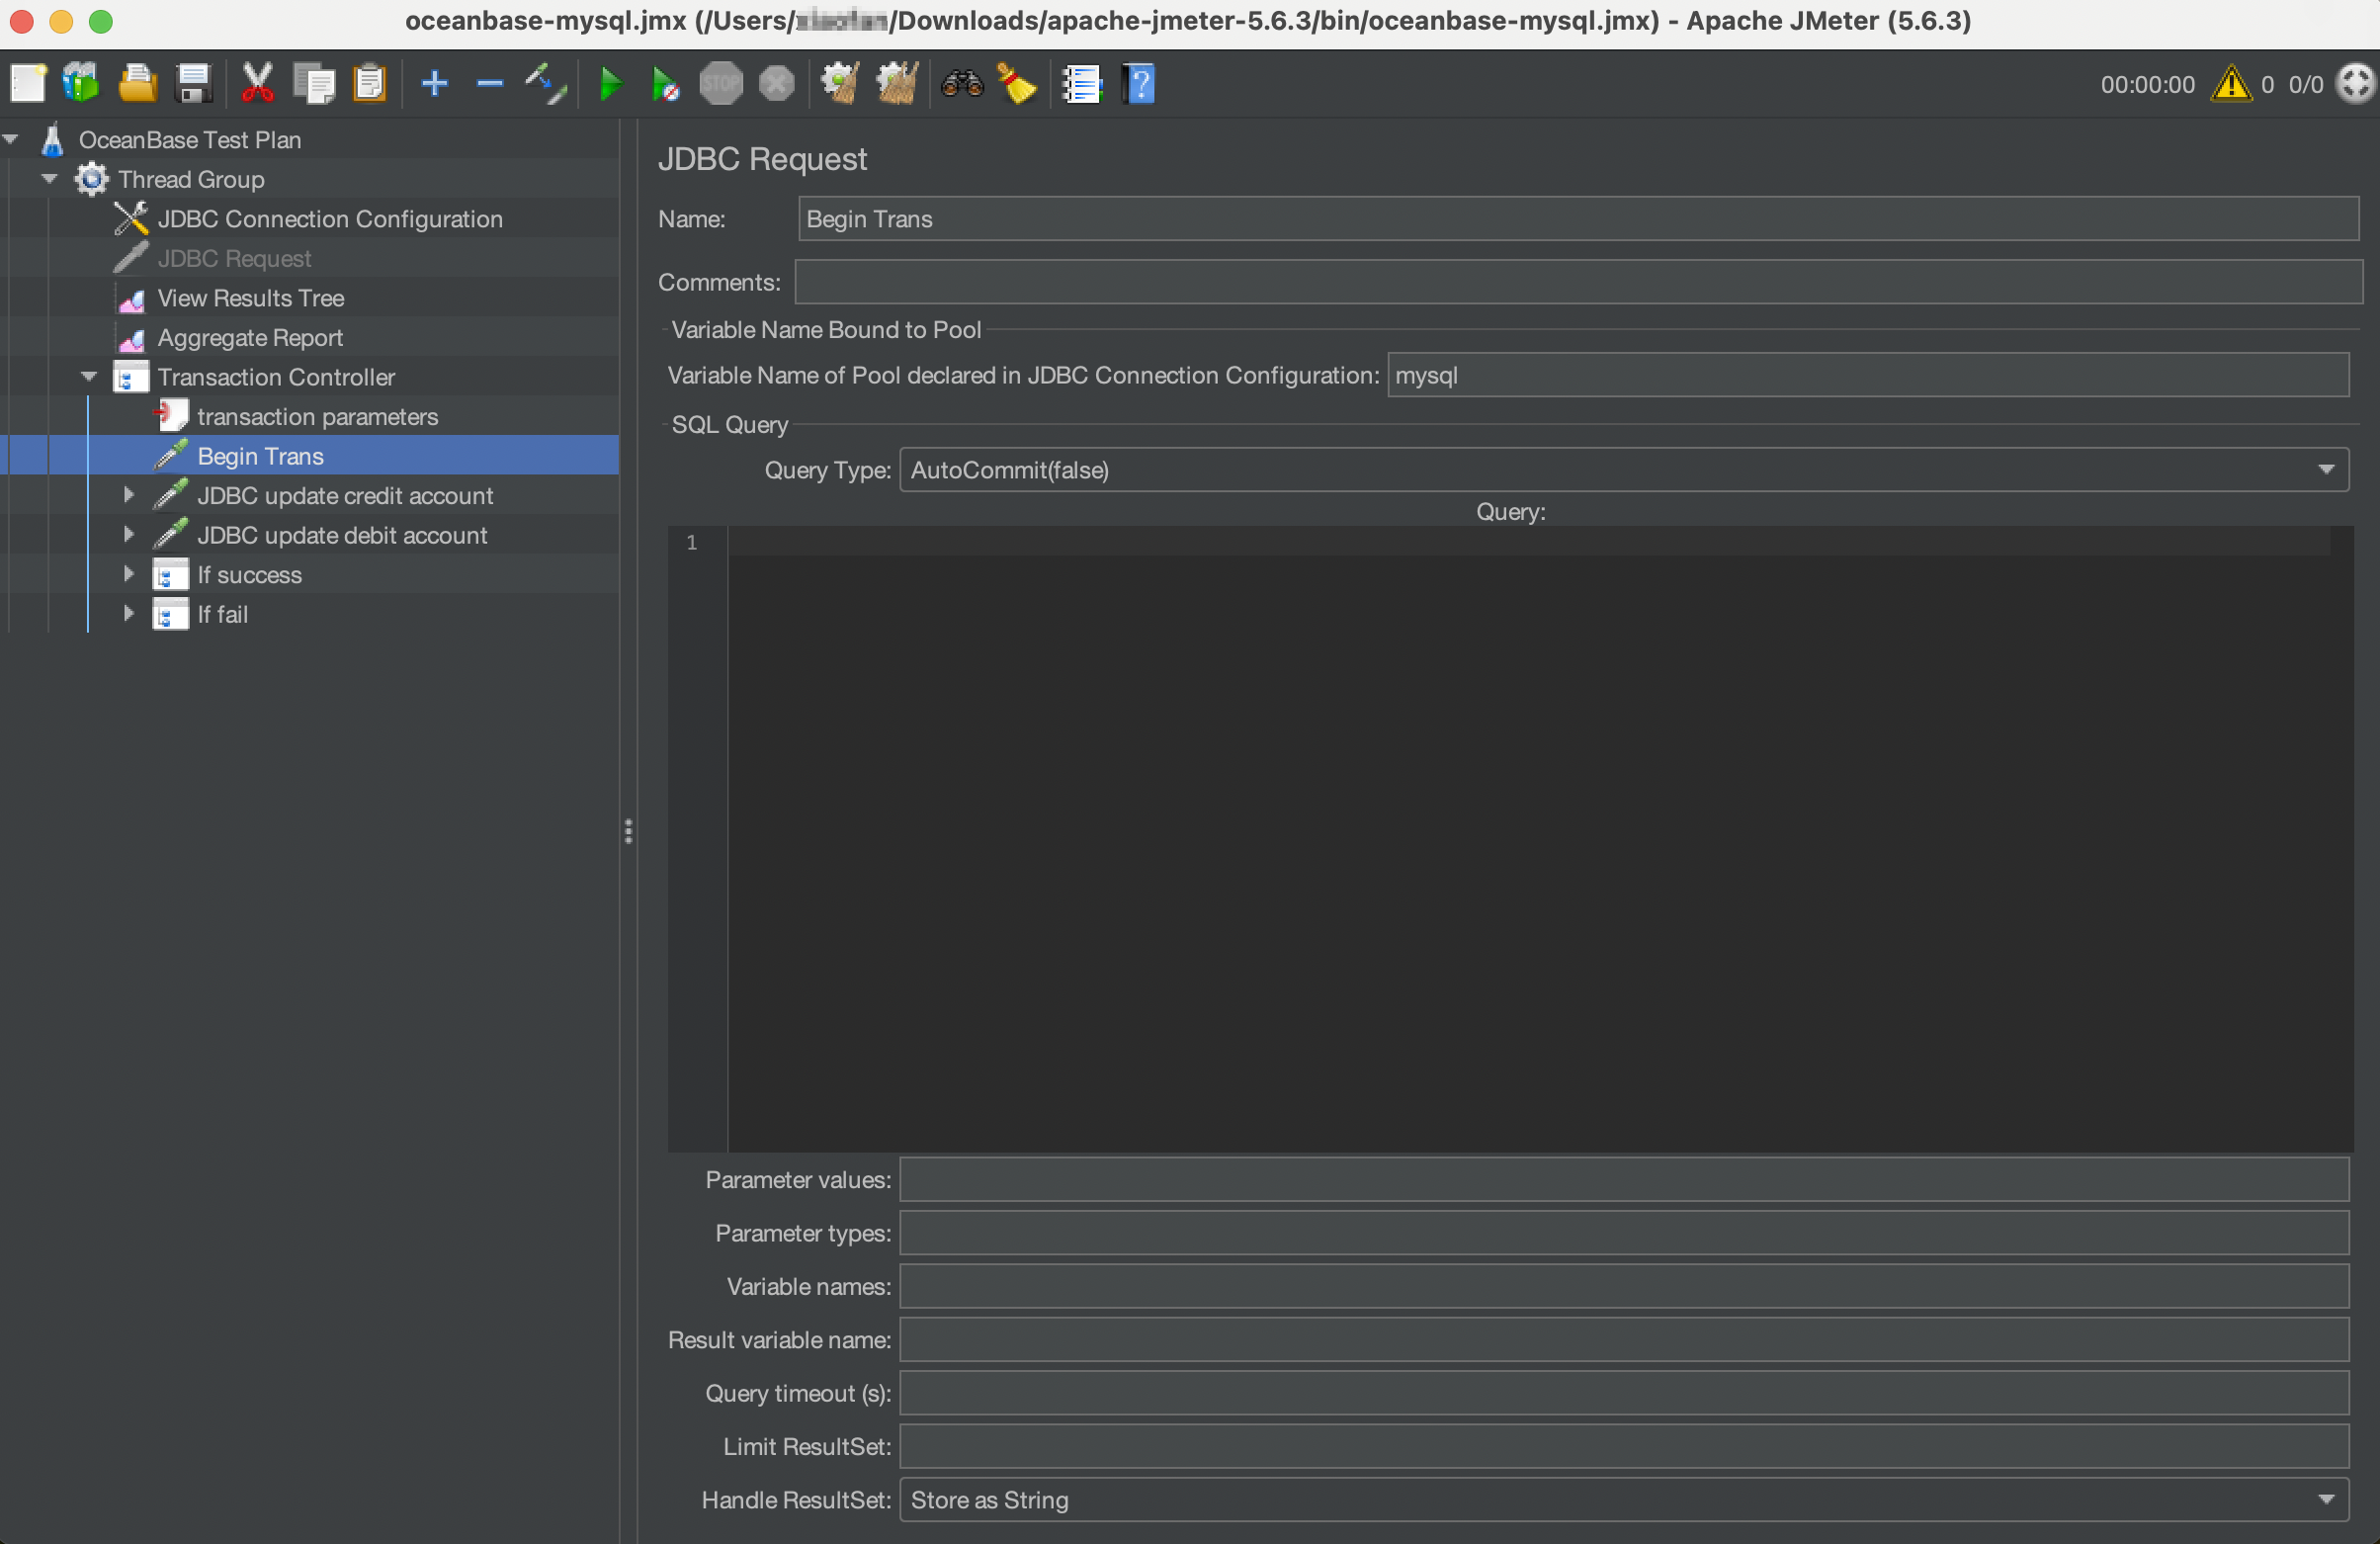
-
Create a JDBC request to deduct the transferred amount from the balance of account A
Click Transaction Controller and choose Add > Sampler > JDBC Request, to create a JDBC request named
JDBC update credit account. Then, add an SQL request to deduct the transferred amount from the balance of account A.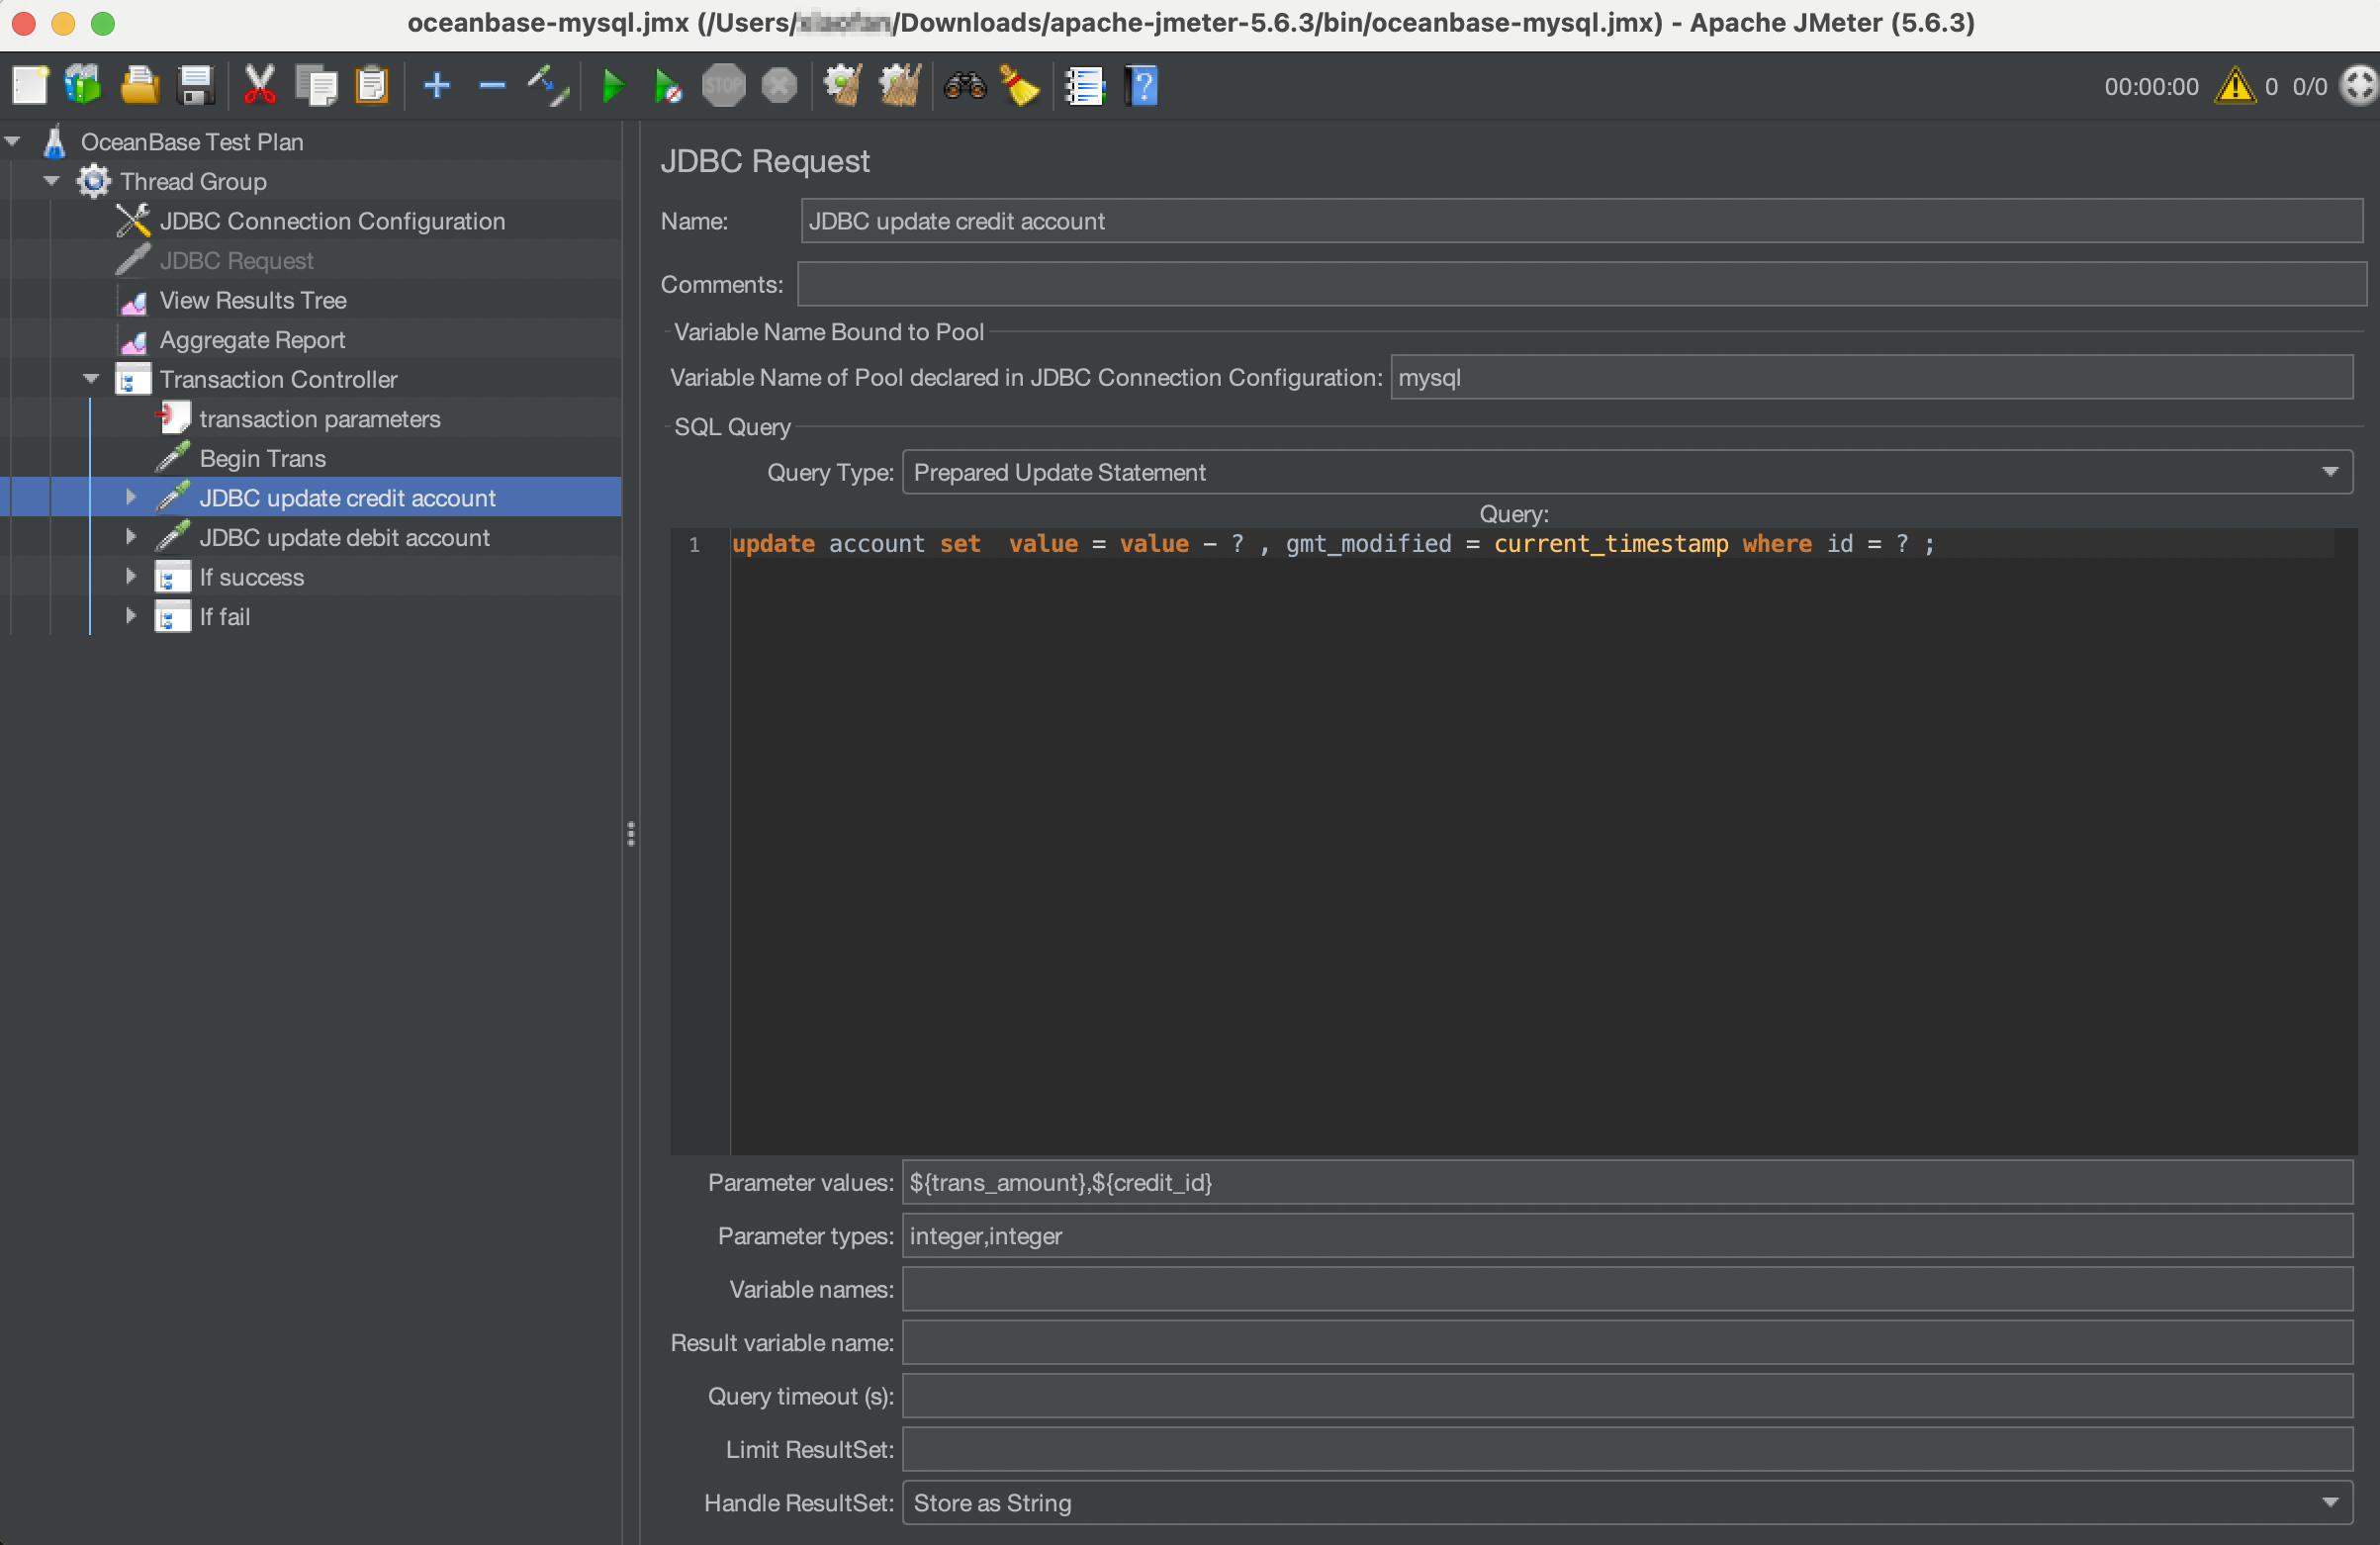
-
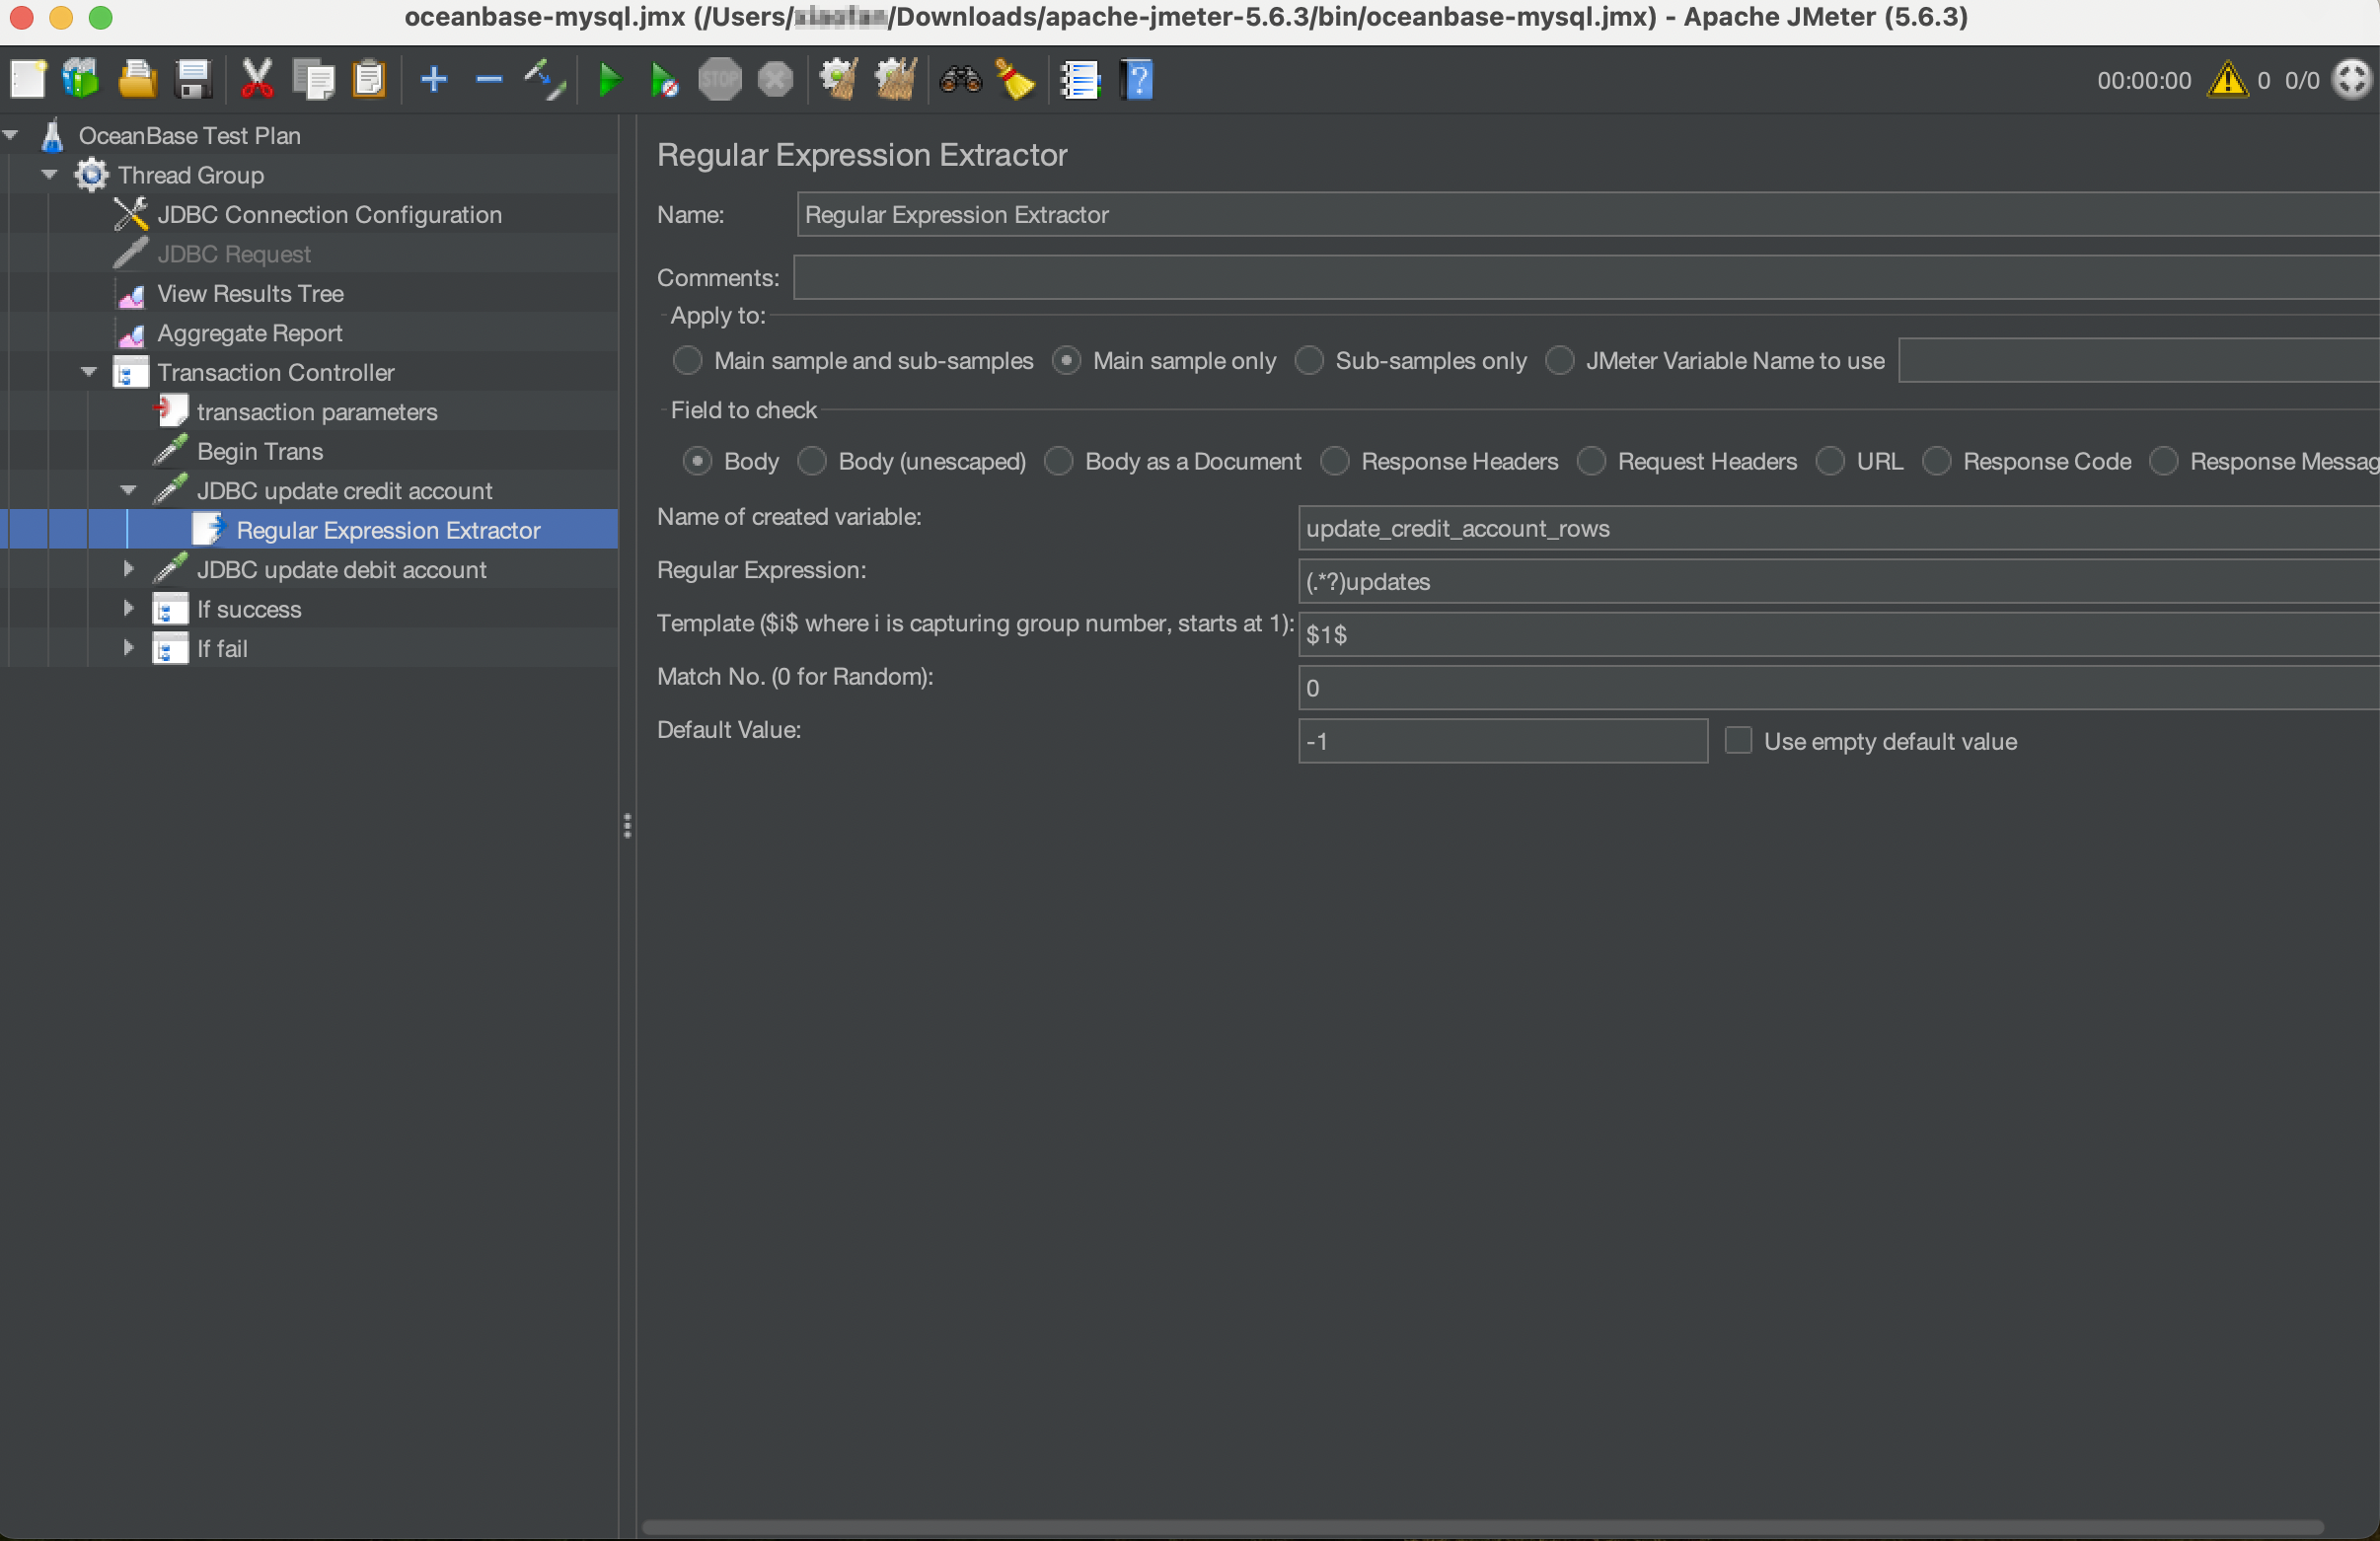
Add Post logic to obtain the return value of the JDBC request that deducts the transferred amount from the balance of account A
Click JDBC update credit account and choose Add > Post Processors > Regular Expression Extractor to add Post logic to obtain the return value of the JDBC request that deducts the transferred amount from the balance of account A.
-
Create a JDBC request to increase the balance of account B
Click Transaction Controller and choose Add > Sampler > JDBC Request to create a JDBC request named
JDBC update debit account. Then, add an SQL request to increase the balance of account B.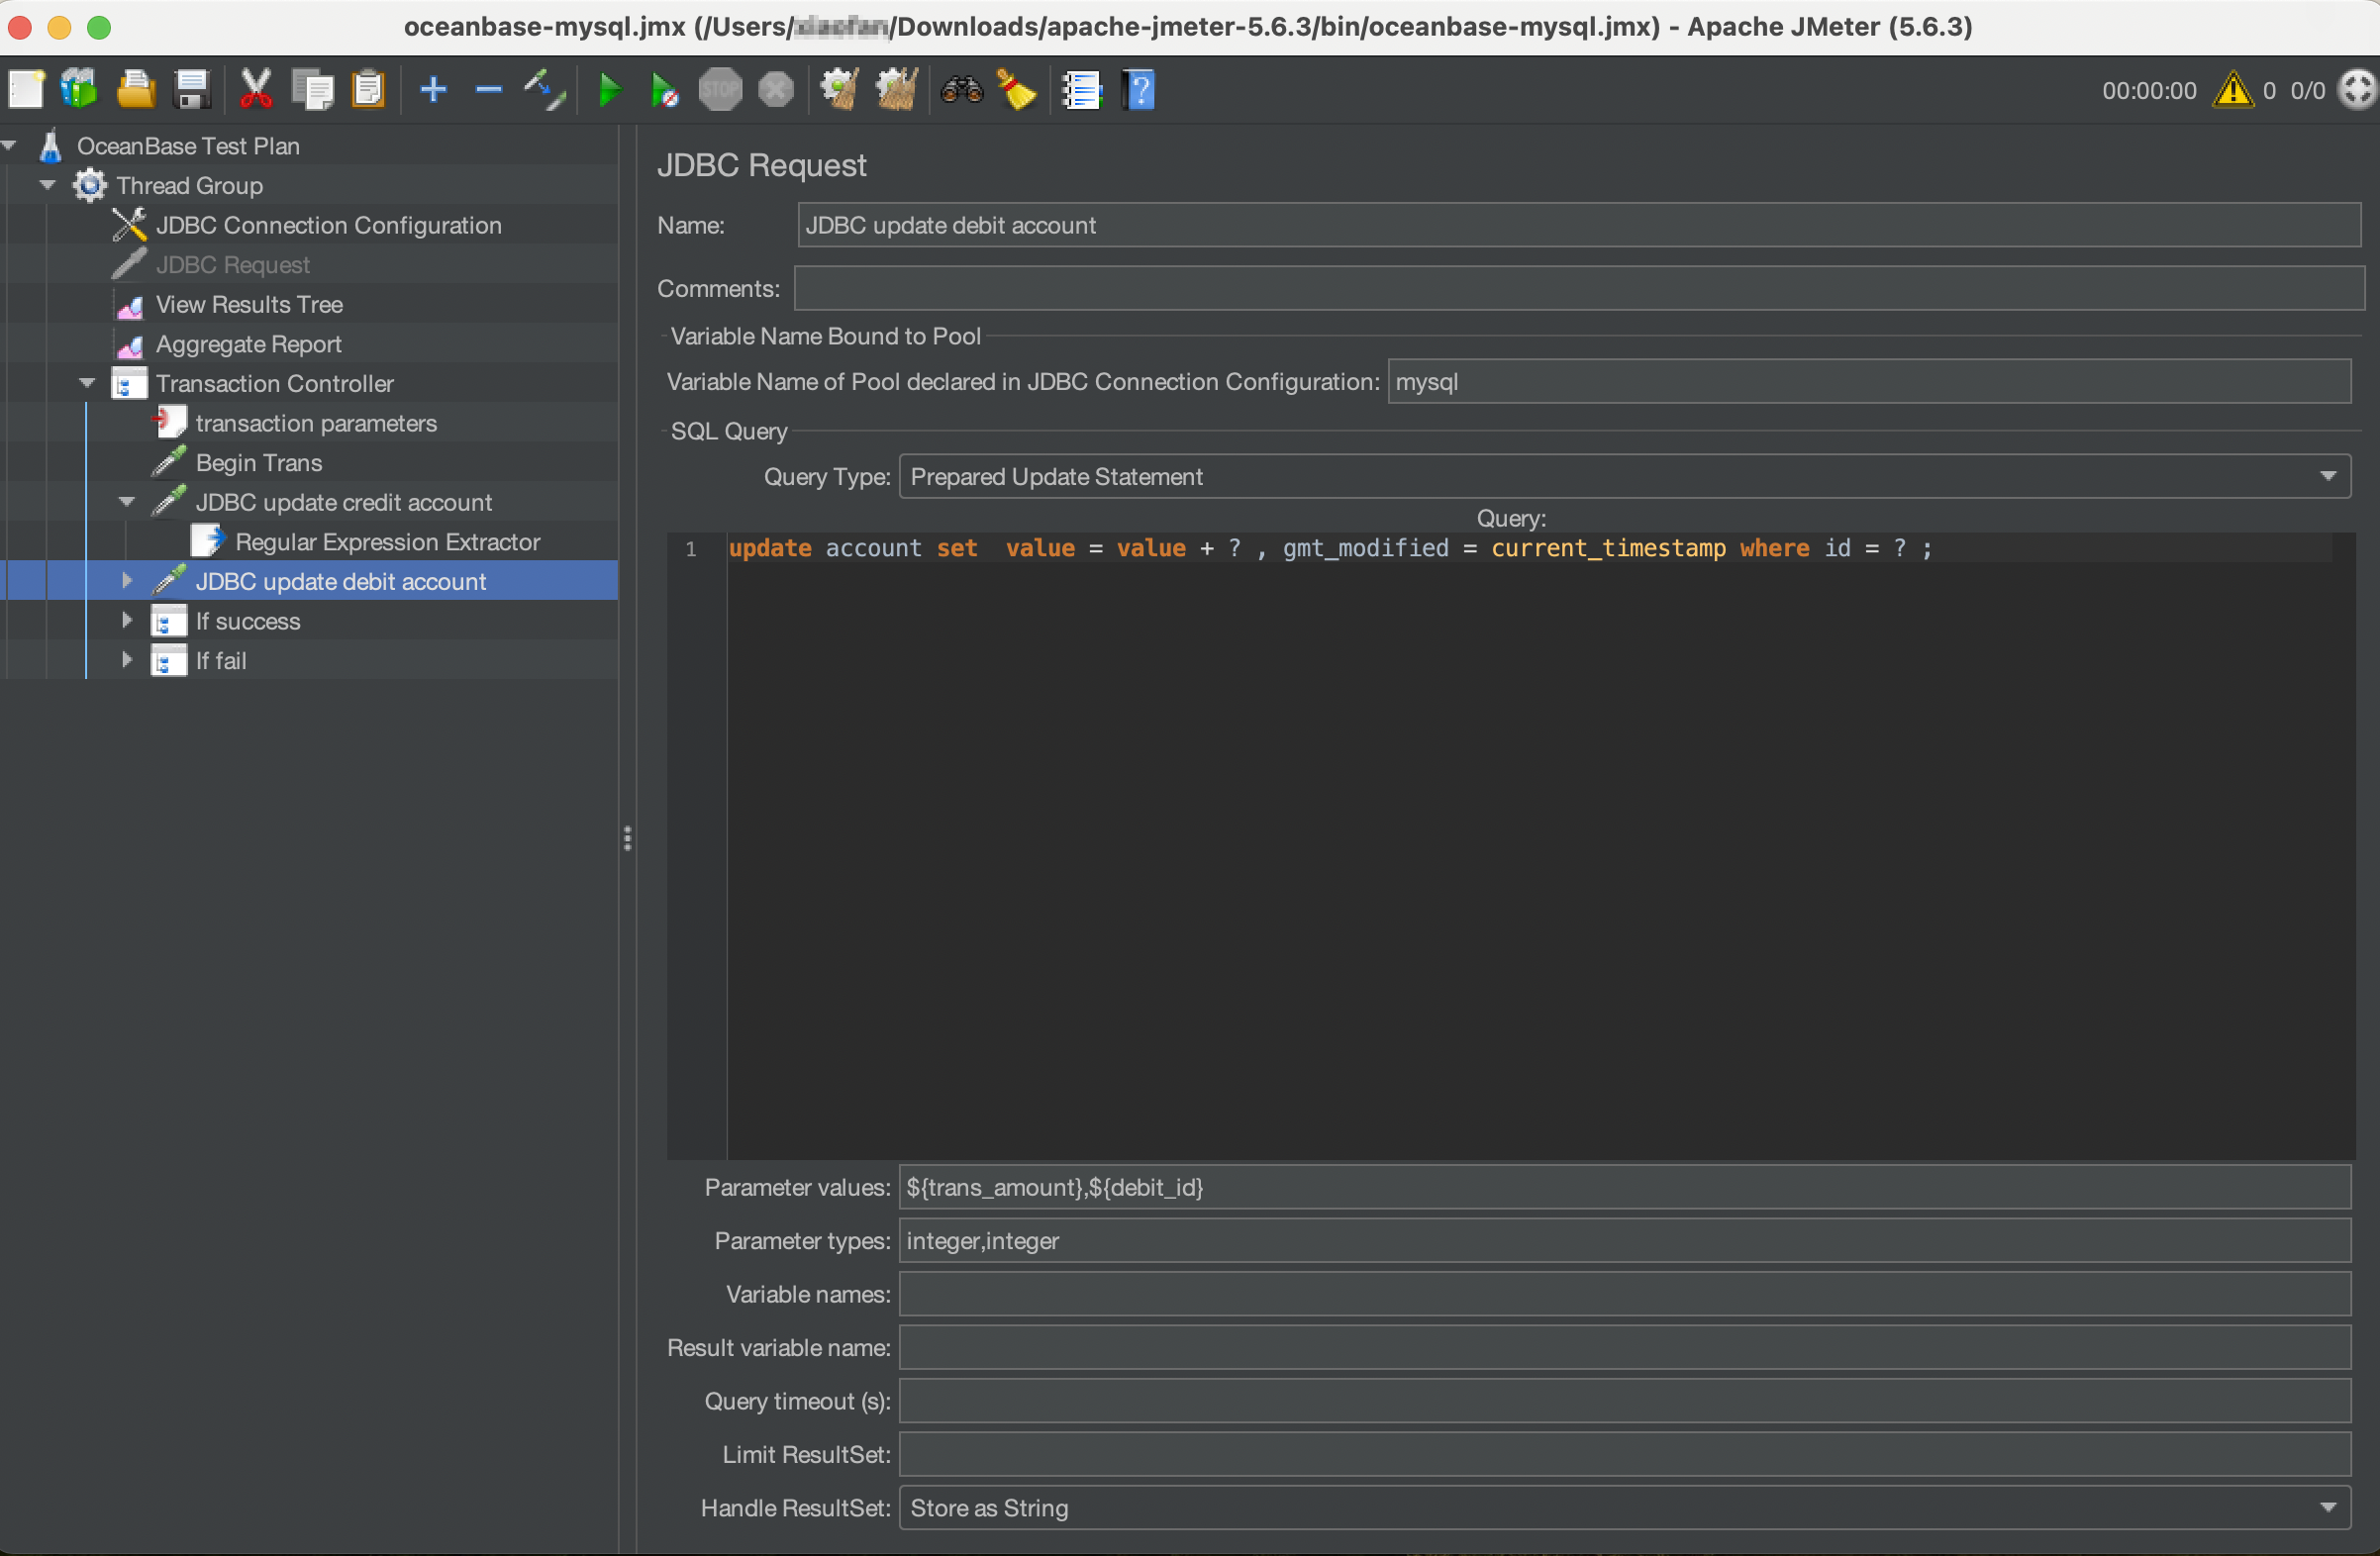
-
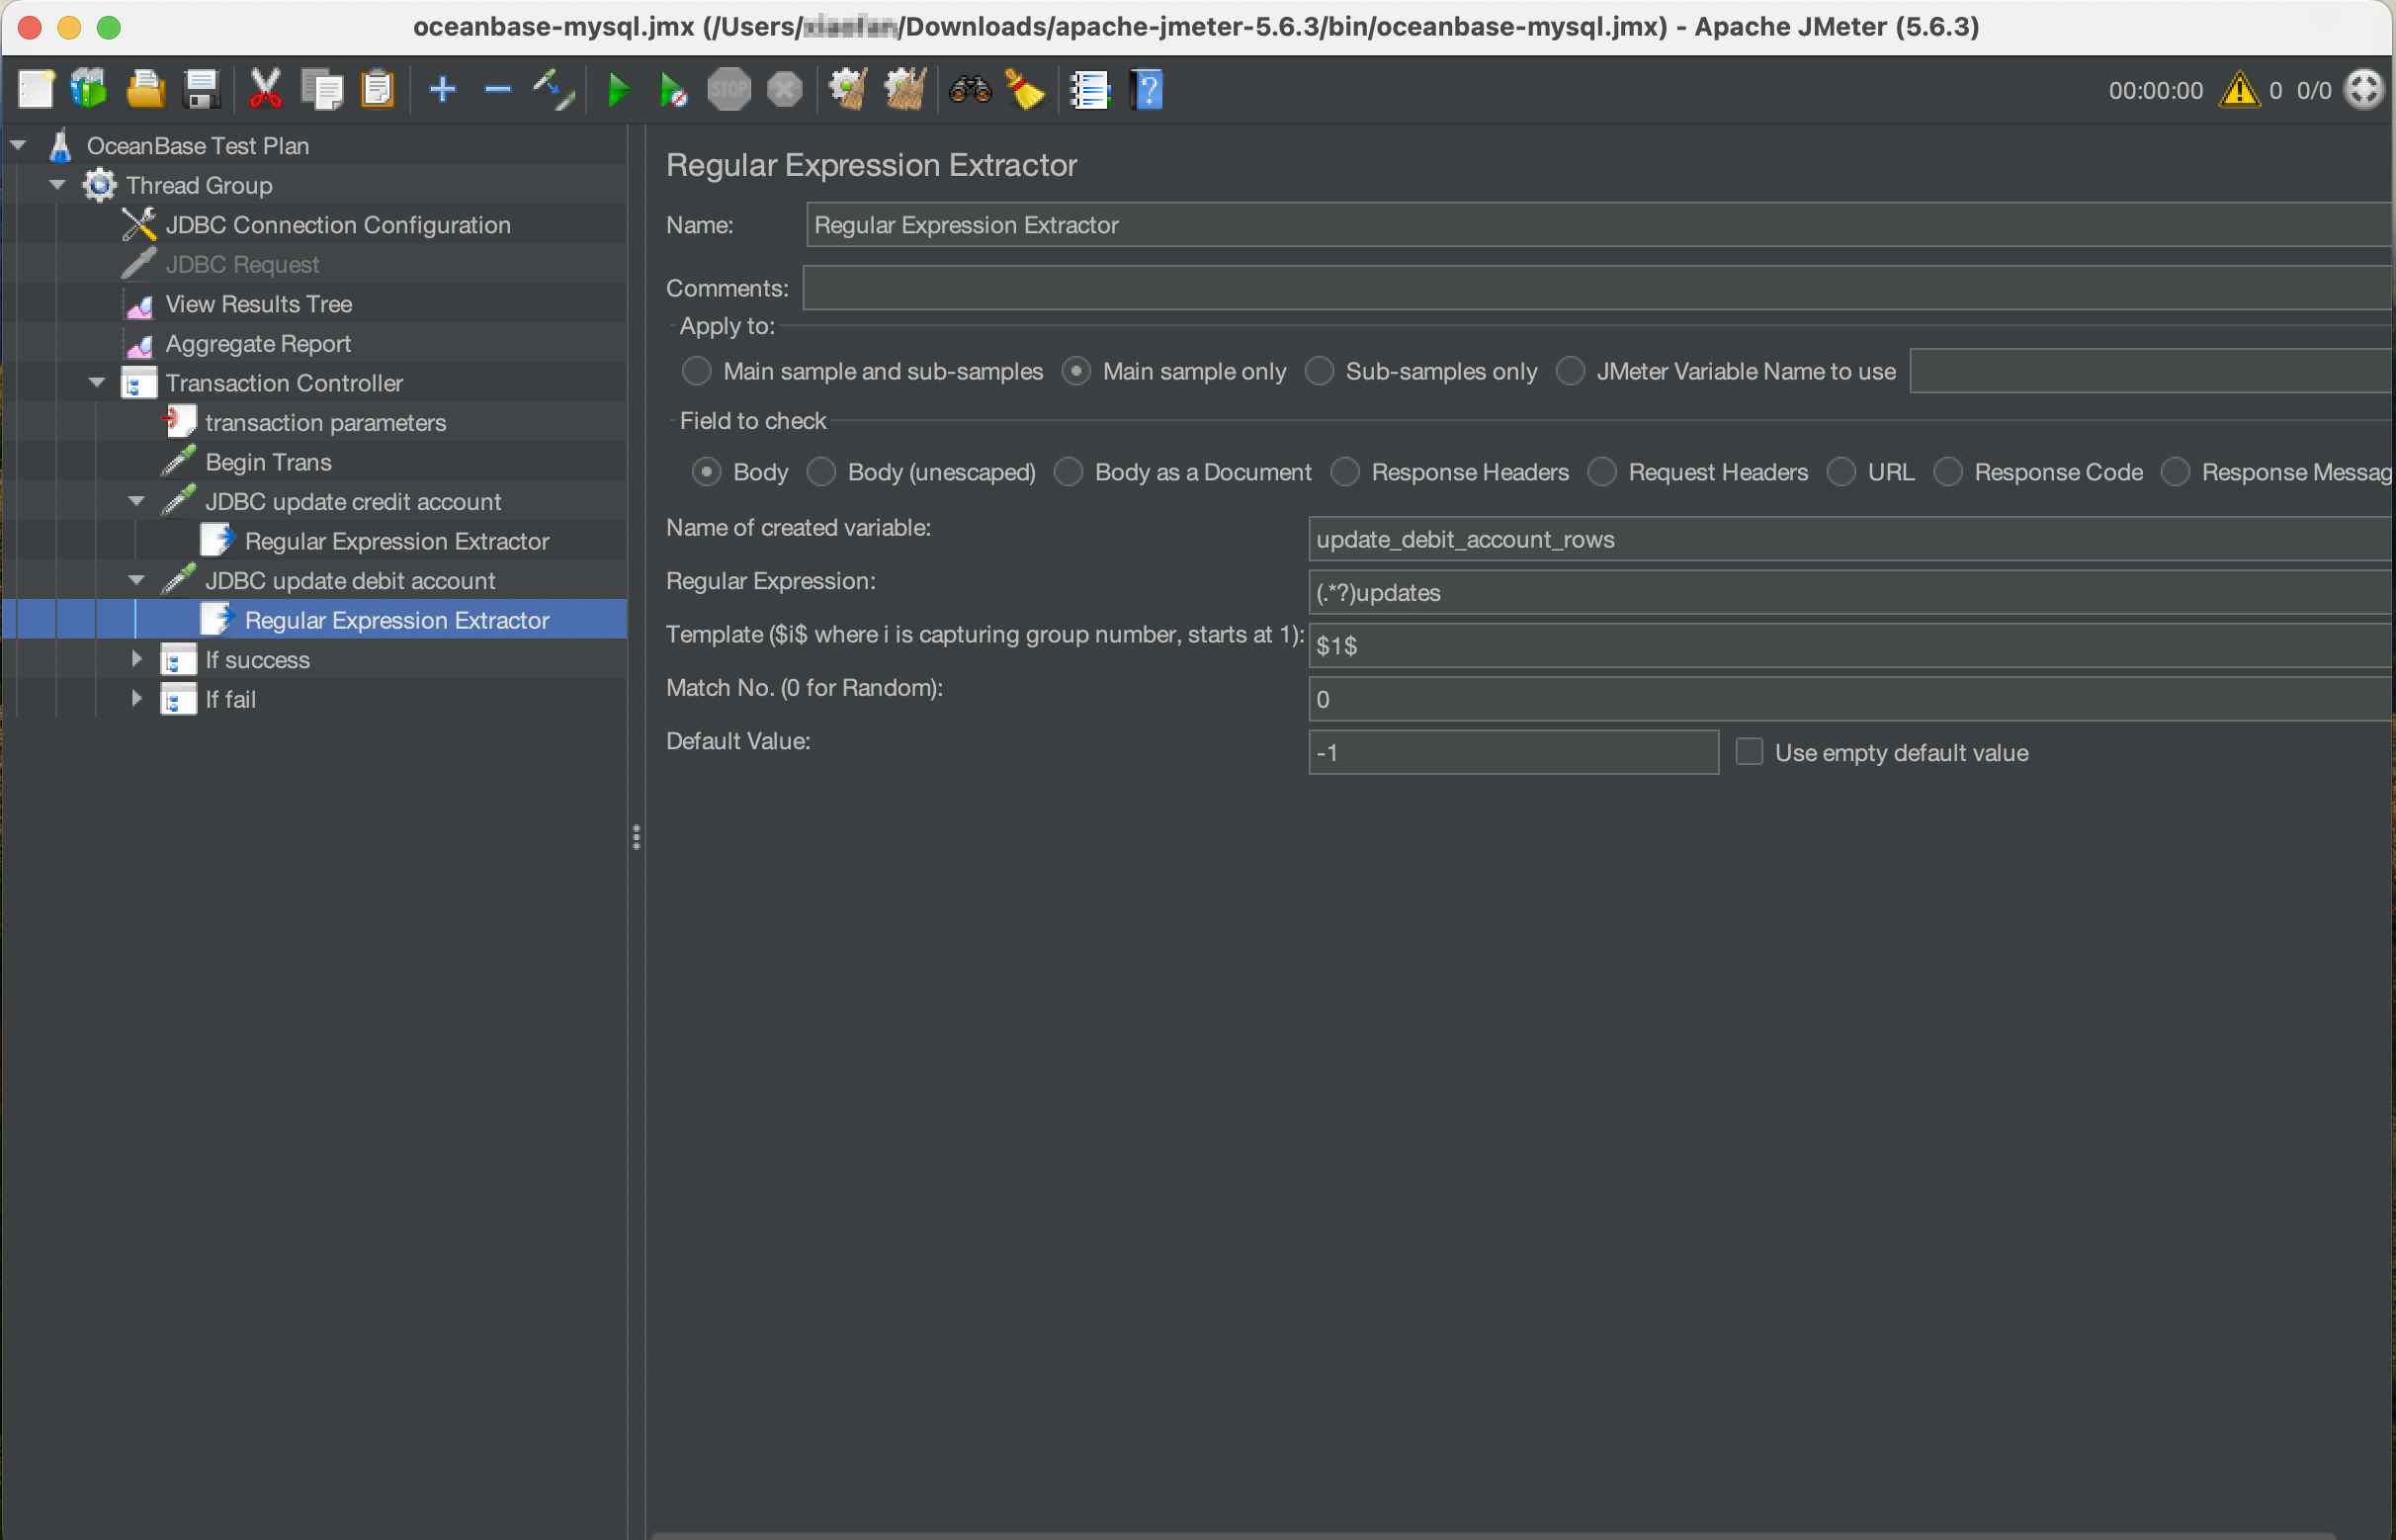
Add Post logic to obtain the return value of the JDBC request that increases the balance of account B
Click JDBC update debit account and choose Add > Post Processors > Regular Expression Extractor to add Post logic to obtain the return result of the JDBC request that increases the balance of account B.
Judgment logic - process succeeded
If the updates for both accounts are successful, the transaction is committed.
-
Add an IF controller
Click Transaction Controller and choose Add > Logic Controller > If Controller to add an IF controller named
If success. Then, add judgment conditions.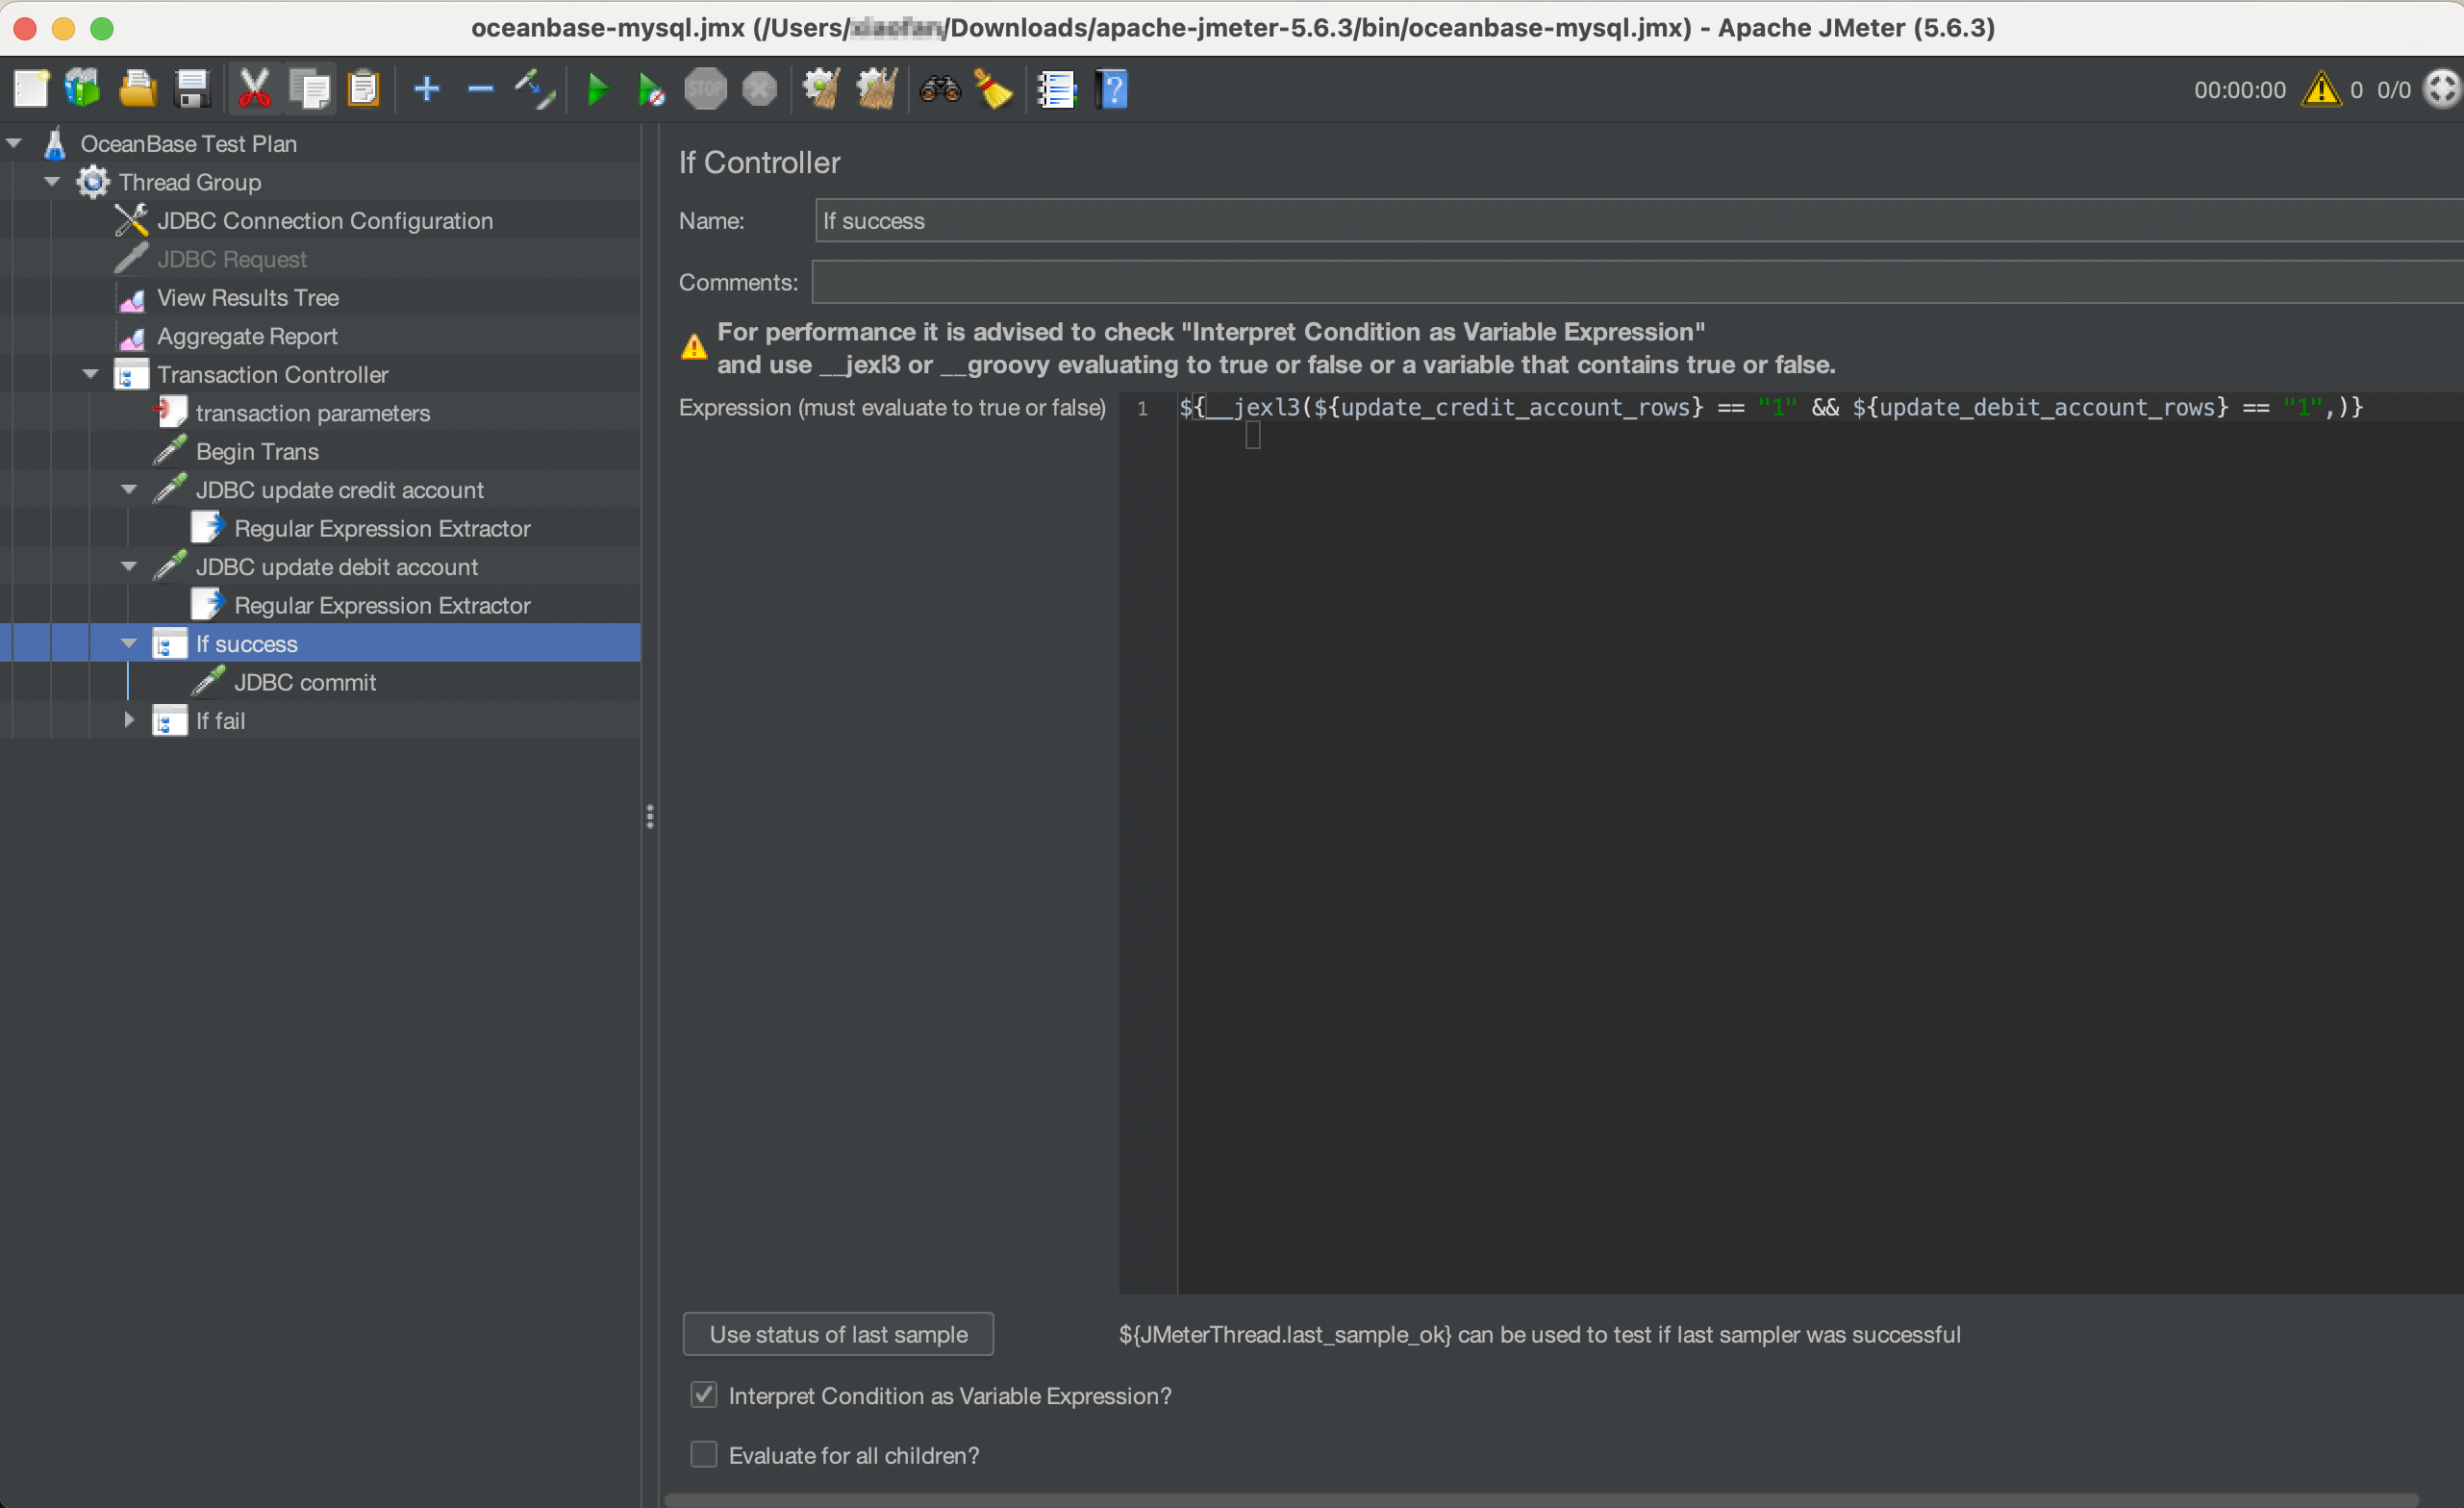
-
Add a commit action upon update success
Click If success and choose Add > Sampler > JDBC Request to create a JDBC request. Set Query Type to
Commit.
Judgment logic - process failed
If the update for either account fails, the transaction is rolled back.
-
Add an IF controller
Click Transaction Controller and choose Add > Logic Controller > If Controller to create an IF controller named
If fail. Then, add judgment conditions.
-
Add a commit action upon update failure
Click If fail and choose Add > Sampler > JDBC Request to create a JDBC request. Set Query Type to
Rollback.
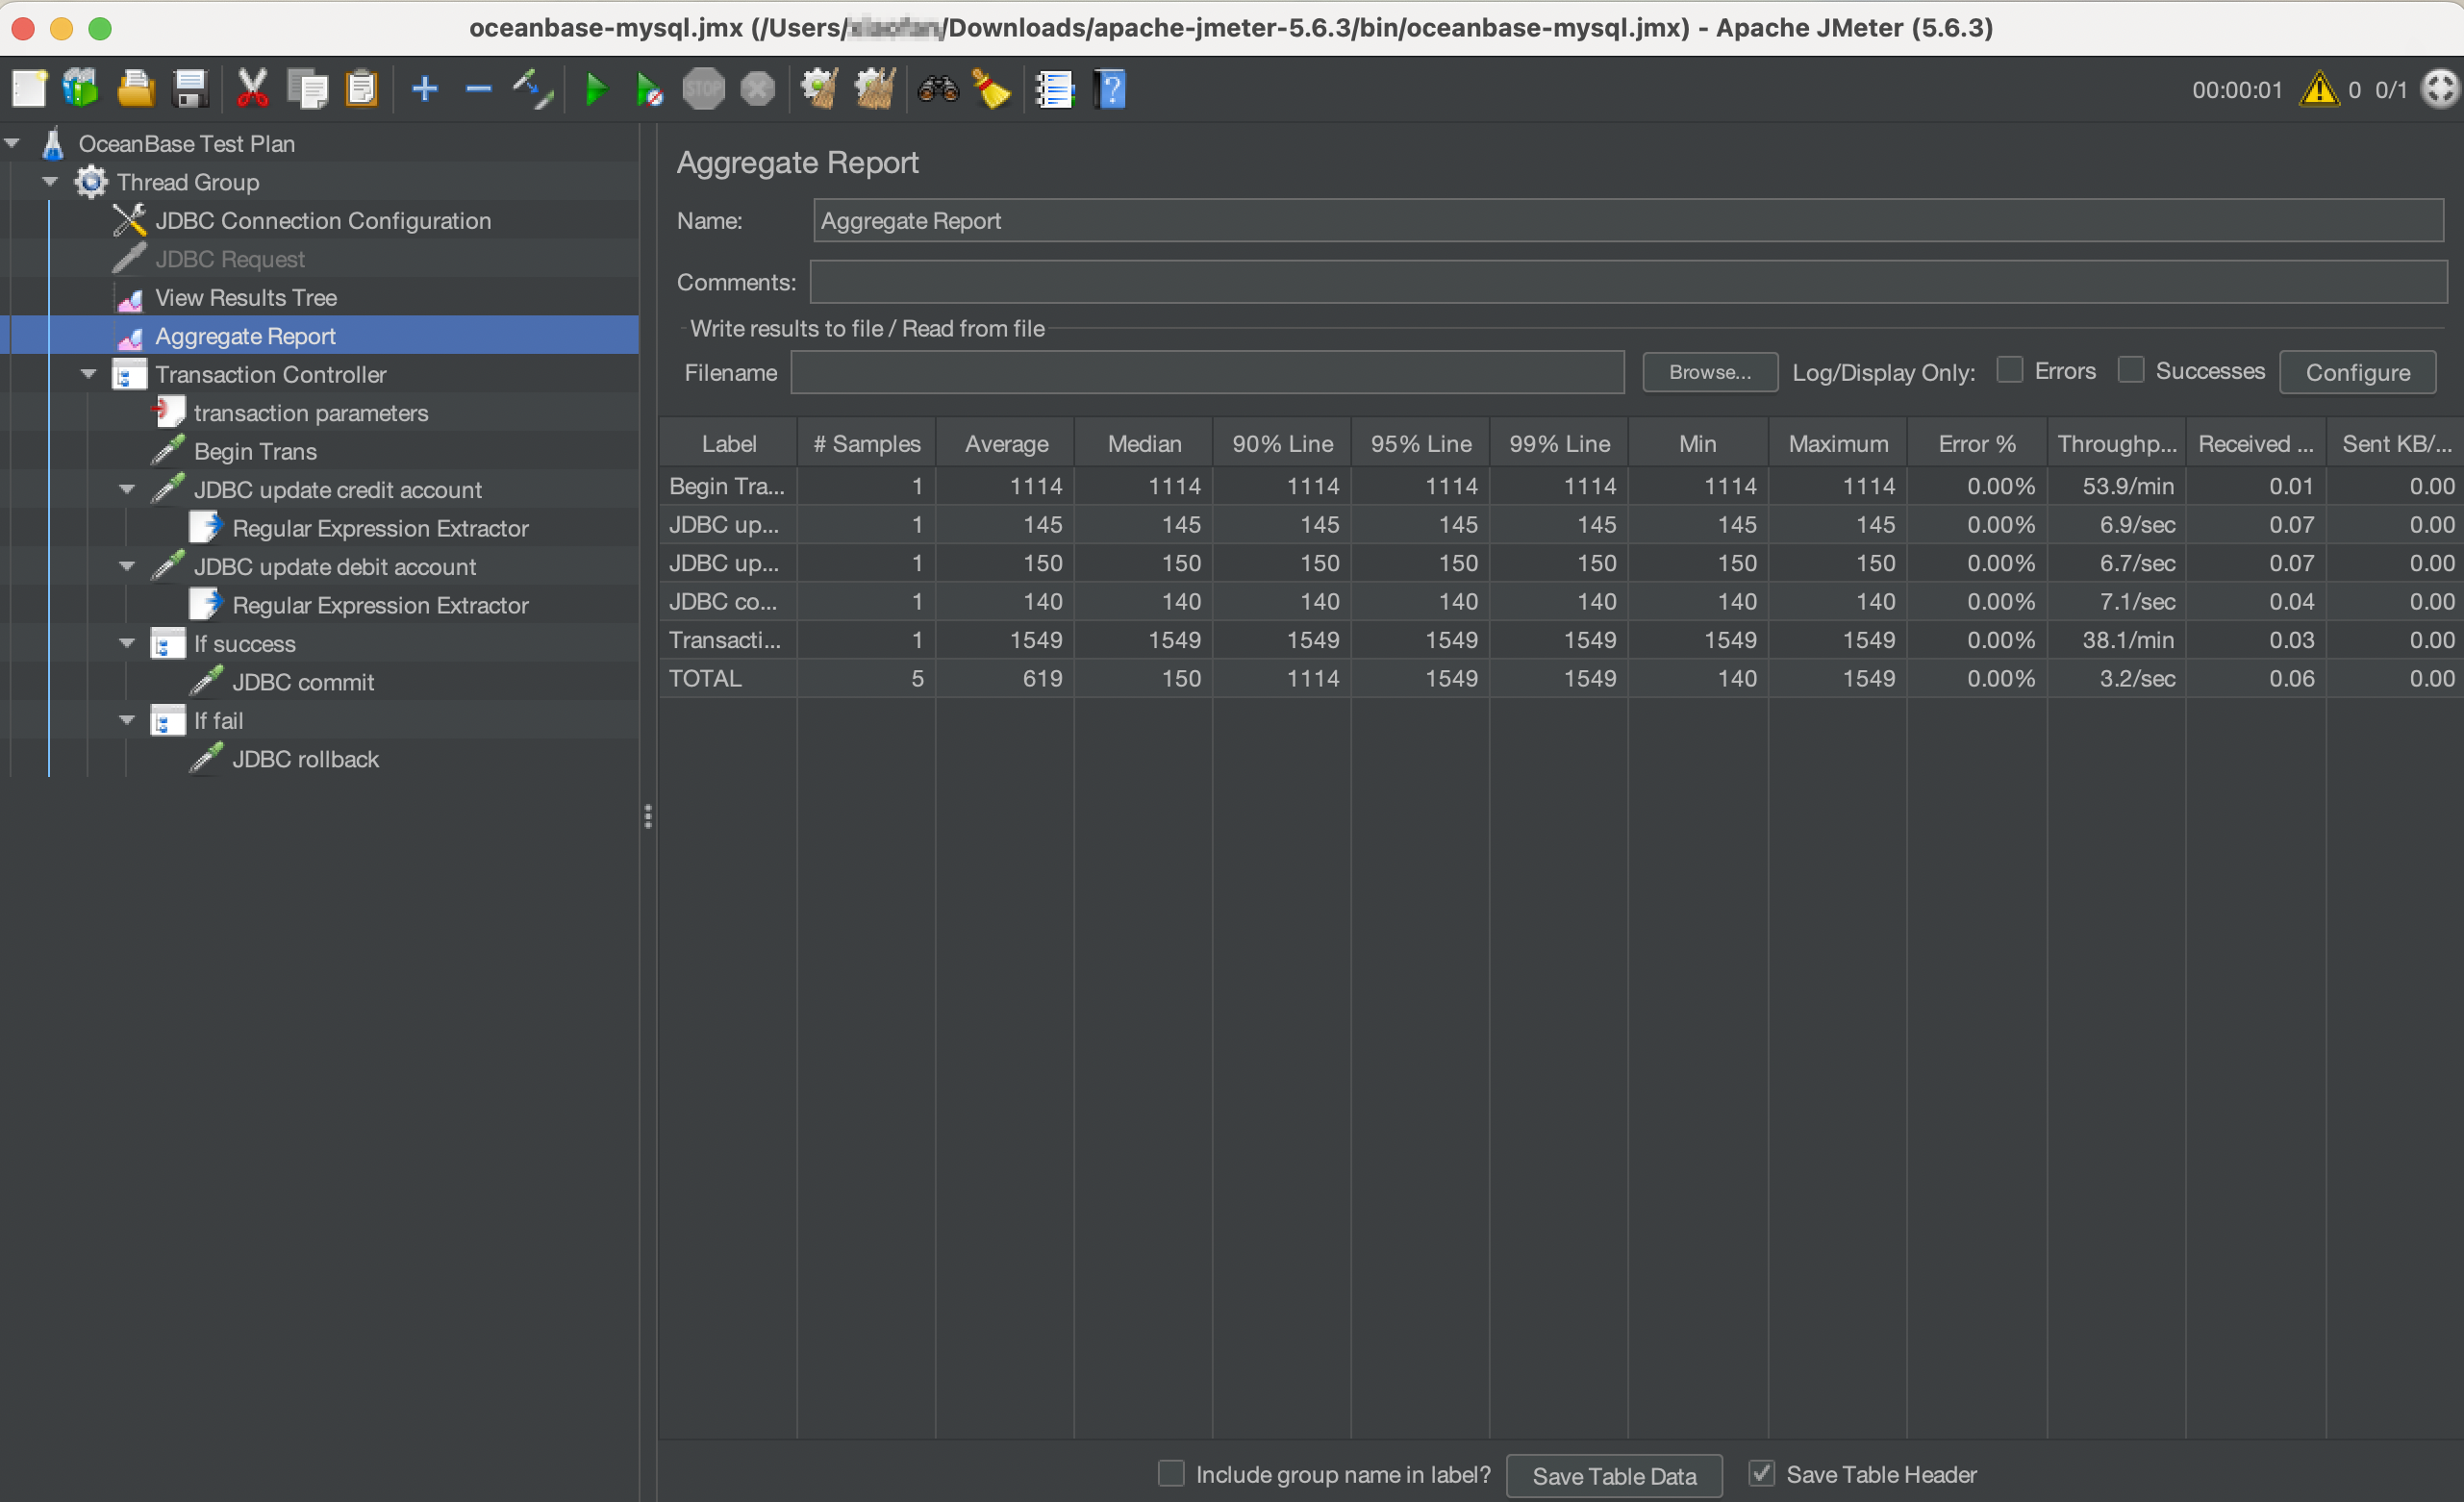
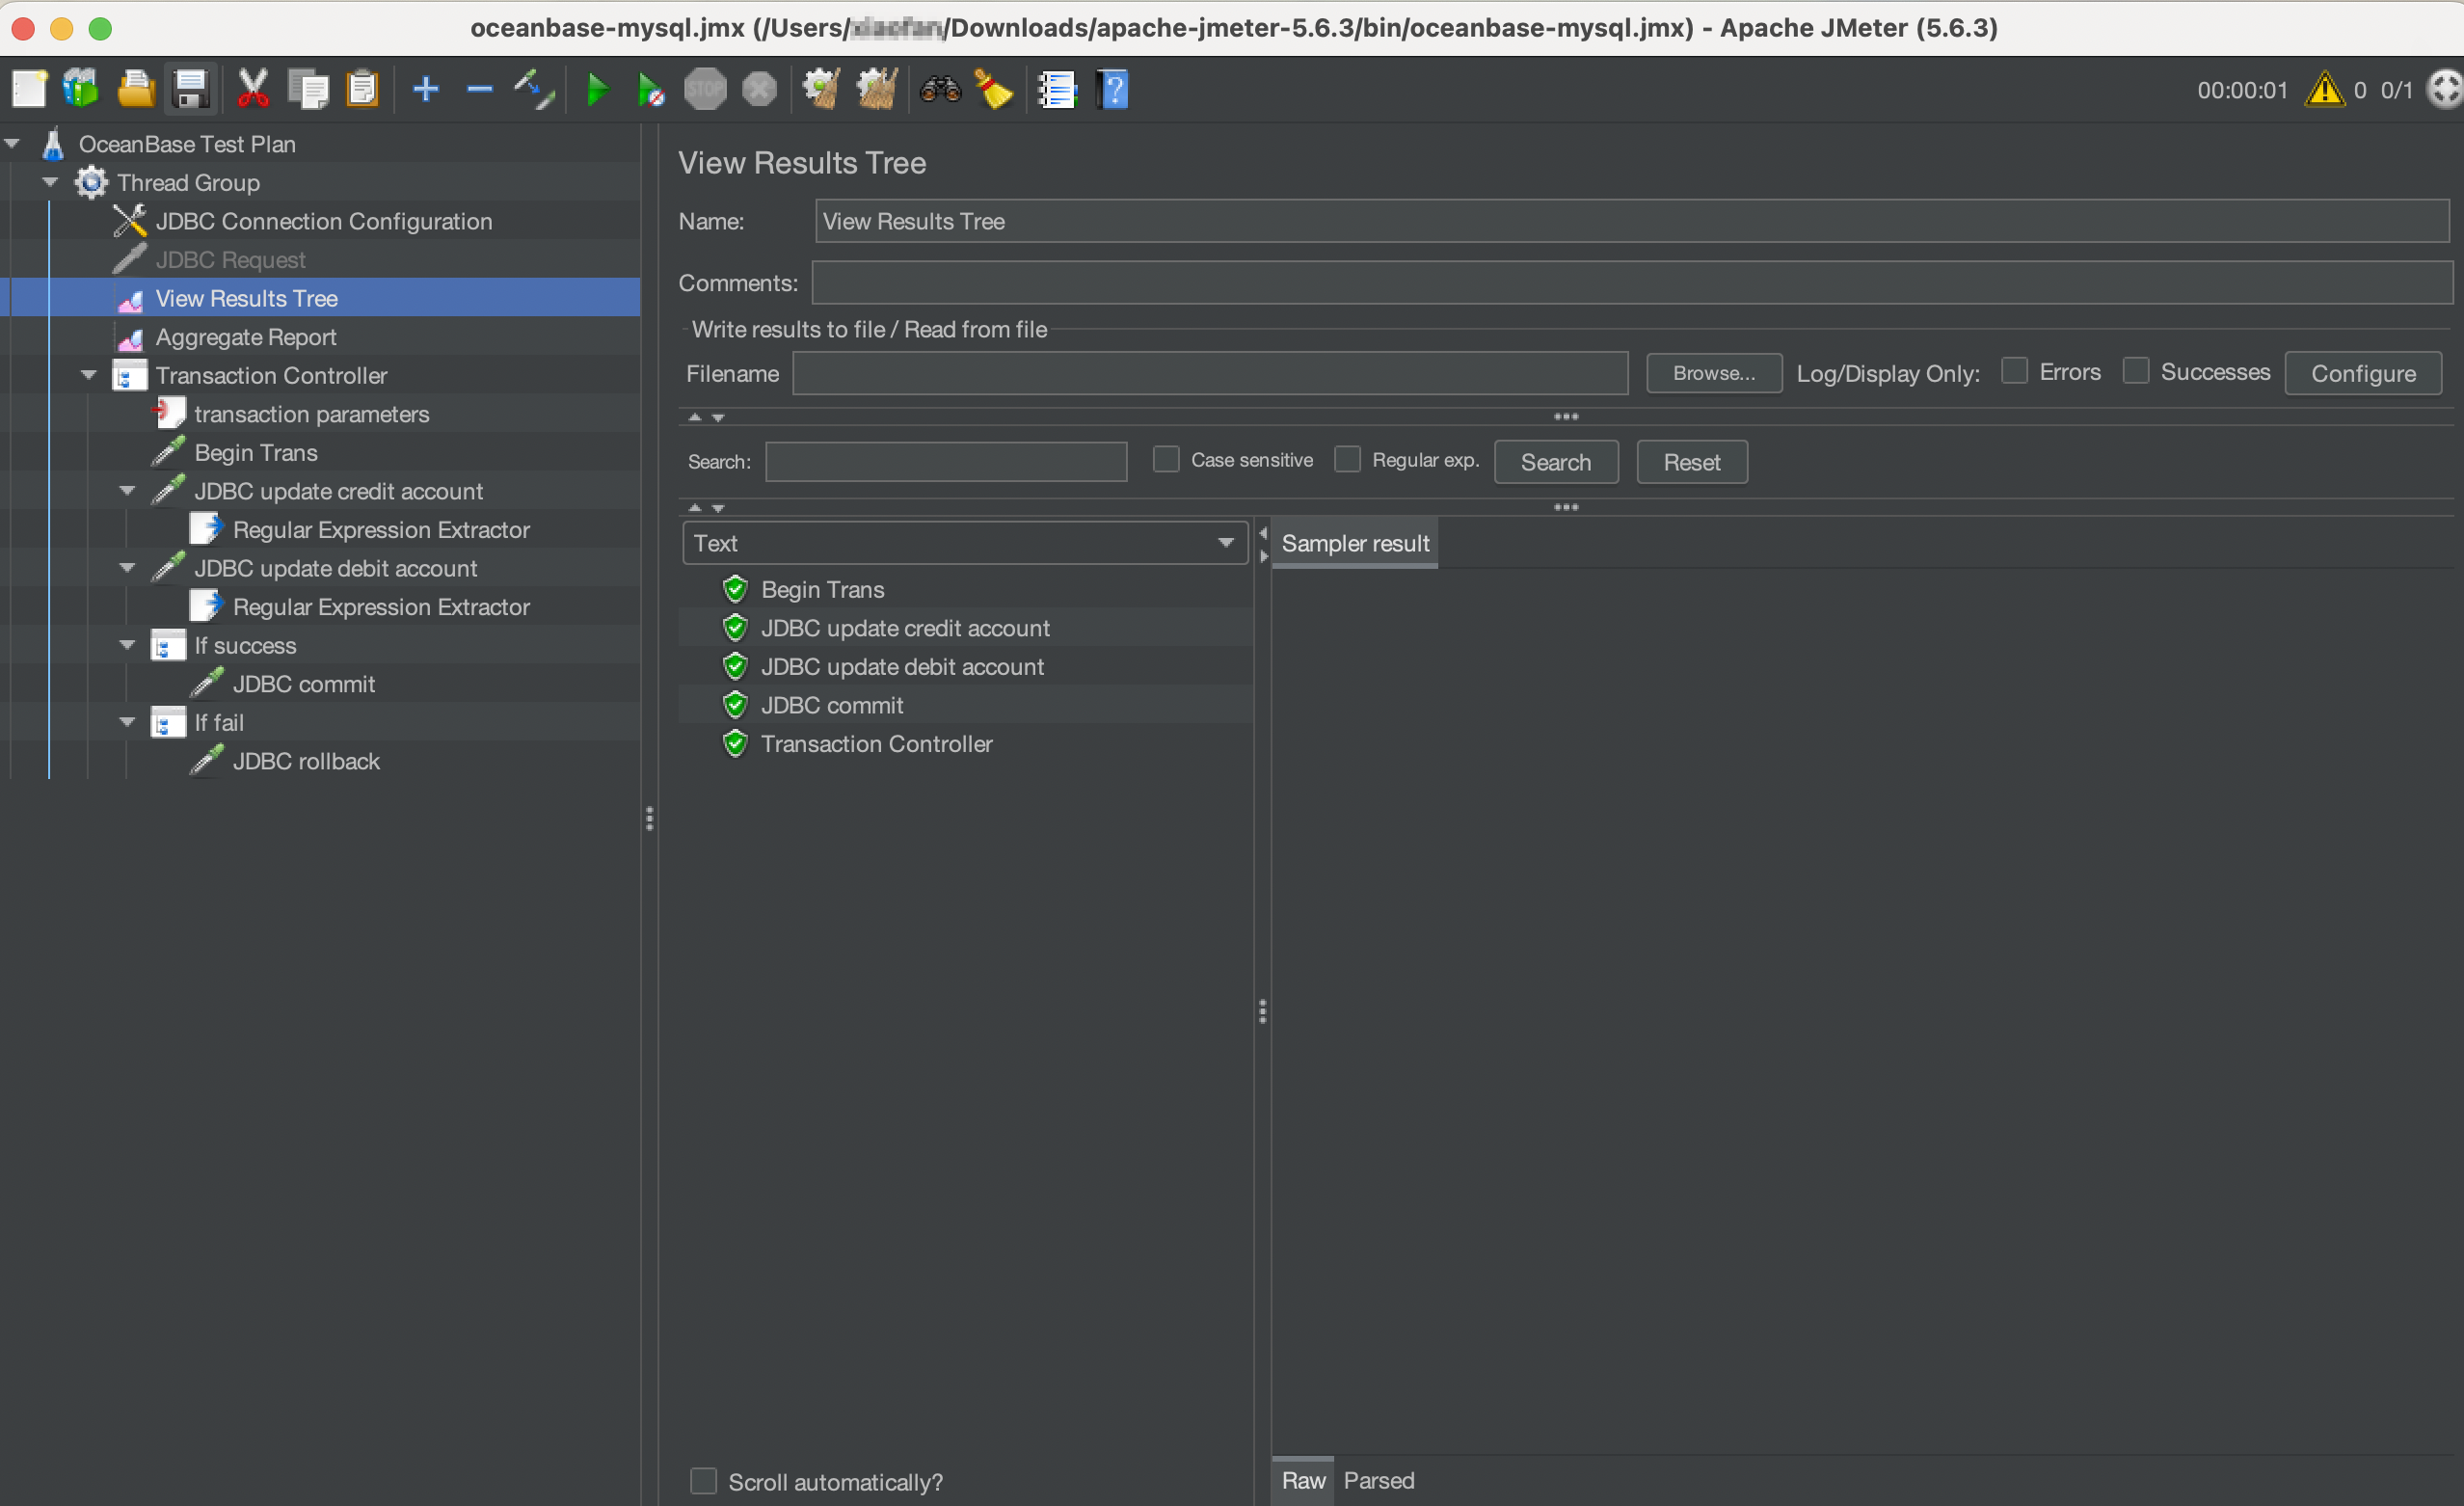
View the results
Click Thread-Group and choose Add > Listener > View Results Tree to create a result tree file to view the test results.
Click Thread Group and choose Add > Listener > Aggregate Report to create an aggregated report that aggregates the results.