Deploy ob-operator locally
Hardware requirements
- CPU: 4 Core available
- Memory: 10 GB available (A Single-node OceanBase cluster takes 8 ~ 9 GB memory)
- Disk space: 120 GB available
Software requirements
You need to install the following softwares before getting started. Installation instructions can be found on their websites. You can get minkube by brew install minikube if you develop on macOS.
- kubernetes/minikube: Run kubernetes locally
- Docker desktop: Manage container development locally
- kubectl: Kubernetes CLI (optional if you prefer minikube kubectl)
Setup steps
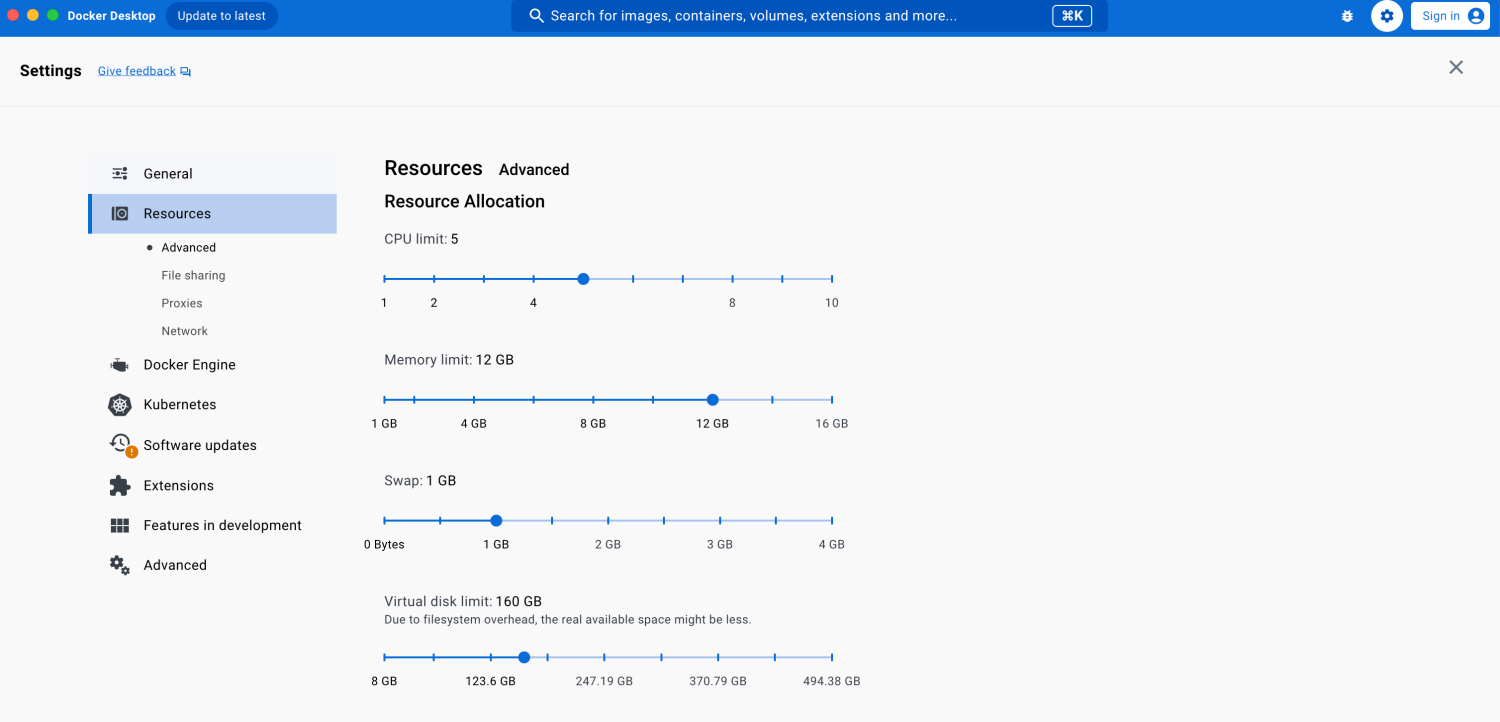
1. Configure Docker Resources
Open Docker desktop - Settings - Resources, set CPU limit, Memory limit and Virtual disk limit to match the hardware requirements.
2. Start minikube cluster
In order to make sure that the hardware limit are enforced to VM in minikube, we set configurations of minikube again by:
minikube config set cpus 4
minikube config set disk-size 120GB
minikube config set memory 10GB
Here we go! Just type minikube start and enter, we can see it starts fetching necessary images. After it says initialization is finished, we can type kubectl get pods -A (or minikube kubectl -- get pods -A) to see all pods in minikube cluster.
Tips: Perform minikube dashboard to open kubernetes dashboard, everything in the cluster could be more clear.
3. Install cert-manager
ob-operator depends on cert-manager to enable TLS functionalities, so we should install it first.
kubectl apply -f https://raw.githubusercontent.com/oceanbase/ob-operator/stable/deploy/cert-manager.yaml
4. Install ob-operator
For robustness, default memory limit of ob-operator container is set to 1Gi which is too large for us developing locally. We recommend fetching the manifests to local and configure it. wget tool could be useful here, while opening the URL and copying the contents to local file is more straight.
https://raw.githubusercontent.com/oceanbase/ob-operator/stable/deploy/operator.yaml
Search the pattern /manager, find the target container, configure the memory limit to 400Mi and cpu limit to 400m.
OK, now we apply the manifest with kubectl.
kubectl apply -f operator.yaml
And check whether the pod gets running successfully,
kubectl get pods -n oceanbase-system
5. Deploy OceanBase cluster
Apply the following yaml file to the cluster,
apiVersion: v1
kind: Secret
metadata:
  name: demo-password
  namespace: default
stringData:
  password: "AAaa__321"
---
apiVersion: oceanbase.oceanbase.com/v1alpha1
kind: OBCluster
metadata:
  name: test
  namespace: default
spec:
  clusterName: obcluster
  clusterId: 1
  userSecrets:
    root: demo-password
    proxyro: demo-password
    monitor: demo-password
    operator: demo-password
  topology:
    - zone: zone1
      replica: 1
  observer:
    image: oceanbase/oceanbase-cloud-native:4.2.1.1-101010012023111012
    resource:
      cpu: 2
      memory: 9Gi
    storage:
      dataStorage:
        storageClass: standard
        size: 40Gi
      redoLogStorage:
        storageClass: standard
        size: 40Gi
      logStorage:
        storageClass: standard
        size: 10Gi
  parameters:
  - name: system_memory
    value: 1G
  - name: "__min_full_resource_pool_memory"
    value: "2147483648" # 2G
You will see outputs like:
secret/demo-password created
obcluster.oceanbase.oceanbase.com/test created
It will take 2~3 minutes for OceanBase cluster to bootstrap. We should wait for it to get ready before we try to connect it. Use kubectl wait to do this,
kubectl wait obcluster test --for jsonpath='{.status.status}'=running --timeout=10m

# After the cluster bootstraps successfully, the terminal outputs:
# obcluster.oceanbase.oceanbase.com/test condition met
Connect to the sys tenant of the cluster,
PODNAME=$(kubectl get pods -l ref-obcluster=test -o jsonpath='{.items[*].metadata.name}')
PASSWORD=$(kubectl get secret demo-password -o jsonpath='{.data.password}' | base64 --decode)
kubectl exec pods/$PODNAME -- yum install -y mysql
kubectl exec -it pods/$PODNAME -- mysql -h127.0.0.1 -P2881 -uroot -p$PASSWORD
And you will enter the REPL of mysql,
Welcome to the MySQL monitor.  Commands end with ; or \g.
Your MySQL connection id is 3221488229
Server version: 5.7.25 OceanBase_CE 4.2.1.1 (r101010012023111012-2f6924cd5a576f09d6e7f212fac83f1a15ff531a) (Built Nov 10 2023 12:13:37)

Copyright (c) 2000, 2023, Oracle and/or its affiliates.

Oracle is a registered trademark of Oracle Corporation and/or its
affiliates. Other names may be trademarks of their respective
owners.

Type 'help;' or '\h' for help. Type '\c' to clear the current input statement.

mysql>
6. Create tenant in deployed OceanBase cluster
Apply the following yaml manifest,
apiVersion: oceanbase.oceanbase.com/v1alpha1
kind: OBTenant
metadata:
  name: t1
  namespace: default
spec:
  obcluster: test
  tenantName: t1
  unitNum: 1
  charset: utf8mb4
  connectWhiteList: "%"
  forceDelete: true
  credentials:
    root: demo-password
    standbyRo: demo-password
  pools:
    - zone: zone1
      type:
        name: Full
        replica: 1
        isActive: true
      resource:
        maxCPU: 1
        memorySize: 2Gi
        minCPU: 1
        maxIops: 1024
        minIops: 1024
        iopsWeight: 2
        logDiskSize: 4Gi
Wait for the tenant to be initialized,
kubectl wait obtenant t1 --for jsonpath='{.status.status}'=running --timeout=10m
Connect to the tenant,
PODNAME=$(kubectl get pods -l ref-obcluster=test -o jsonpath='{.items[*].metadata.name}')
kubectl exec -it pods/$PODNAME -- mysql -h127.0.0.1 -P2881 -uroot@t1